¶ JOIN Mobile Detail screen case
¶ Detail screen case
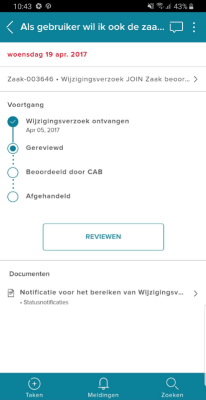
When you open a task related to a case, the detail screen of this case opens. The screen always has a fixed structure:
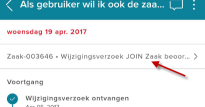
At the top (the so-called header) you can use the arrow to quickly return to the task list, you can go to the comments about the case (and add comments yourself) and you have the action menu where you can take various actions, such as forwarding the case, assigning to a colleague or skipping the current action.
Below you will find the description of the case (in the example below “Fair in Rijnsburg”).
The first card contains the details of the case. By default, we show the case characteristic and the case type. Via “all details” you enter a screen where you can view all details of the case, such as the person involved, case characteristics, etc.
The second card shows the progress of the case based on the status model (from JOIN Case types). A status with a filled “green circle” has already been reached, a status with a blue circle is currently being reached, and an empty circle marks a future status.
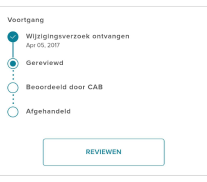
You will find the handling button between the second and third cards. This button takes you to the completion screen, where, for example, you can complete the task via a checklist or a manual decision. Further on in this wiki you will find more information about this screen (handling task)
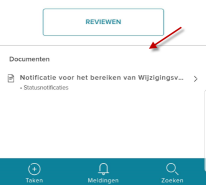
The third card contains the case documents. Via each document you can click through to the document details and the files (see also document detail screen). Are there more than 5 documents in the case? Then you can click through “all documents” to a screen where all documents are displayed.
Does your organization work with JOIN Decision-making? Then there is a fourth card where the decision-making documents are displayed (such as college and council proposals). Clicking on the document takes you to the proposal detail screen (where, for example, the paragraphs and appendices of the proposal are shown (see also proposal detail screen).