¶ All case types
After registering, you will be redirected to the Zaaktypen.nl portal. In this portal you will find the list of case types that are already present in your organization. For each case type you will see the following information in the list:
- Name - This is the title of the case type
- Version - The version number of this case type. Each time a published case type is reworked, a new version will be created.
- Status - Published means that this case type has been published to your business system (this can be a test and / or production environment, for example). Concept means that this version of the case type is still being processed and that this version is not yet available in the case system.
- Last Modified - Date this case type was last modified
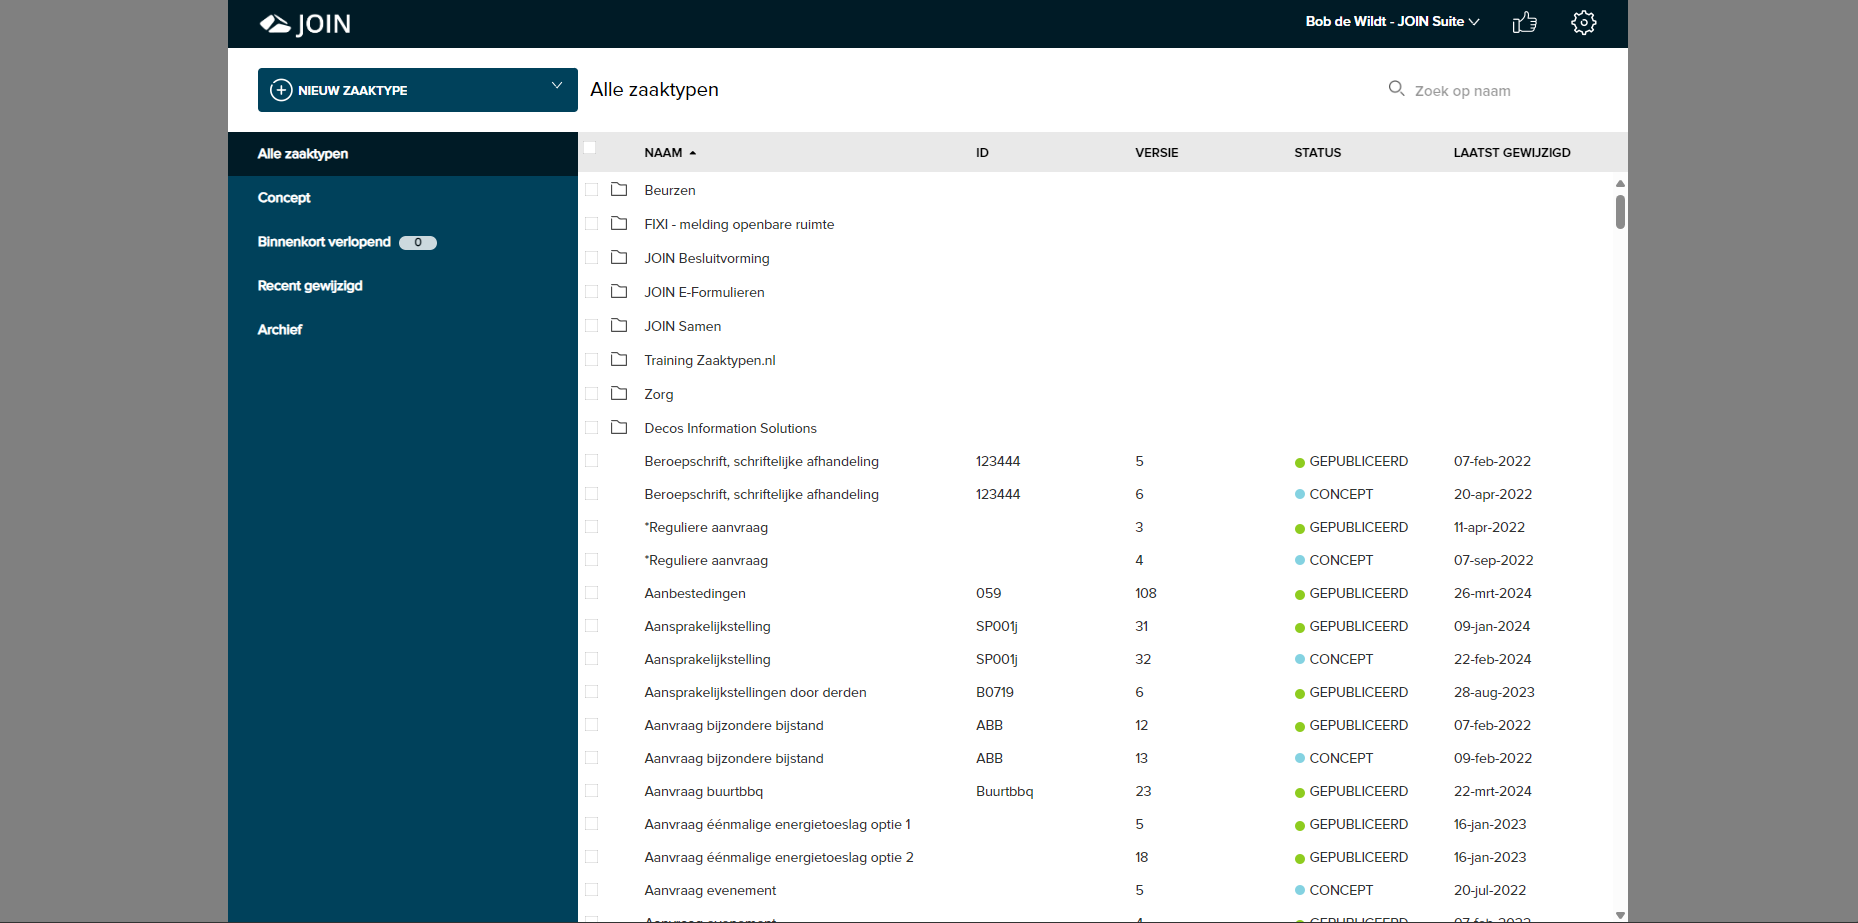
¶ Navigate
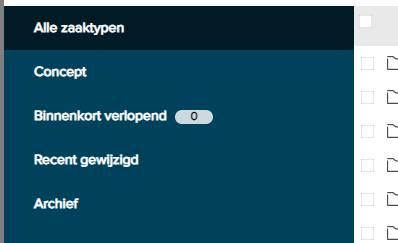
You can navigate through the All case types list with the menu items on the left side of the screen. These are:
- All case types - The total list of case types in the environment that are now published or in progress (This is selected by default)
- Concept - Case types in the Status Concept list
- Expiring soon - Case types that are soon to close
- Recently changed - Case types that have been recently changed
- Archive - Earlier versions of case types that have since been replaced by a later published version
¶ Search and sort
You can search through the list by (part of) the name of the case type with the Search by name functionality at the top right of your image.
- Enter a value - All or part of a case type name
- Press ENTER
You can sort the list of case types by clicking the column name. You can see by the blue arrow on which column and order the list is currently being sorted.

¶ Folder management case types
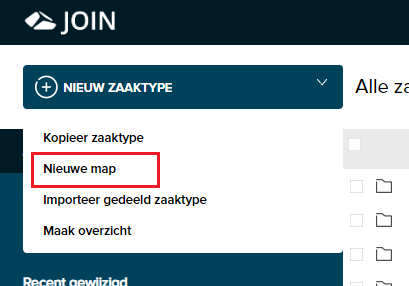
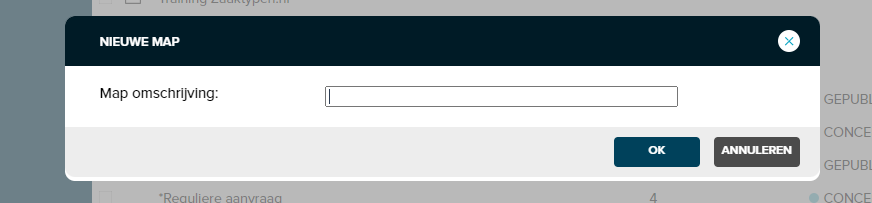
Your case types can be organized in a folder structure that you create yourself. To do this, follow the next steps:
- Click on the arrow to the right of New case type
- Click New Folder
- Enter the Folder description
- Click OK
You now have a new folder with this name in the case type list, you can select it to Open. By selecting the empty line next to the name you can Delete, Rename or Move the folder (these buttons are displayed at the top of the list).
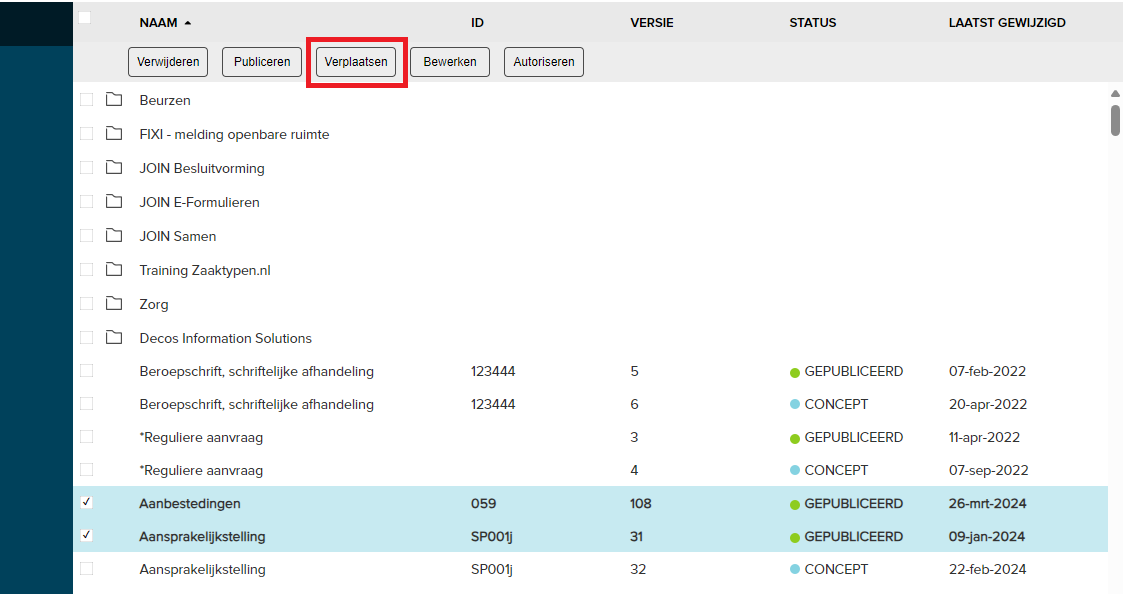
Follow these steps to place a case type in the folder:
- In the case type list, click on the empty line to the right of the case type name (The bar turns blue, multiple case types can be selected at the same time)
- Click Move to the top of the list
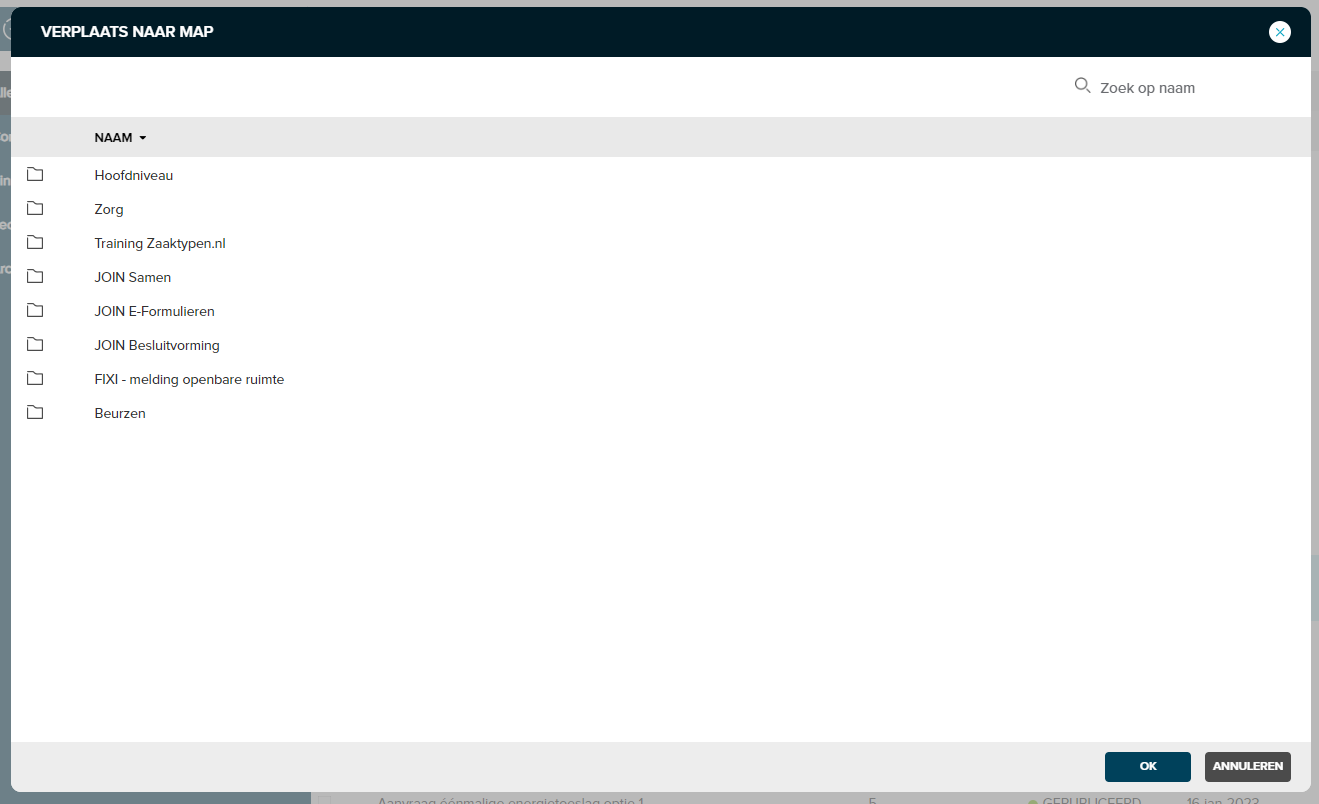
- Select the desired folder
- Click OK
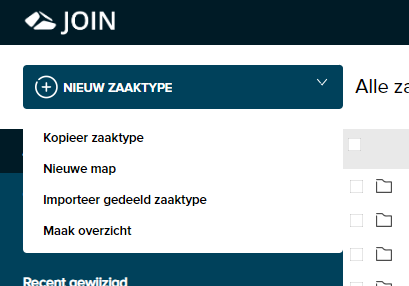
¶ New case type menu
At the top left you will find the menu with New case type. Of course you can create a new case type with this, but the white arrow to the right of the menu will make more options available. These are:
- New case type - Creating a completely new case type
- Copy case type - Creating a new case type based on an existing case type in your area
- New folder - Creating a folder format in the case type list
- Import shared case type - Importing a case type made available by another customer or Decos
- Create overview: via this function (only available for administrators) an overview of all case types and data can be exported to an excel file