¶ Question types
Each web form consists of a set of questions. In the web form you have the option to ask different types of questions. These different types of questions are listed below.
¶ Standard entry fields for all question types
For each question you have the option to enter the title and provide an explanation.
The title is the question itself that you ask your users (max 250 characters) and the explanation you give (max 1000 characters) is optional and can be used to provide additional explanation for a question.
¶ Formatting in texts
It is possible in the explanation field and in the introduction text to layout of the text to use.
¶ Working with user profiles
You can include some questions in a user profile. The answers that are given are then stored per logged-in resident and reused in follow-up applications or in other forms.
¶ Text box

The user of the form will see an input field where he / she can enter text. This field is a one-line input field.
It is possible to make this question mandatory. A user must then answer this question, he / she will receive an error message if he / she tries to send the form anyway.
¶ Multiple answers possible
This question can be asked several times. You can use ‘Ask a maximum of [1] times’ to indicate how often this question may be asked.
Example: Names of your children, List of trees to be felled, Reasons for granting, etc.
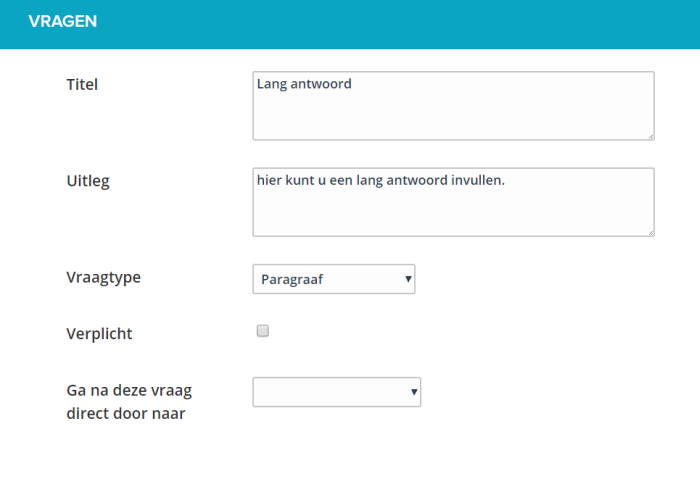
¶ Section

The user will see an input field where he / she can enter text of multiple lines.
It is possible to make this question mandatory. A user must then answer this question, he / she will receive an error message if he / she tries to send the form anyway.
¶ Decision

With this question type it is possible to skip certain questions based on the choice of the user.
For this question you choose first a table. The table values become the choices that the filler gets.
Often a ‘Yes / No’ construction will be used, but multiple table values are of course also possible.
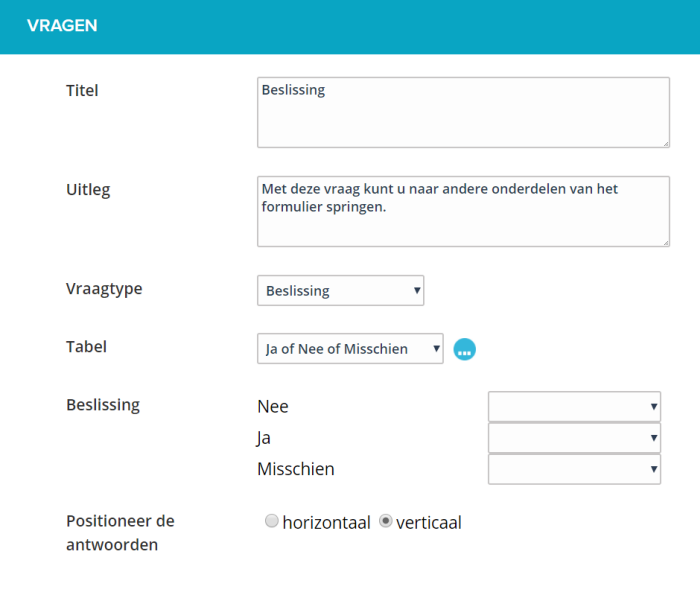
When you a table have selected or created, you must save the question once. The screen refreshes and the table values become visible at the question.
You can then choose per table value where the form continues. Here you can only choose questions that are asked further down the form, or go directly to the summary of the form.
Example:
Are you a contact person for this application:
Yes -> Go to summary
No -> Go to question contact person
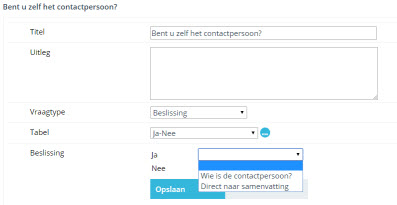
The number of decisions you make in the form is unlimited. A table kan meerdere keren reused, the table values are taken over in the question. So you can later a table without affecting the existing questions.
Skip questions
With this functionality it is possible to skip questions. When you use multiple answers, it is sometimes nice when you can skip other questions from a ‘normal’ question.
Example:
what kind of pet do you have:
dog: go to questions about dogs
cat: go to questions about cats
rabbit: go to questions about rabbits
If the end user chooses ‘dog’ then the form will go to the first question about dogs. But after the questions about dogs, you don’t want to show the questions about cats and rabbits anymore.
to do this, use the option ‘Continue directly to after this question’
Here you choose which question will be displayed after the selected question has been completed. You can also choose a direct step to the summary of the form here.
¶ Stop form
With these decisions, you can also ensure that users find out that they don’t qualify for this form or need to be elsewhere. (For example if you are not a resident of the municipality, or do not need to issue a permit)
You then refer from a decision to a question type ‘no question, only text’ with the option ‘end form’
¶ Date Time

The user will see an input field where he / she can enter data.
It is possible to make this question mandatory. A user must then answer this question, he / she will receive an error message if he / she tries to send the form anyway.
You can ask the date / time question in a number of different ways. Below are the options:
- Date: one date input field is displayed in the form.
- Period of days: Two date input fields are displayed in the form. From to…
- Date + time: one date input field and one time input field are displayed in the form.
- Date + time slot: One date input field and two time input fields are displayed in the form. From to…
Multiple answers possible
This question can contain multiple answers. You indicate this with ‘Ask a maximum of [1] times’, whereby you determine the maximum number of times this question may be asked.
Example: Dates for opening, dates for event, dates for parking waiver etc.
¶ Restrictions on input
It is possible to apply restrictions to the dates, so that certain dates are not possible to enter.
You activate restrictions by placing the check mark in front of the option. At that time you can enter restrictions on the date.
Restrictions are: The date cannot be more than {number} days / weeks / months / years in the past or future.
Example:
An application must be submitted 6 weeks in advance, but must be requested annually.
From: 6 weeks in the future
Until: 1 year in the future
Example 2:
A person must be at least 18 years old and not older than 65.
From: 18 years in the past
Up to: 65 years in the past
Example 3:
A move may not be earlier than 10 days in the future, but must be communicated no more than 5 days after the move.
From: 5 days in the past
Until: 10 days in the future
If you only want to give a warning about a wrong date entry, use the setting ‘Allow other data, but show this warning’
The text you enter here is displayed when a user enters a date outside the specified range.

¶ Drop-down list (one answer possible)

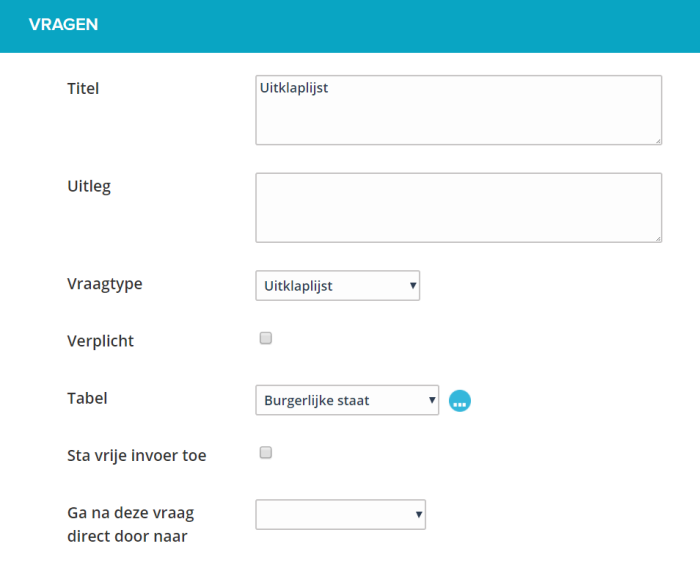
With this you can offer a predefined list to the user where he / she can make a choice. The presentation in the web form is a drop-down list.
It is possible to make this question mandatory. A user must then answer this question, he / she will receive an error message if he / she tries to send the form anyway.
Use this question type especially with a large number of answer choices.
You determine the content of this list by selecting a table from the existing list of tables or by creating one.
With the option ‘Allow free entries’ you allow the user to choose the option ‘Other’ from the list and enter a value himself.
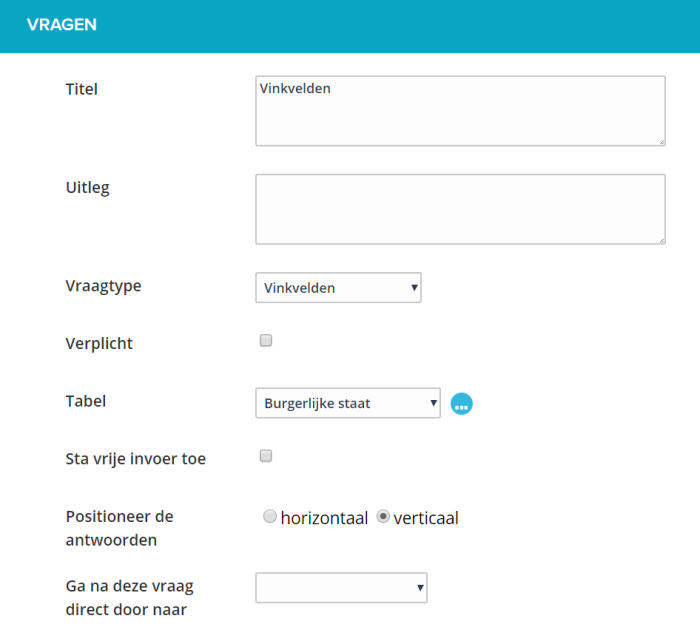
¶ Checkboxes (multiple answers possible, checklist)

With this you can offer a predefined list to the user where he / she can make a choice. The presentation in the web form is a summary of all the possibilities with the option to choose more than one answer.
It is possible to make this question mandatory. A user must then answer this question, he / she will receive an error message if he / she tries to send the form anyway.
You determine the content of this list by selecting a table from the existing list of tables or by creating one.
Depending on the number of answers and the length of the answers, you can choose to position the list horizontally or vertically.
With the option ‘Allow free entries’ you allow the user to choose the option ‘Other’ from the list and enter a value himself.
¶ Selection list (one answer possible, radio buttons)

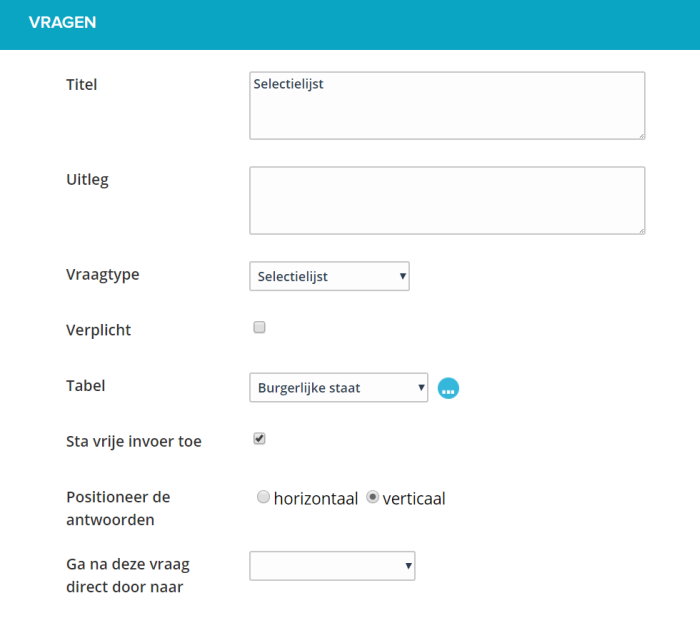
With this you can offer a predefined list to the user where he / she can make a choice. The presentation in the web form is a summary of all the possibilities with the option to choose one of the answers.
It is possible to make this question mandatory. A user must then answer this question, he / she will receive an error message if he / she tries to send the form anyway.
You determine the content of this list by selecting a table from the existing list of tables or by creating one.
Depending on the number of answers and the length of the answers, you can choose to position the list horizontally or vertically.
With the option ‘Allow free entry’ you enable the person completing the list to choose the option ‘Other’ and enter a value himself.
¶ Appendix

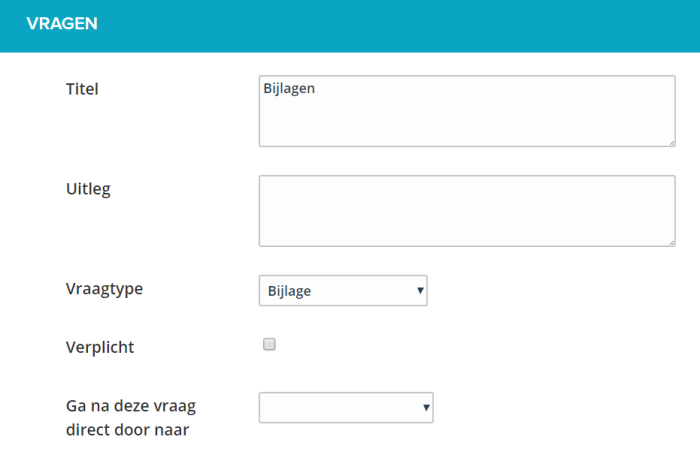
The user can add one or more attachments. The user will see an upload button where he / she can upload one or more files at the same time.
It is possible to make this question mandatory. A user must then answer this question, he / she will receive an error message if he / she tries to send the form anyway.
A description field is shown per file that the user can fill in. (not required)
All files are checked for size (max 20Mb per file)
All files are checked for file type. The following formats are allowed by default: pdf, doc, docx, xls, xlsx, csv, txt, rtf, html, zip, mp3, wma, mpg, flv, avi, jpg, jpeg, png, gif
If you want to allow additional or fewer file types, please inform our JOIN Customer Support department.
¶ Header - no question
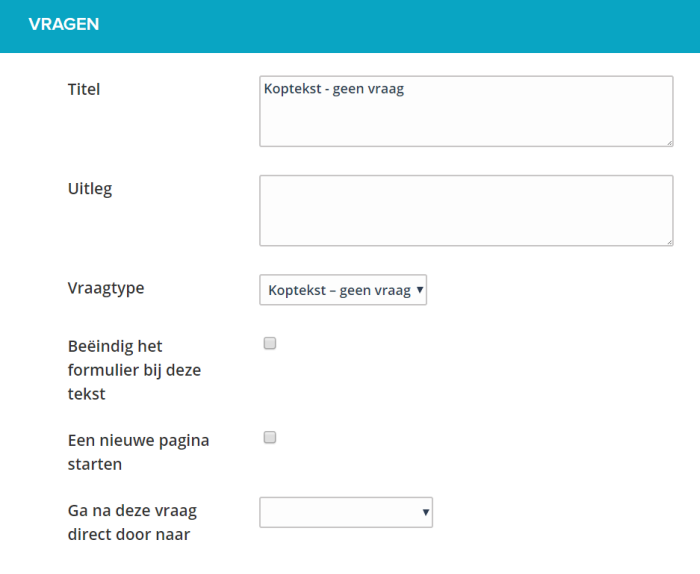
This special question type allows you to create subheadings in your eform. The user sees the title and the explanation as a subhead in her / his web form.
You can also choose to stop the form with this text.
As soon as you indicate that the form ends here, no further questions will be asked.
Use the option to stop a form preferably only in combination with the question type decision.
¶ Location on map
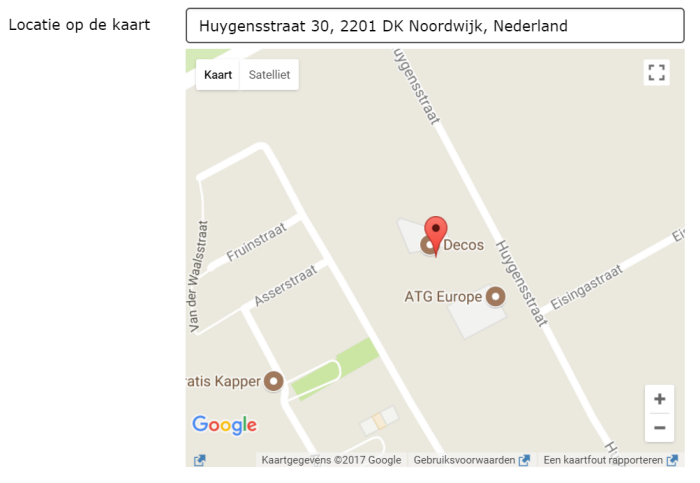
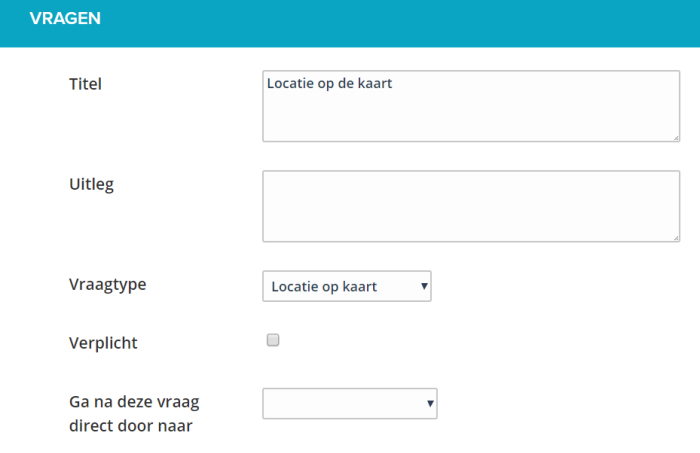
This places a location spike on the eform. The user is shown a card and an entry field. When entering a street or city, the user can jump or zoom directly to this location and scroll to the correct location.
The map uses Google maps. By clicking on the map, the user places a pin to indicate the location. The pin can still be moved by picking it up and placing it somewhere else.
¶ Personal Information
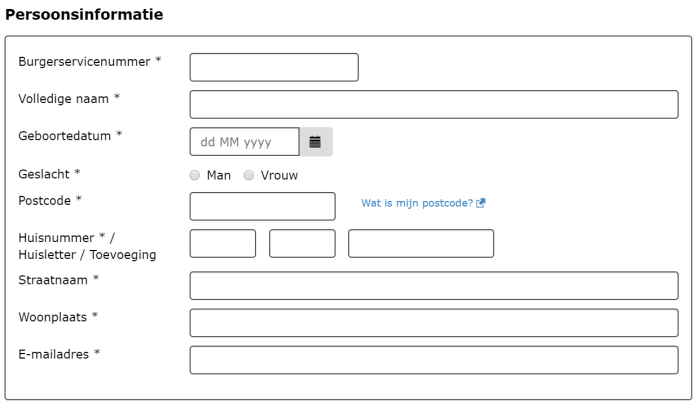
With this you place a complete block with personal information with one question type.
You can choose how many details you want on a personal level and you determine per field whether this is mandatory.
You can choose whether the block may be completed more than once. If you choose multiple times, you can, for example, request the names and dates of birth of the children.
A user is given the option to add or remove blocks.
You can choose from:
- Citizen Service Number (Citizen Service Number is checked for 8 or 9 digits and the 11 test)
- Name (the full name is requested, no subdivision into first name, middle name, last name)
- Gender (male / female option)
- Date of birth (date entry, not in the future)
- Address (postcode, house number, house letter, house number addition, street name and city. As soon as a valid postcode house number combination has been entered, the street name and city will be entered automatically.)
- Telephone (Telephone number with associated checks.)
- Email address (email address with associated checks.)
- Bank account (bank account number with IBAN check and name of bank account)
By default, Name, address, telephone and email are checked and mandatory.
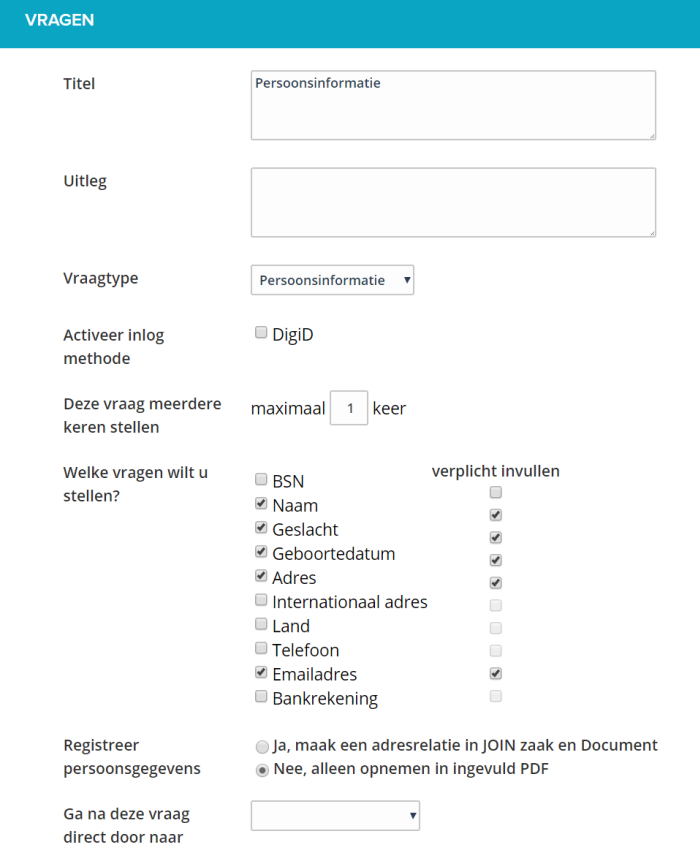
You can choose per person block whether you want to register the data in JOIN as an address registration or only receive the personal data in the completed PDF of the form.
If you choose to create an address registration, the data of the person will be included by default in the address book ‘natural persons unknown’
¶ Activate DigiD
It is possible to activate DigiD per person block (if you have this functionality)
When you check this option you will get a number of extra functionalities, including the option to known data to be completed in advance.
Choose DigiD security level
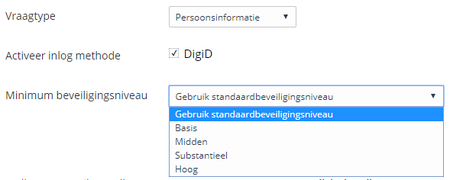
DigiD has several security levels. You can choose these levels when you activate DigiD in your form. This means that at least this selected security level must be logged in by the citizen. You can therefore choose this level for each form to ensure that you are more sure of the person who logs in.
For more information about the different security / assurance levels, please visit: https://www.logius.nl/diensten/digid/detailinformatie/
Register as - second DigiD login By default, the DigiD login is set to ‘applicant’. In most cases this is sufficient and you can consider the DigiD login as the person who fills in the form.
It is also possible to have a second person log in with DigiD. When you choose the option ‘second person (without session, only log in)’, a DigiD login screen will be displayed for this place in the form. The user then lets another person log in with DigiD. The data is prefilled just like the applicant and restrictions can be placed on it. However, this DigiD login is not considered a session of the applicant.
¶ Restrictions on input
You can restrict the information that is prefilled from your data warehouse. This only works if it is actually possible to prefill, not with manual input of users.
You decide which restrictions are checked. You cannot change the order of restrictions. The checks are performed in this order.
- “If person has died go to” checks whether a date of death has been entered for the person.
- “If the person is under guardianship go to” checks whether an indication has been placed in receivership for the person.
- “If person is younger than” Here you can enter an age. The check is carried out on reaching this age in combination with the date of birth.
- “If address is not within the Netherlands”. Here it is checked whether the country of residence is the same as the Netherlands or is empty.
- “If the address is not in the city code []” Enter your city code here. It is checked whether the code matches the code of the logged in DigiD user.
You can use these restrictions to prevent forms from being filled in incorrectly.
With the setting ‘go to’ you can refer to a question type ‘header - no question’ and thus end the form.
¶ Organization information
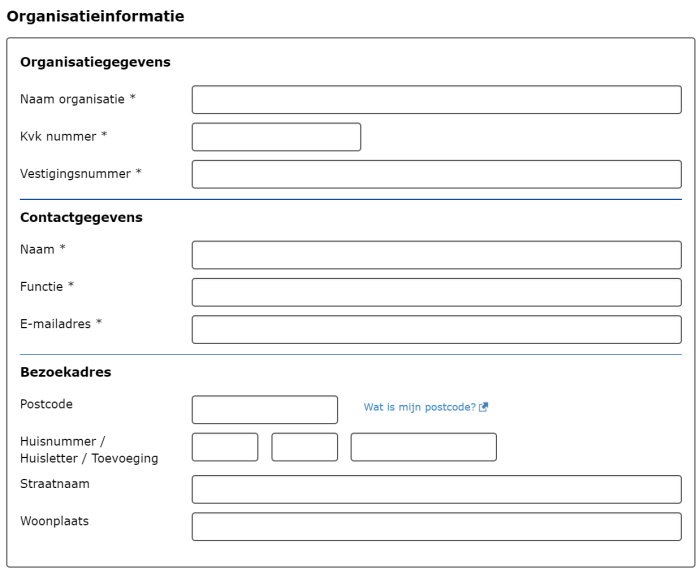
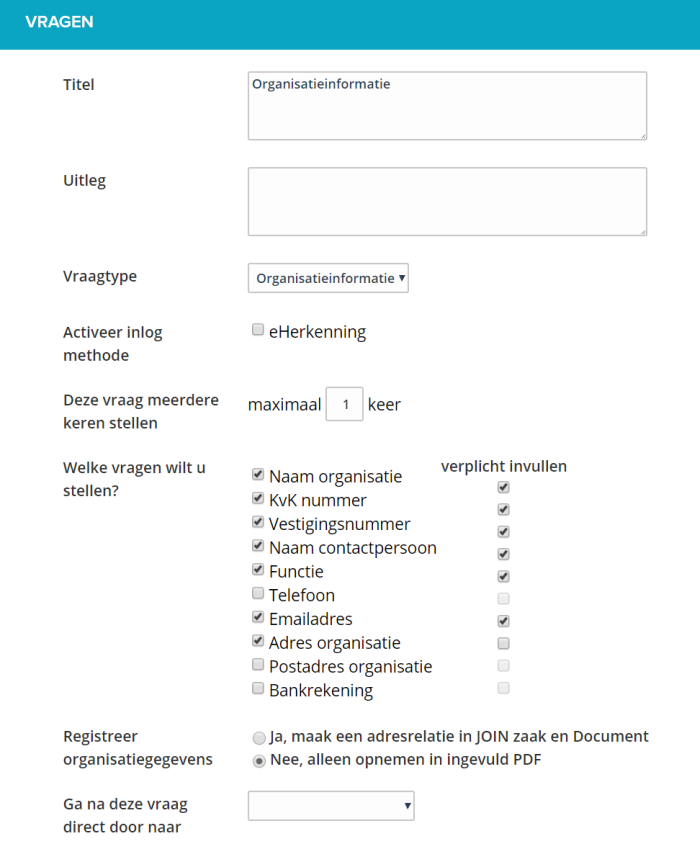
With this you place a complete block with organization information with one question type.
You can choose how many details you want at the organizational level and you determine per field whether this must be completed.
You can choose whether the block may be completed more than once. If you choose multiple times, you can, for example, request the names and email addresses of multiple contact persons.
A user is given the option to add or remove blocks.
You can choose from:
name organisation
Chamber of Commerce number (check for correctness of Chamber of Commerce number)
Establishment number
name contactperson
Function
Telephone (Telephone number with associated checks.)
Email address (email address with associated checks.)
Address organization (zip code, house number, house letter, house number addition, street name and city. As soon as a valid zip code house number combination is entered, the street name and city will be entered automatically.)
Postal address organization
Bank account (bank account number with IBAN check and name of bank account)
You can choose per organization block whether you want to register the data in JOIN as an address registration or only receive the organization data in the completed PDF of the form.
When you choose to create an address registration, the data of the organization is included by default in the address book ‘non-natural persons unknown’
¶ Payment order

This allows you to handle payments within a web form.
After a user has completed a form, he is redirected to the checkout page where he can make the payment. Then he returns to the web forms page with a confirmation of the payment.
Note: For this functionality you need your own subscription to an Ingenico payment platform. More information about this can be found at https://www.internetkassa.com
This question type is NOT shown in the web form in the list of questions, but it is processed in the summary page. Without payment, the summary page is the last page that the end user sees. With payment, the end user is redirected to the payment page.
It is possible to process multiple payment orders in one form.
Make sure that the payment orders appear in the active flow of the form. All these payment orders are shown on the summary page and added together.
It is possible to skip a payment order, using the ‘decision’ or ‘skip questions’ functionality.
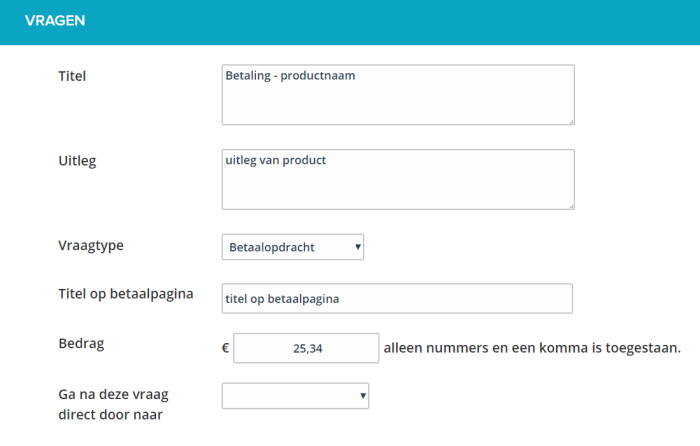
The title and explanation will be placed on the summary page, under the chapter ‘Payment’.
The title on the payment page is used to show on the payment page itself (of Ogone) for which product is being charged. This value is passed on to the payment page and displayed there.
When multiple payments are added together, the title on the payment page becomes the title of the form.
The amount is the amount in euros that must be settled before a web form can be sent to JOIN Business & Document.
¶ Payment status reference
If you want to register the status of the payment at case level, you create a reference at case type level called ‘Payment status’. You link this to a random question in which you configure the payment. In this way, the status of the payment is updated when the payment is made.
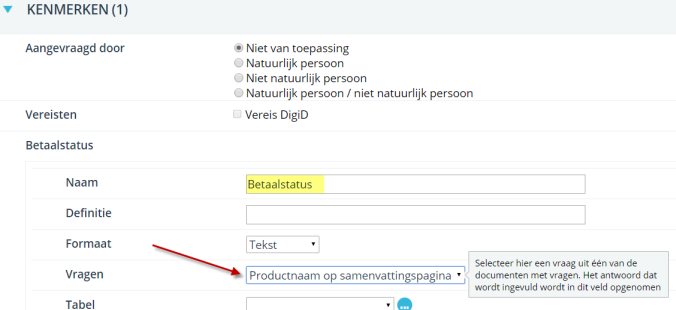
This field gets the status ‘Payment approved’ -> the status has been updated and the product has been paid. The product can therefore be delivered.
Payments that have not been successful are not entered as a case in the case system.