¶ Configureren van de clientless Template Editor
Vanaf JOIN versie 2024.11 is het mogelijk om een nieuwe template-editor te gebruiken die werkt zonder de JOIN-client te installeren. De nieuwe template-editor is een clientless Word-invoegtoepassing. Deze pagina beschrijft hoe de clientless JOIN Template Editor geconfigureerd moet worden.
¶ Toevoegen van de Template Editor invoegtoepassing in Microsoft Word
-
JOIN-gebruikers kunnen het manifest voor de Template Editor add-in downloaden via deze link:
- Voor AKS:
https://[join website]/TemplateEditorManifest.ashx - Voor een on-premise website:
https://[join website]/decosweb/aspx/TemplateEditorManifest.ashx
Vervang [join website] door je JOIN-domein.
- Voor AKS:
-
Als je browser de download blokkeert, sta deze dan toe. Er zou een bestand genaamd TemplateEditorManifest.xml gedownload moeten worden.
-
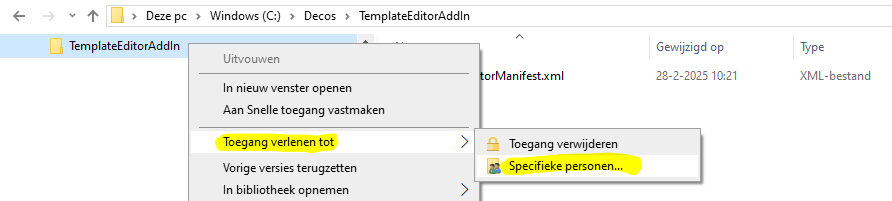
Open Verkenner en maak een map aan, kopieer het bestand TemplateEditorManifest.xml hierin.
-
Klik met de rechtermuisknop op de map met het bestand, ga naar Toegang verlenen tot, en selecteer Specifieke personen.
-
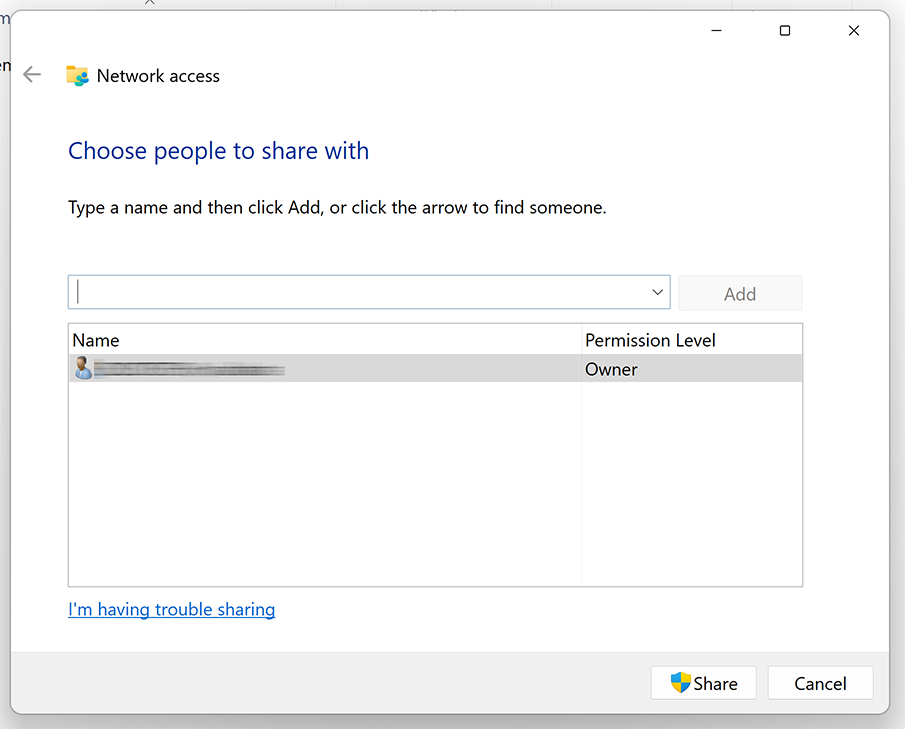
Nadat “Specifieke personen” is geselecteerd, wordt het tabblad Netwerktoegang geopend. Selecteer de gebruikers met wie je de map wilt delen en klik op de knop Delen.
-
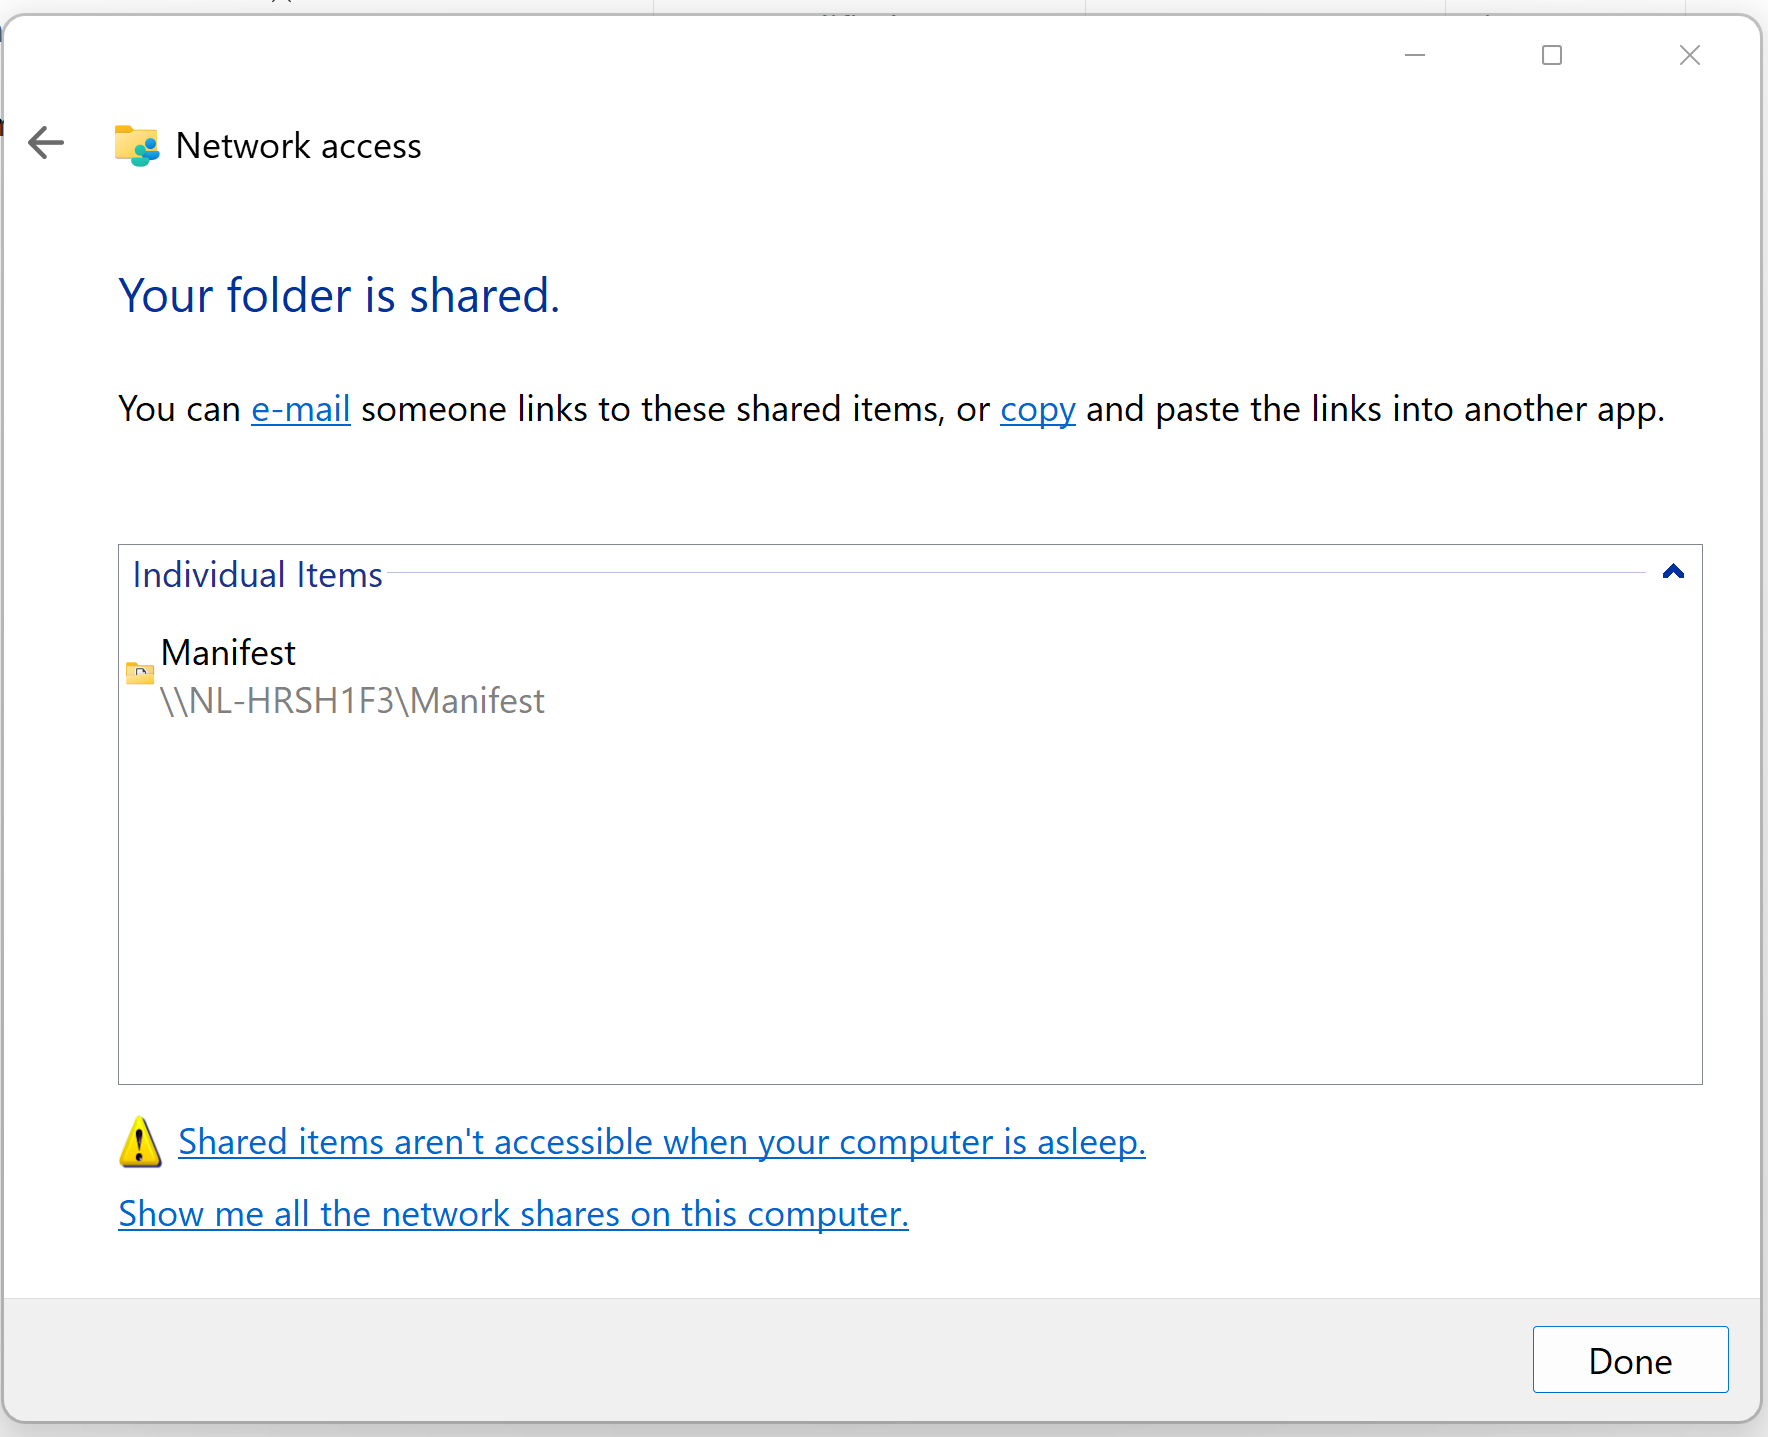
Nadat je op “Delen” hebt geklikt, verschijnt een venster zoals hieronder. Laat dit venster openstaan.
-
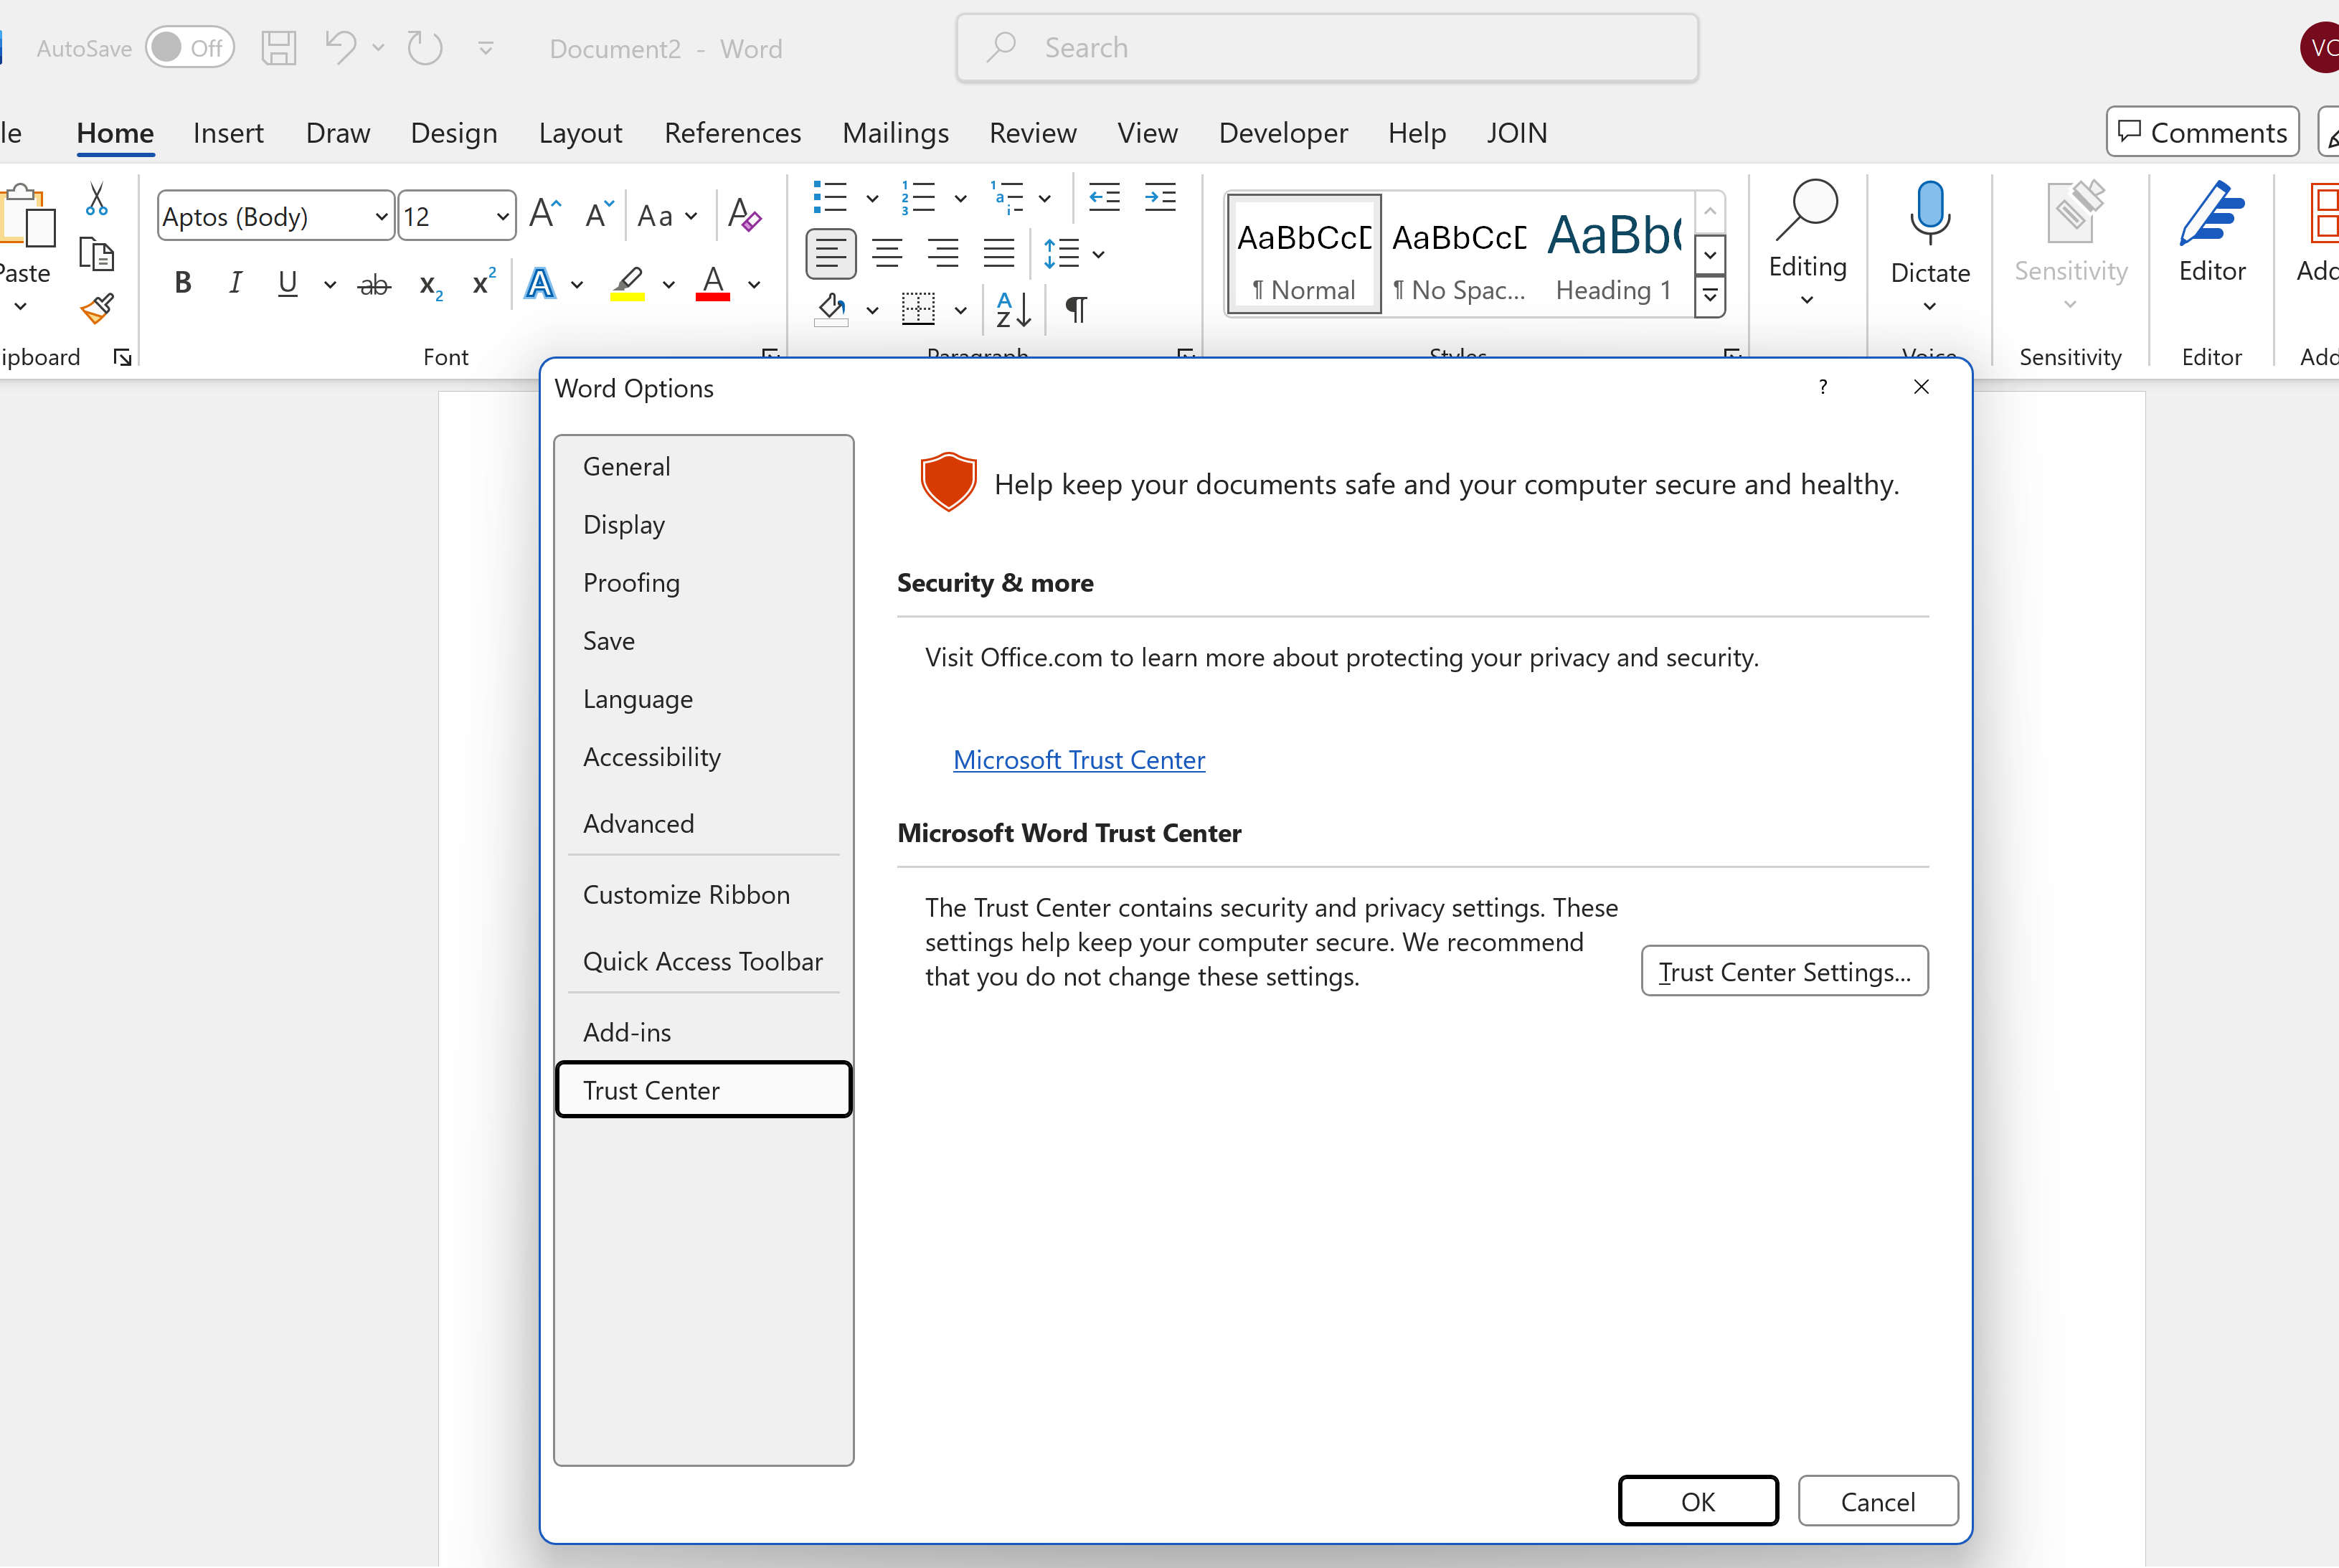
Open Microsoft Word, ga naar Bestand en klik op Opties.
-
In het venster Opties, ga naar Vertrouwenscentrum en klik op Instellingen voor het Vertrouwenscentrum.
-
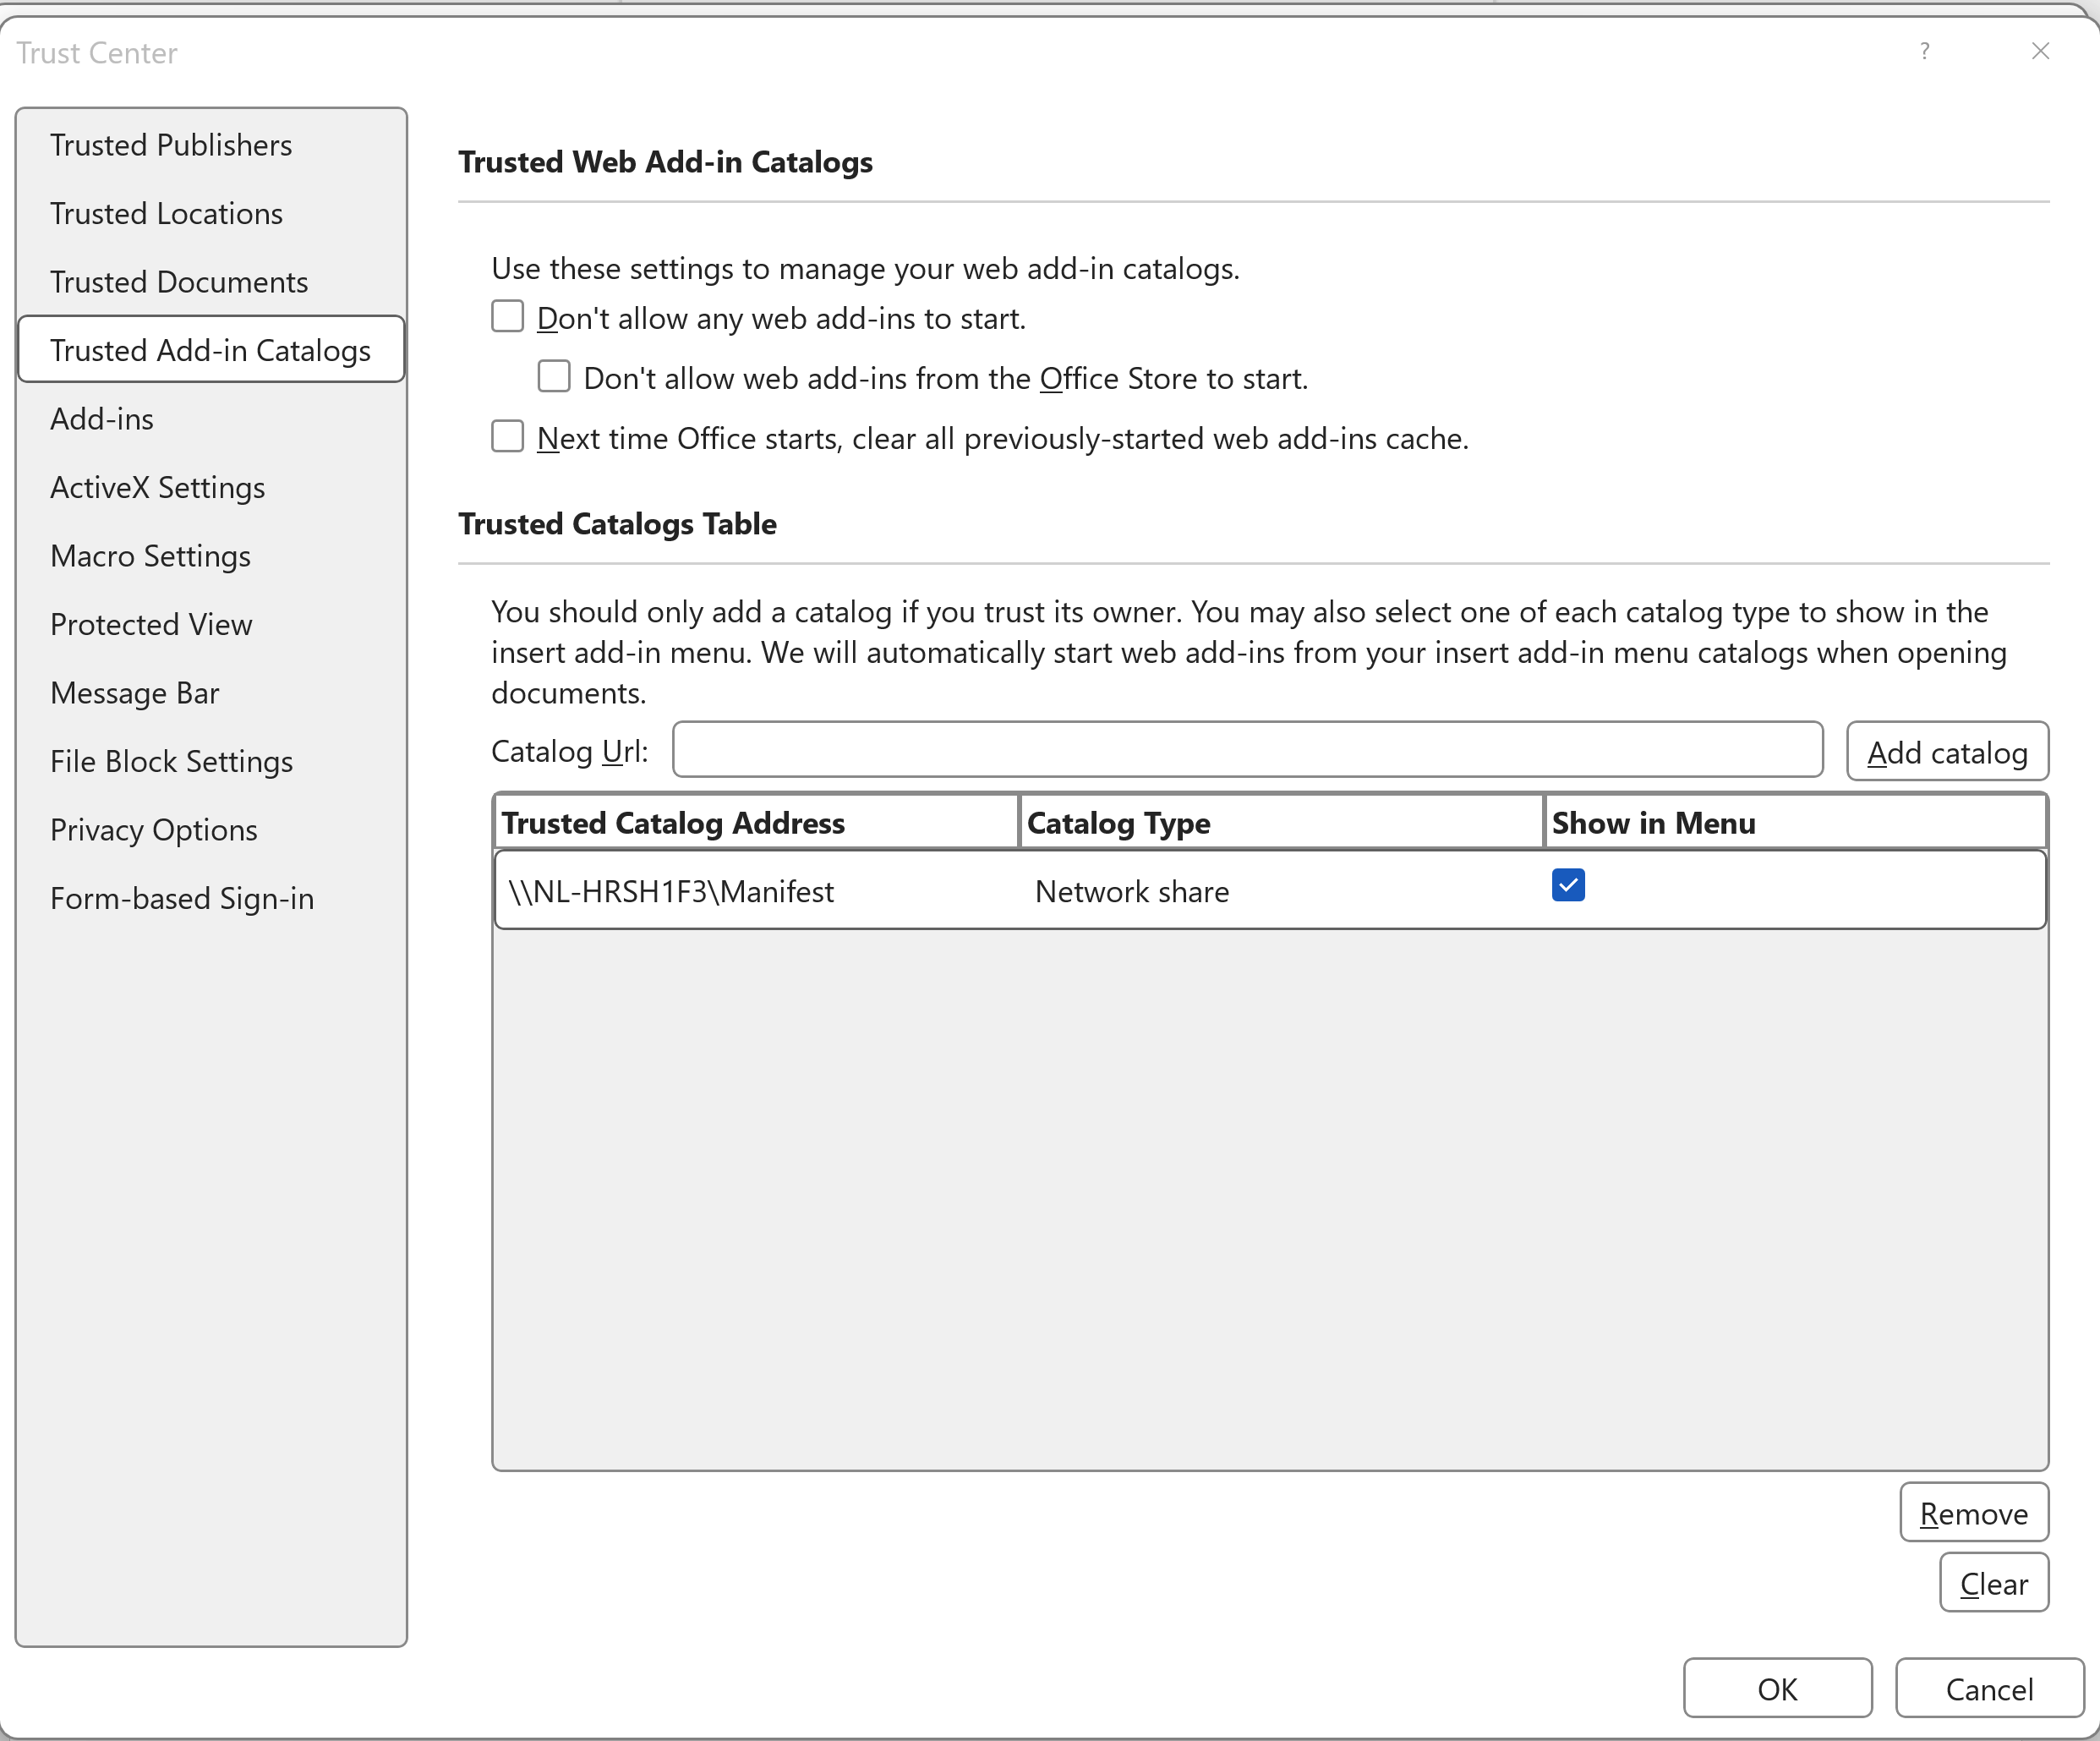
Een nieuw venster verschijnt. Ga naar Vertrouwde catalogi voor invoegtoepassingen. Voer de URL in zoals weergegeven in het venster van stap 6 als Catalogus-URL, en klik op Catalogus toevoegen. Vink vervolgens het vakje Weergeven in menu aan en klik op OK.
-
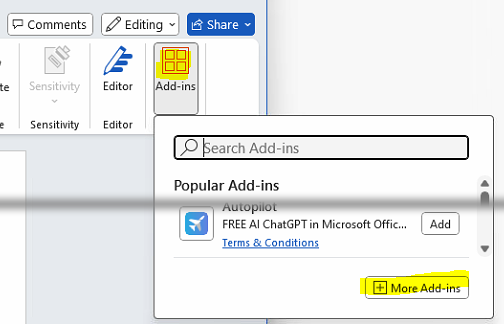
Herstart Microsoft Word, klik op Invoegtoepassingen in het hoofdmenu en vervolgens op Meer invoegtoepassingen:
-
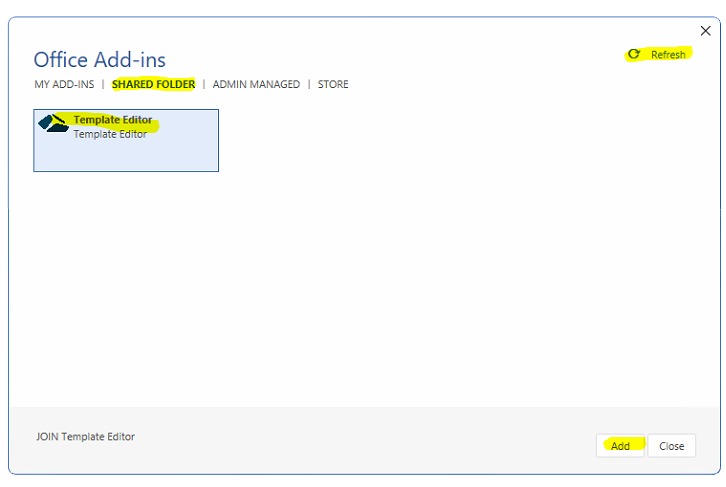
Klik op Gedeelde map. Als de Template Editor niet zichtbaar is, klik dan op Vernieuwen. Zodra de Template Editor add-in verschijnt, selecteer deze en klik op Toevoegen.
-
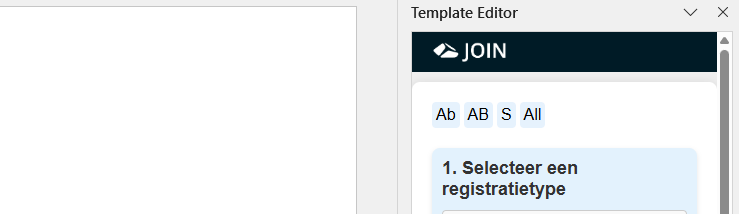
De Template Editor moet nu in het lint verschijnen.

-
Voordat je de add-in kunt gebruiken, is configuratie in JOIN Admin vereist, zie hieronder.
¶ Configuratie in JOIN Admin
- Ga in JOIN Admin naar Systeembeheer > Configuratie.
a. Schakel de optie Enable clientless template editor in. Deze instelling is vereist.

b. Om gebruikers met lokale wachtwoordverificatie toe te staan de template-editor te gebruiken, moet de optie Skip ADFS logged out page uitgeschakeld zijn.

JOIN customer support maakt vaak gebruik van een ADMINISTRATOR-gebruiker met lokale wachtwoordverificatie. Daarom wordt aanbevolen deze optie uitgeschakeld te laten tijdens de acceptatietestperiode.
Sla de configuratie op na het wijzigen van de instellingen.
- Ga naar Connectiviteit > Systeemconfiguratie en voeg een nieuw systeem toe met de naam Templateeditor. De systeem-ID moet exact overeenkomen met deze afbeelding:
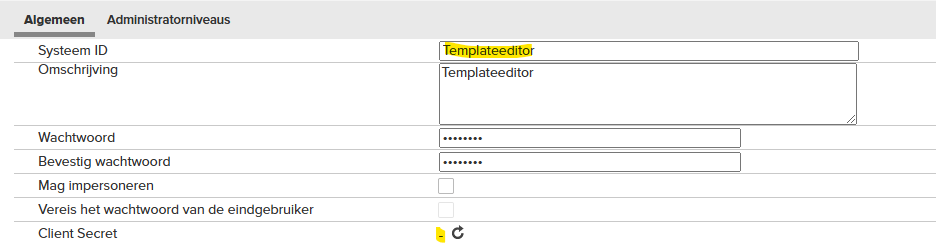
Stel geen Client Secret in. De template-editor zal niet werken als een clientgeheim is geconfigureerd. Een wachtwoord instellen is ook niet nodig. De Word-add-in gebruikt een JOIN-gebruikersaccount om de gebruiker van de template-editor te authenticeren. Let op dat de website is ingegeven bij: Toegestane URLs.
¶ Verbinding van de Template Editor testen
Na de configuratie in JOIN Admin moet het mogelijk zijn om een JOIN-gebruiker te authenticeren via de Word-add-in. Open Word, klik op Template Editor in het lint en vervolgens op de knop Authenticeren met JOIN.
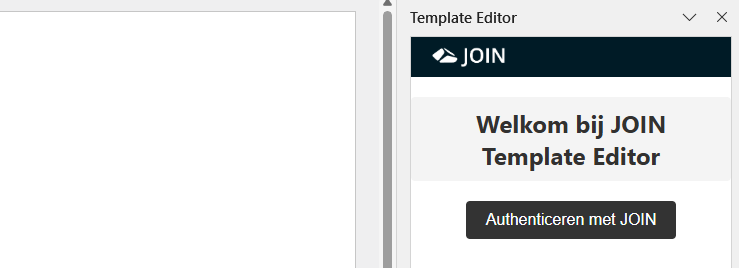
Als de configuratie correct is, verschijnt een pop-up met een inlogvenster. Log in met een gebruiker die de rechten heeft om in te loggen in JOIN Admin. Na een succesvolle login wordt de zijbalk van de template-editor ververst: