¶ Documents
In JOIN you register and manage documents in document books. You can add files to document registrations, link addresses and document codes, etc.
When you register a document, place the data of the document in the desired document book, for example Outgoing documents or Minutes.
¶ Register document
A document book contains document registrations. Each document registration can contain addresses, files, linked codes, actions, etc. To create a new document registration, proceed as follows.
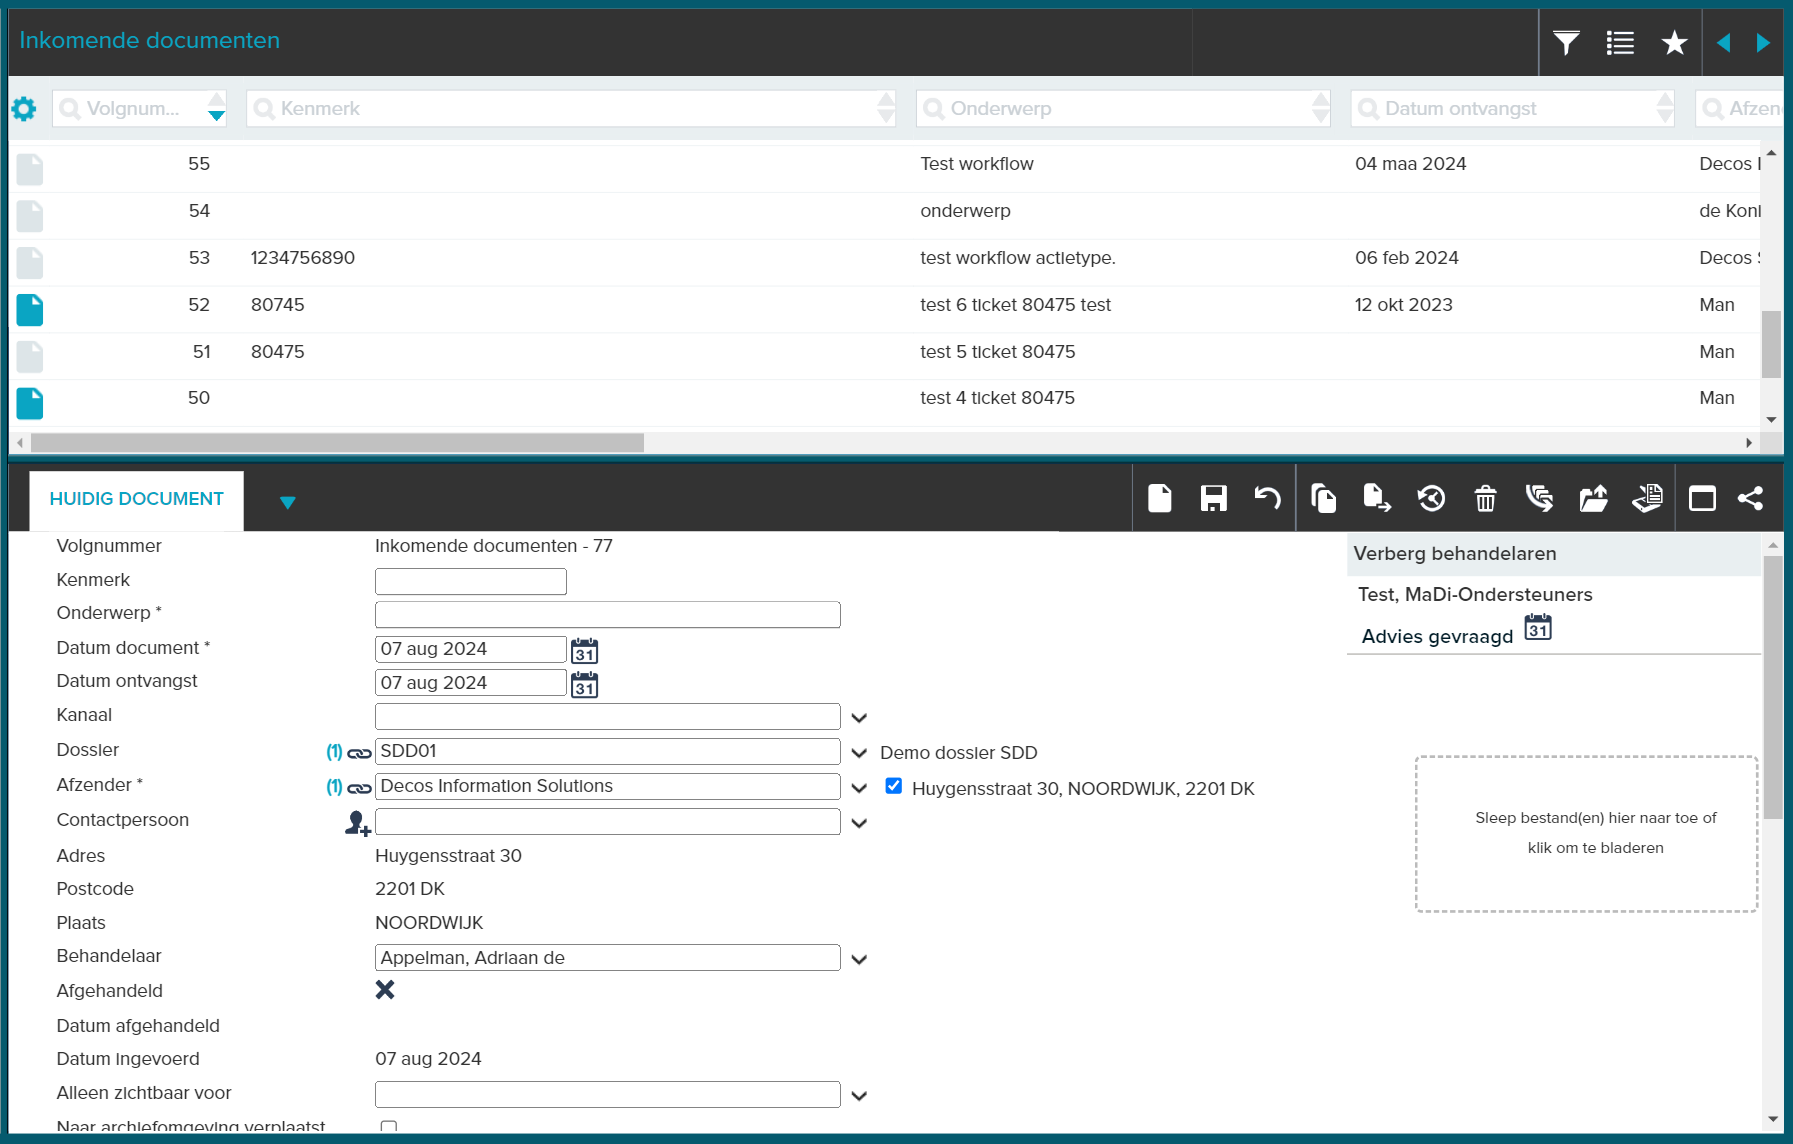
- In the Menu, open the Registrations -> Documents pane and then the Document book in which you want to register a document. The contents of the document book are displayed in the List;
- In the Registration screen, make sure that the Current Document tab is active and click New;
- Enter the desired data per field;
- To simplify the registration of documents, the application manager can have various fields filled in automatically, for example a settlement date based on the date of registration, or a work process based on an assigned file description;
- In the Registration screen, you have a number of options that make entry easier:
| Button | Description |
|---|---|
| Selects a value from a table | |
| Opens a calendar to select a date | |
| With this button you can quickly link addresses or item types to a registration under the Current Document tab |
- Click on Save
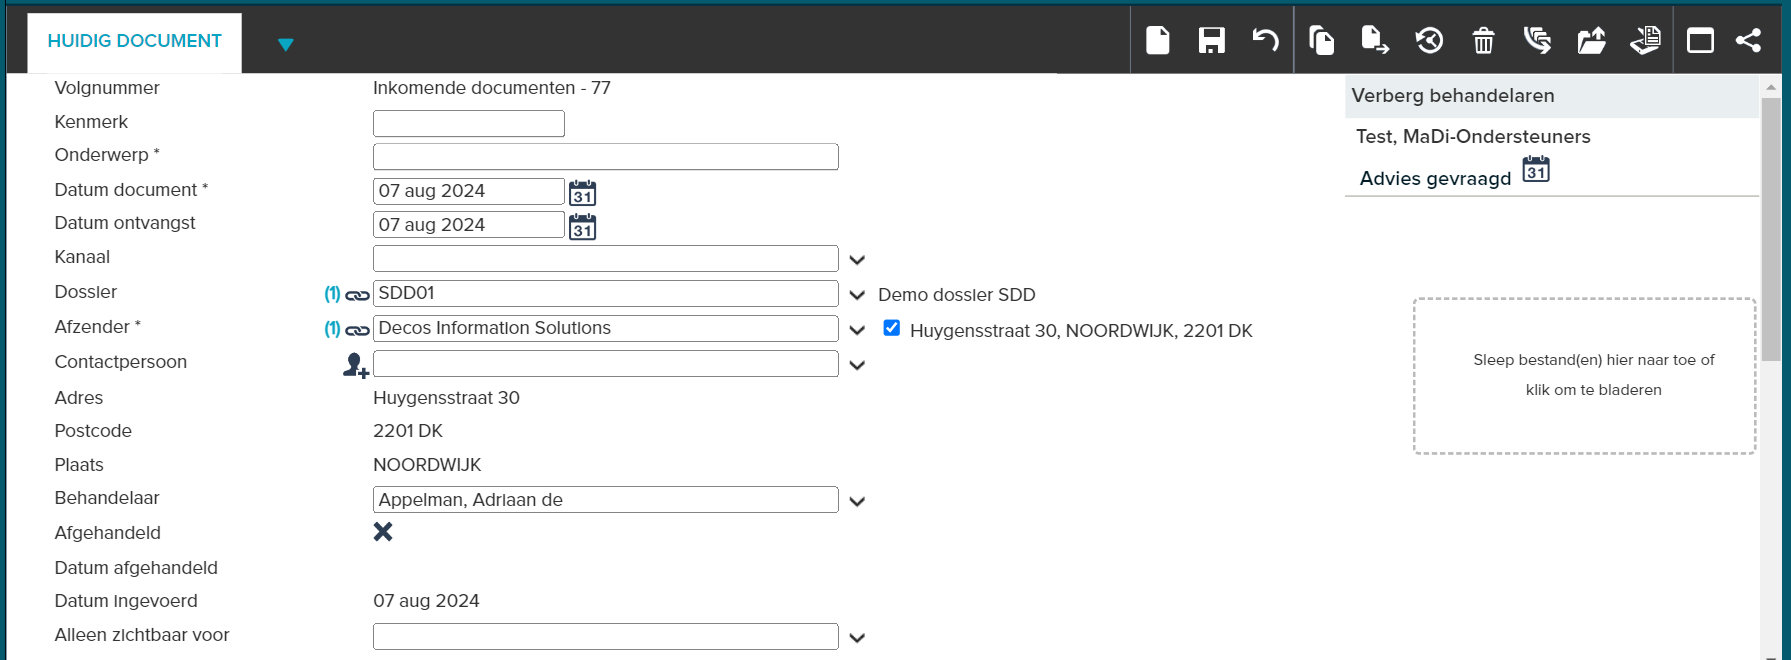
The document data is now registered. You can now add extra information per tab.
Set permissions per document
The application manager indicates per user whether registrations can be assigned to others. Every user for whom this right is activated will see an extra field “Only visible for” under a registration. In this field, the users of user groups can be selected from a drop-down list who are allowed to view the document registration.
Notes and comments
Notes or comments that you want to record with a document can be stored under the tab Extended Content (or Notes).

After clicking on the tab, the following screen appears:
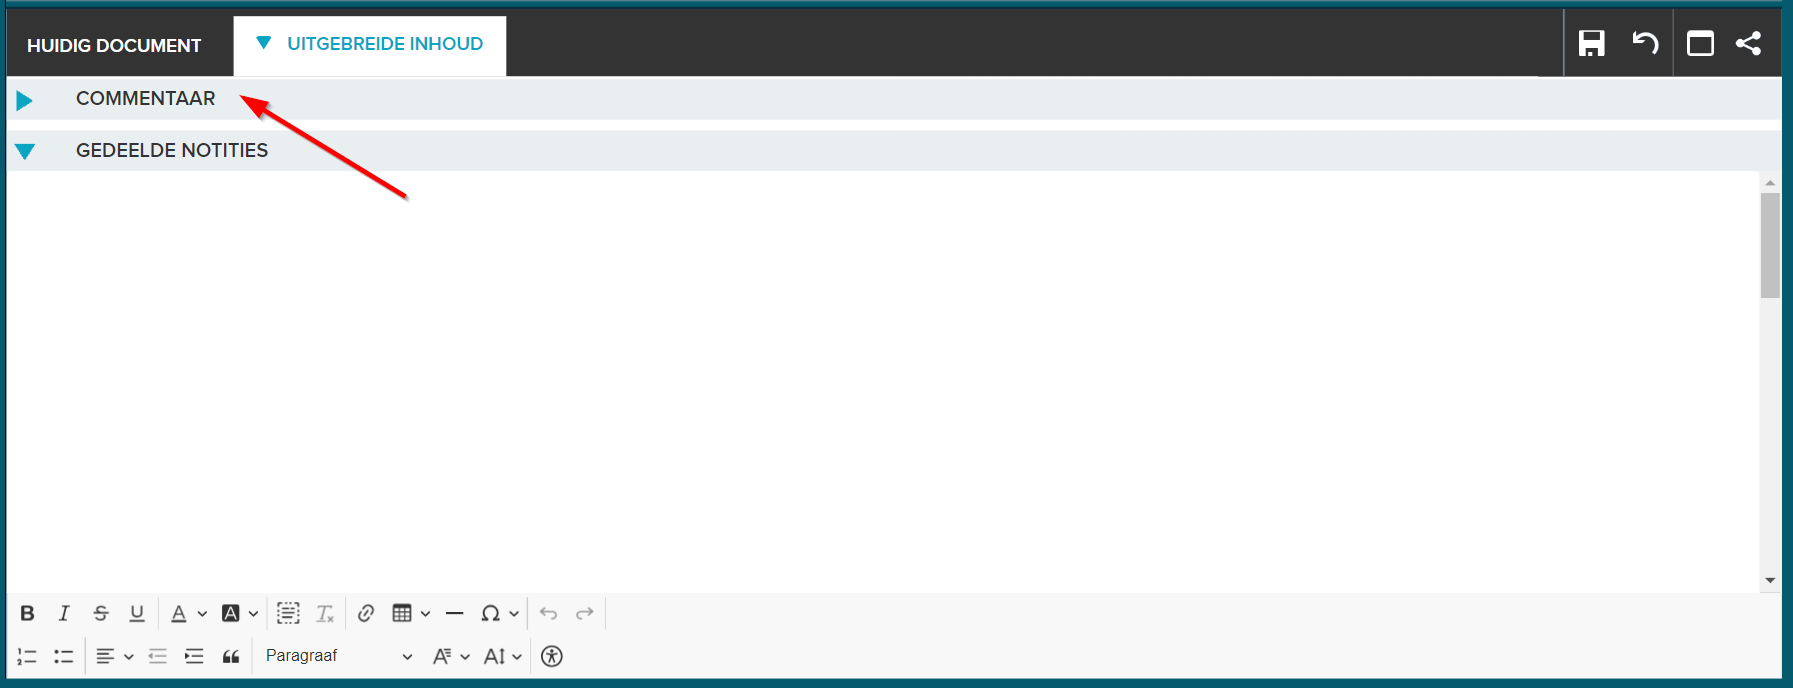
This screen is divided into a block “comments” and a block “shared notes”. the comment block is for chatting with colleagues about this document and posting other comments. the “shared notes” tab is your notepad, in a way. You also have access to editor options here (such as font size, color, etc.)
After you save the information, there is a paper clip on the tab that indicates that there’s information to be found there. If another user selects the document, they will see from the paperclip that there is information on the Notes tab.
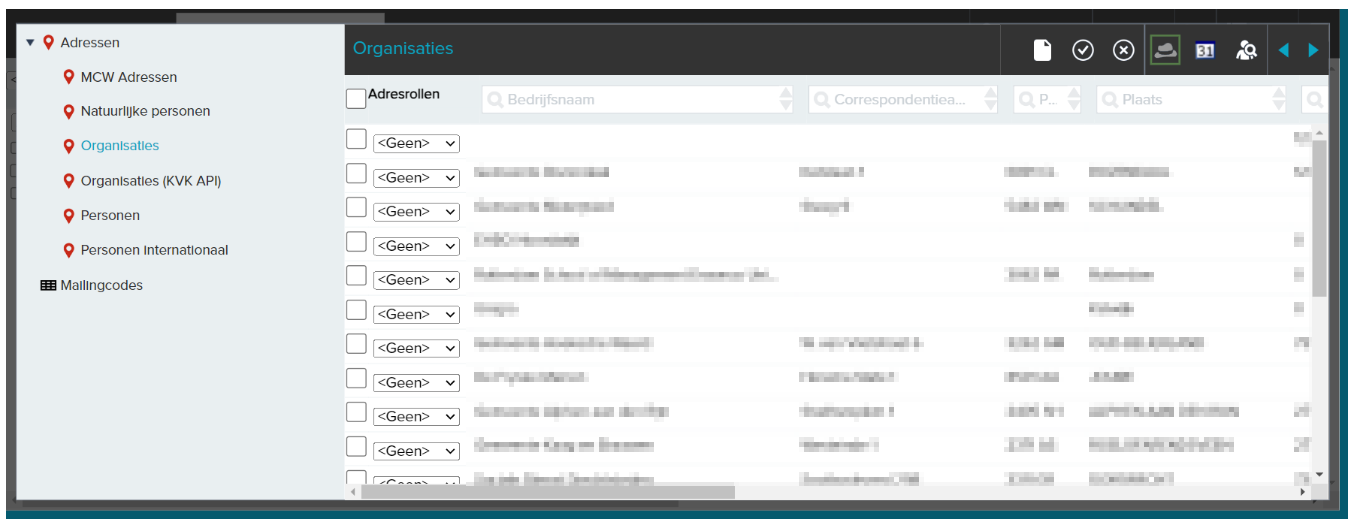
Link address
Linking an address to a document registration can be done in several ways:
Via the Link Addresses button
- Open via the window Registrations -> Documents and then choose the correct document book. The contents of the book are displayed in the List;
- Select the desired document registration;
- Click on the link button for the Company name field;
- A list of available address books will appear on the left side of the Registration screen;
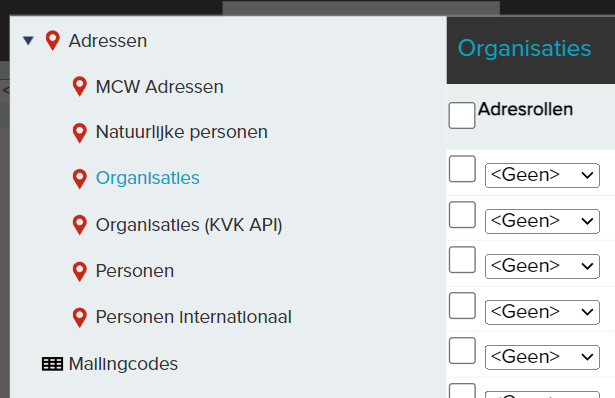
- Open the correct address book and then tick one or more addresses;
- Click on Link to establish the link;
- The address is now linked to your document registration.
Via the addresses tab
- Open the Registrations -> Documents pane via the Menu and then select the correct document book. The contents of the book are displayed in the List;
- Select the desired document registration and select the Addresses tab in the Registration screen;
- Click on Link;
- Open the correct address book and then tick one or more addresses;
- Click on Link to establish the link;
- The address is now linked to your document registration.
Enter door letters in the Company name field
It is also possible to enter the first letters of the company name in the field. The application gives you the most suitable names from the address book that was last used.

You can select a value (or enter the full name) using the arrows on your keyboard. To link an address, press Enter. The address is also selected via the tab key on your keyboard.
¶ Link contact
Usually, contact persons are also known at an address. These are then linked via the Address Book. As soon as you link an address to a document registration as described above, a drop-down arrow automatically appears behind the Contact person field and you can select the contact person associated with this address. By entering the first letters of a last name, the correct contact person can be selected. You can also add a Contact via the Addresses tab. Select the Addresses tab and place a check mark in front of the desired Contact person. Click Save to save the link.
¶ Search for a contact
You can quickly search for contacts through all address books using the Lookup Address Contact button in the toolbar of the List. This button is available in the List of an Address Book.
- Select an address book;
- Press the button marked in green below in the List and enter the desired search terms;
- Press Enter to view the results.
¶ Linked files
Various types of files can be linked to a document registration. Via the Files tab you have the option of adding Word documents, Excel files, Open-Office files, images, e-mail messages, scanned documents, presentations, Vodcast, Podcast etc. to the registration.
- Open the Registrations -> Documents pane via the Menu and then select the correct document book. The contents of the book are displayed in the List;
- Select the desired document registration and go to the files tab in the Registration screen;
- Click on Link. In the screen that appears you can navigate to the correct file via the Browse button;
- Click on the file and press Enter;
- You will now see the path to the file you want to link;
- Click on link and the file is linked to the registration.
- After you save the changes, there is a paper clip on the tab that indicates that it contains data and is thus in use.
From the files tab, you can also print the linked files. To do this, select the list view of the associated files, tick the files you want to print and then click the printer logo. The contents of the selected files are then printed.
You can view the files linked to a registration at any time. From the Current Document tab, choose the Open button. The linked file will then be opened immediately. If you have more than one file linked to the registration, you will see a window on your screen in which you can click the desired file. This file will then be opened. If you do not want to view any of the displayed files, close the window with Cancel.
If you want to be kept informed of changes, click RSS feed in the toolbar of the registration screen. A URL will be displayed in the screen that appears. You copy this and add it to the RSS feed in the portal or another RSS reader such as MS Outlook. You will then be notified as soon as the registration details are changed. You can choose where you receive the notification: in your email box or in the Internet Explorer Favorites Center.
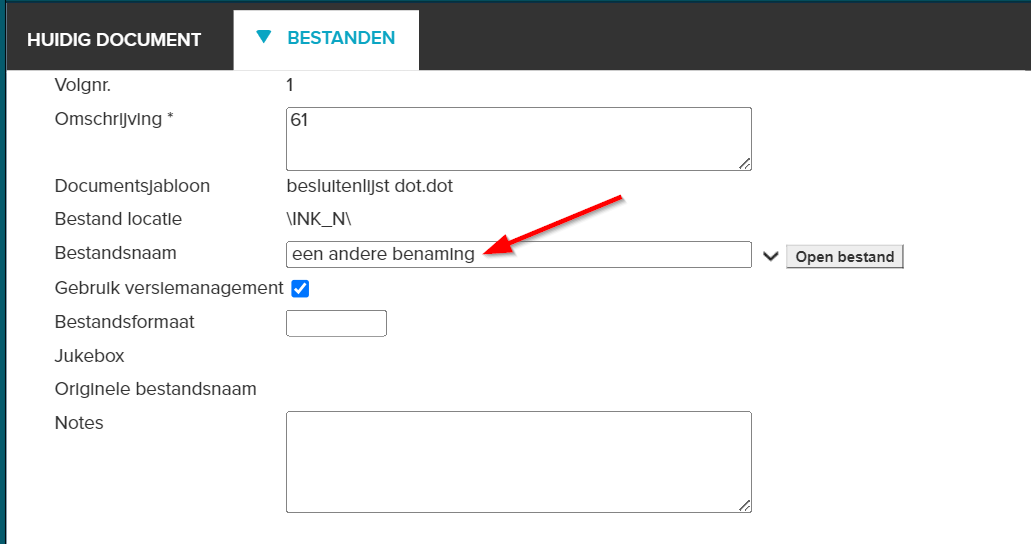
If in the config editor it is configured that file names can be changed, you can select and change the file name. This does not work for scans and only if you have editing rights to the document registration.
¶ Create file with template
During a document registration you can create a new file under the files tab by using a template in MS Word or Open Office Writer. Templates are created by the application manager in the JOIN - Admin Tool.
- From the Menu, select the Registrations -> Documents pane and then choose the appropriate document book. The contents of the book are displayed in the List;
- Select the desired document registration and go to the files tab in the Registration screen;
- Click on New and the input screen for the new file will appear;
- Select a template from the table and enter the description;
- Click on Save (green arrow) to create the new file;
- MS Word or Open Office Writer is started and the new file is created. The predefined fields of the template are automatically filled in with the data from the Registration screen;
- Edit the file as desired and save it by clicking Save. The file you created will be saved in JOIN with the registration you selected;
- To reopen or edit the file, click the Open File button in the toolbar of the Current Document tab. Or, on the Files tab in the list view, click the file number of the file name. In both cases the document will be opened in MS Word or Writer.
If your organization uses Registration Templates, this offers a number of extra options in JOIN. You can create a file with a template as described. Again, the data you added to the registration screen will be displayed in the new file. In the file created with a registration template you can edit a value, and it will be automatically copied into the fields of the registration screen in JOIN. For example, a user in MS Word can open a file via JOINDirect, change a field value and change a registration without actually opening JOIN. In the screenshot above, you can see a registration template that opens in MS Word. For example, a department can be added to the file and as soon as the file is saved, the selected department is not only visible in the file but is also automatically added to the relevant field in the JOIN Registration screen. In addition, a value in the JOIN Registration screen can be adjusted at a later time and this value is automatically transferred to the file created with this registration template. For example, if you always want to add the sending date to an outgoing letter and record it in JOIN when sending a letter, only the date has to be entered in the Registration screen. Then click on the print button to print the letter and without opening the file, the sending date is also added to the letter.
Note: Your application manager sets the rights for the use of templates. It is possible to set rights for users and user groups per template. It is also possible to offer only the relevant templates per book. If you do not have the desired templates, please contact your application manager. To be able to use registration templates, you must have at least Office 2007.
¶ Sending a mailing from JOIN
You can use mailing codes to send a mailing to several addressees. An earlier chapter described how to link mailing codes to an address or a contact person. If you want to send a mailing, follow the steps below:
- From the Menu, select the Registrations -> Documents panel and then choose the appropriate document book. The contents of the book are displayed in the List;
- Click on New in the toolbar of the Registration screen and fill in the data;
- In the Company name field, click the link button:
 ;
; - In this case, in the screen that appears, do not choose an address book but Mailing Codes;
- Search for the correct mailing code and tick it via the filter bar;
- By clicking on Link (green tick) the link is established;
- Depending on the number of Addresses or Contacts to be linked that belong to the relevant mailing code, this process can take a few seconds;
- In the Registration screen you will see blue numbers in front of the Company name and contact name field. These numbers indicate how many mailing codes are linked.
You now have the choice between sending a digital mailing or on paper.
¶ Sending an HTML mailing from a document registration
An HTML e-mailing can be sent from a document registration. In doing so, the document data is merged with the email, and all contacts associated with the document receive an email.
If you want to send an HTML mailing, select the Files tab;
- Click the Send e-mailing button;
- A popup window will appear;
- Select a mailing via the drop-down arrow and enter the subject of the e-mail, the sender and a reply address. Optionally you can choose to send attached (linked) files.
- Click the Send Mailing button and each contact person associated with the document registration will receive an email. The condition is that an e-mail address has been entered for the contact person.
- If you want to see who this mailing will be sent to before sending, click the Preview button.
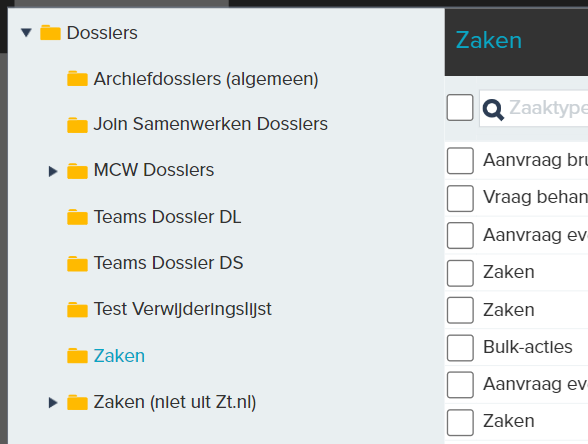
¶ Linking a dossier
JOIN offers you the option of linking your document registrations to dossiers. This allows you to store documents in a structured manner and to archive them digitally in a correct manner. This is done in the Registration screen under the Files tab.
- In the Menu, select the Registrations -> Documents pane and then choose the appropriate document book;
- Open the desired document registration via the List;
- In the Registration screen, go to the Dossiers tab or click Link Dossiers in the registration button;
- Click “Link” in the toolbar. A list of existing dossier books will now appear on the left of the Registration screen. Select the correct book and then tick one or more dossiers;
- Click on Link. The link has now been created.
After you have linked a dossier, a paper clip appears on the tab to indicate that the tab contains data and is therefore in use.
Because users often link documents to the same dossier book, the application manager can indicate in the JOIN - Admin Tool what the default dossier book should be for a particular user. For example, for a P&O employee the personnel dossiers can always be selected from the list of existing dossier books.
From this place it is also possible to create a new dossier in any desired dossier book. In the Dossiers tab, you do not click on Link, but on New. You can then select a dossier book in the Registration screen and create a new dossier. As soon as you click on Save, the link with the document registration from which you are working is automatically established.
If you want to unlink a registration from a dossier, click on Unlink in the Registration screen under the Files tab. Check the link you want to remove and click Unlink.
¶ Assign Workflows and Actions
Your application manager can automatically start workflows when registering a document. If no workflow is started, you can manually link a workflow or an action.
- From the Menu, select the Registrations -> Documents pane and then choose the desired document book. Open a document registration via the List;
- In the Registration screen, go to the Workflow tab. If your organization does not use a workflow module, you have the Activities tab;
- Click on New registration and the input screen will appear. You can assign a one-time promotion;
- Fill in the Action, the Handler and possibly other fields;
- After you have filled in all the required fields, click on Save to save the data;
- The action is automatically assigned to your chosen handler and placed in their active work queue
- If you have the workflow module, you can also manually select a workflow;
- To do this, click on the Link workflow button;
- Select the desired workflow by clicking on the name;
- The workflow is automatically assigned to the predetermined handlers and placed in the active work queue.
- Once you have assigned a workflow or action, a paper clip will appear on the Workflow / Activities tab to show that the tab is in use.
To link workflows or actions to document registrations, you need rights that the application manager can assign to you in the JOIN - Admin Tool.
Note: You can read more about how this functionality works in the Workflow chapter.
¶ Version management
JOIN works with version management by default. If a document is linked to a registration in JOIN, it is kept in its original form and is provided with information such as author, date and time when it was created.
If the original is edited or changed, JOIN automatically saves this edit as a new version. The new version also automatically stores additional information such as: name of the user who made the most recent change, date and time when this happened. In this way the history of the document is preserved. Each new version is given a new serial number.
If you are on the Current Document tab and you want to open a linked file, click the Open file button. The most recent version of the file will then be opened automatically. If you edit this document, it will be automatically saved as a new version (with a new number).
If you are on the Files tab, you can view the history of the file concerned via the drop-down arrow behind File name. The “old” versions of a file can then be opened as a “Read only” version.
¶ Check out - Check in (working document)
This functionality offers the possibility to edit a document registration without another user being able to make changes in the meantime. This can be useful when modifying a linked document whose content should not be available to other users until it is completely finished.
It is not possible for other users to edit checked out documents or dossiers. It is also not possible to link dossiers or documents to documents or dossiers that have been checked out.
The check out - check in functionality is a user right that is granted by the application manager. A user who is granted this right will find two new folders in the Worklist panel, namely Work Documents and Work Dossiers.
All individually checked out document registrations are placed in the Work documents folder, all checked out dossiers are placed in the Work files folder. In this case, changing document registrations linked to dossiers with possibly linked Word documents takes place from the Work dossiers folder.
- In the Menu, open the Registrations -> Documents panel and then choose the desired Document Book;
- Select the correct document in the List;
- In the toolbar of the Registration screen, select the option Check out;
- Under the toolbar of the Registration screen the system now shows the following message: You have checked out this document, it cannot be changed by others;
- Other JOIN users will see the message: You cannot edit this document, it has been checked out by [employee name];
- After editing the document, select the Check In option in the toolbar of the Registration screen. The document is once again available to other users.
¶ Make a letter
The Letter button allows you to quickly create a Word or Writer document from the main screen of a document registration. The application manager must grant the right to use this function per user and assign a default template per book. Both things are set in the JOIN - Admin Tool.
- In the Menu, open the Registrations -> Documents pane and then choose the desired Document Book;
- Select the correct document in the List;
- In the toolbar of the Registration screen, select the Letter button;
- A Word or Writer document is immediately created and opened. The information you have registered is immediately incorporated into the letter;
- Edit the document as desired and close with Save. The changed document is then directly linked to the registration in JOIN.
To reopen the document, select the Files tab and then click the file number or file name. The document will then be opened in MS Word or Open Office Writer. Or you choose Open file in the toolbar of the Registration screen and click on the file to be edited.
¶ Create label
The Label button, just like the Letter button, offers you the option of creating a document (label) at the touch of a button. Label files, however, are temporary files that are not automatically saved in JOIN.
The application manager can select a document template per user in the JOIN - Admin Tool to be used as a Label template.
¶ Link scans
You can also link scans to the document registration. You can scan directly into JOIN with a network scanner, or operate another (twain or ISIS) scanner via JOIN.

- Log in to the network scanner (your application manager can set this up for you) and scan the document;
- From the Menu, open the Registrations -> Documents panel and then the appropriate document book. The contents of the book are displayed in the List;
- Select the desired document registration and go to the Files tab in the Registration screen;
- In the toolbar of the Registration screen, click Scan The scan is automatically linked to the document registration.
After you link a scan, a paperclip will appear in the Files tab. This means that the tab contains data and is therefore in use.
The scan functionality described above is mainly aimed at occasional scanning and linking of documents. JOIN has very extensive options for users who process a lot of scans. The options are described in the chapter Bulk scanning.
¶ Open and view scans
There are several ways to access and view saved scans in JOIN. First of all, you can click the  Open file button and the scan will open in PDF. If several files / scans are linked to the relevant registration, you will first see an intermediate screen in which you click on the relevant scan. This will then also be opened in PDF. If you have activated the button Show thumbnail view
  in the Registration screen, you will immediately receive the linked file as a preview in a small version on the right side of your screen with every registration. Clicking on this image will open the scan in PDF.
If you have rights for bulk scanning or full user, you can also open a scan in the File viewer.
¶ File viewer
- In the Menu, open the Registrations -> Documents pane and then choose the desired Document Book;
- Select the correct document in the List;
- In the toolbar of the Registration screen, click on Open file viewer
 . The file viewer opens in a new window;
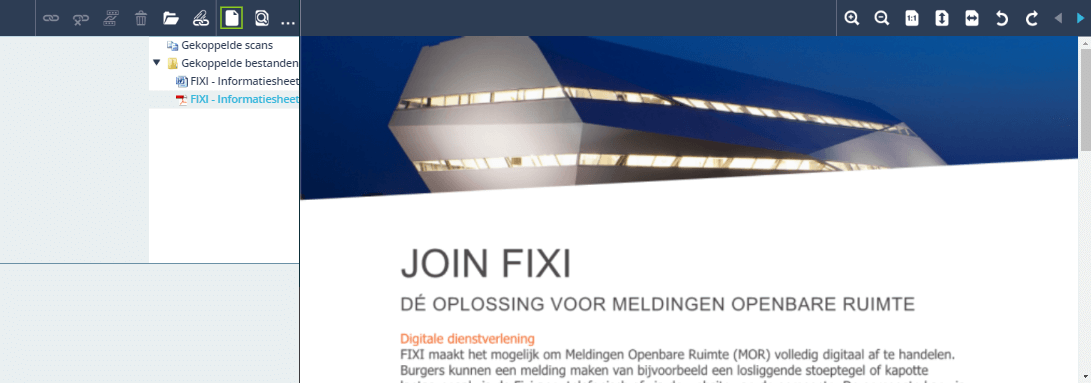
- In the scan tree on the left (blue area) you can see whether scans have been linked or whether other files have been linked;
- If you click on the top scan in the scan tree, you will see the first linked page on the right side of the screen and a thumbnail view of the first four pages at the bottom left;
- If you click on another scan in the scan tree or on a thumbnail at the bottom left, it will be displayed on the right. Above the full page view are buttons Image: Page.png to scroll through the remaining pages;
- If you click on a linked file other than a scan in the scan tree, the first page of the file will be displayed on the right side of the screen. Files can be displayed without having to open the application in which the file was created.
- When viewing files other than scans, you do not have the thumbnail display on the left side of the screen;
- Regardless of the file type, you can enlarge, reduce and rotate the page shown on the right using the buttons at the top of the right panel;
- Within the file viewer it is possible to paste memo sheets (also called sticky notes) on scans. This allows you, for example, to alert a colleague to a specific part of the scan. You can also mark a text block to draw extra attention to it;
- If you have bulk scan rights, the file viewer offers various other functionalities. These are described in the chapter Bulk scanning
- If you have 2 screens, you have the option to display JOIN on one screen and drag the file viewer to the second screen.
¶ OCR and scan
JOIN allows you to save a scanned document as OCR to create a searchable text file. Many scanners have the standard option to create PDF scans and convert them to high quality OCR. These results are available 1-on-1 in JOIN. If your scanner does not have this option, the OCR function of JOIN will be used.
If you choose the Files tab, Input screen view in the Registration screen, you will see in the note field at the bottom that the scanned file is available as a searchable text file.
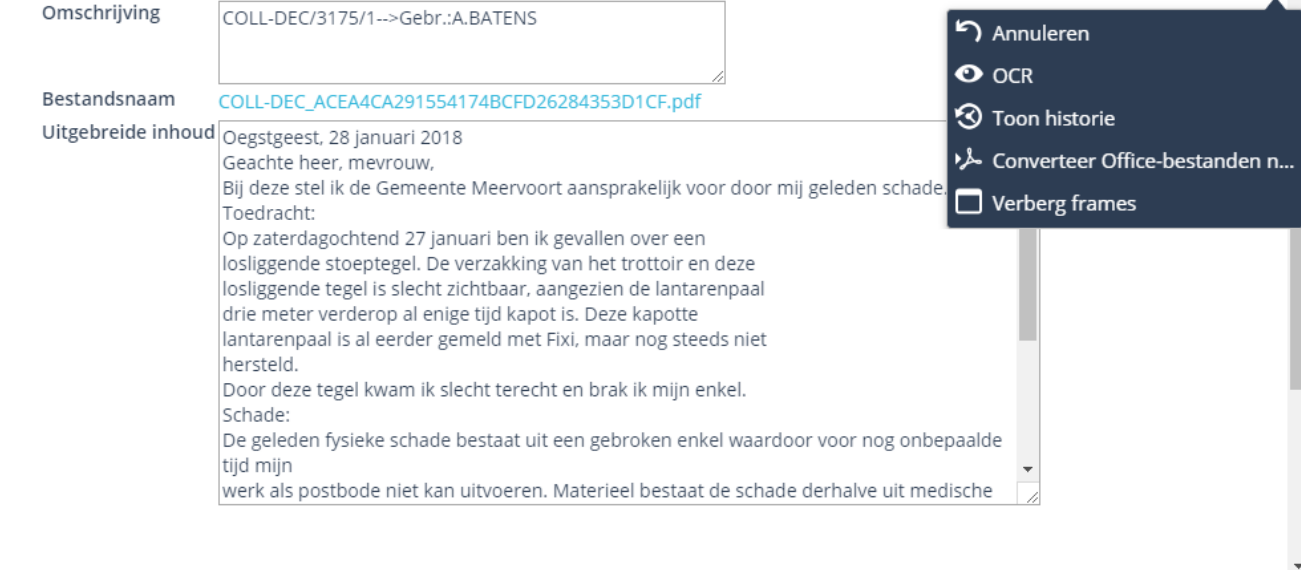
The OCR capability is used for PDF, TIFF and scanned DSC files.
¶ Make a copy
You can make a copy of a document registration. This can be convenient if you want to create a registration that is very similar to another registration.
- In the Menu, select the Registrations -> Documents pane and then choose the document book in which the new registration should be placed;
- In the toolbar of the Registration screen, click Copy from;
- A list of existing document books will appear on the left side of the Registration screen. Open the document book containing the registration to be copied (the original);
- Then find the registration you want to copy and click on it. A copy registration is created and you can make adjustments if necessary.
A paper clip has appeared on the Documents tab of the new registration. This means that data is present. If you move the mouse button to the Documents tab, the words Copies and Original will appear immediately below the tab.
Behind Original is a number. This not only means that data is present, but it also displays the link to the original registration. If desired, you can click on the link to get the original registration directly on your screen.
In the document book with the original registration, a paper clip has now also become visible under the Documents tab. If you move the mouse button to the Documents tab, the words Copies and Original will also appear here under the tab.
Here is a number behind Copies. This refers to the copy you just made. If desired, you can click on the link to go directly to the copy of the registration.
Either nothing or (1) is stated behind Original. After all, there can only be one original. Multiple links are possible with Copies, so multiple numbers are also possible here.
Move registration
If you have bulk scan rights, you can move a registration with all linked data.
- In the Menu, select the Registrations -> Documents pane and then choose the desired document book;
- Open a document registration via the List;
- In the toolbar of the Registration screen, click on Move to
.png)
- Click the desired book in the Menu that appears;
- Registration has moved.
¶ Link Thesaurus term
With a thesaurus, structure can be introduced within documents and files. By using a thesaurus, you can find all relevant documents on a particular subject or on a particular classification code.
Whether or not you may (un)link thesaurus terms depends on the rights that the application manager has granted you.
- In the Registration screen, go to the Thesaurus tab and click Link;
- You can search systematically for thesaurus terms by using the [+] buttons to make parts of the tree structure visible on the left until you have the desired term in view;
- Click on the term you want to link;
- This is put in the list on the right;
- If you don’t know exactly where the term to be used is located in the thesaurus, search for text by entering one or more keywords in the search field above the list;
- Click on the term you want to link;
- After you have chosen all the desired terms, click on Link. The chosen thesaurus terms have now been added to the current document registration.
Preferred Terms and Non Preferred Terms
To prevent employees from assigning different terms for the same concepts or using a different spelling, we work with preferred terms and non preferred terms. For example, if you link the word Nurseries, the final result will say: Nurseries NURSERY. The term Crèches is the non-preferred term and Daycare centers the preferred term. If a daycare center is searched at a later time, the registration to which the word Crèches is linked is also found.
The thesaurus is managed in the JOIN - Admin Tool.
¶ E-mail document data
-
To send an e-mail from JOIN, click E-mail in the toolbar of the Registration screen. The email screen of the application appears;
-
Enter the e-mail address of the addressee;
-
You can check the option Send me a copy so that you also receive a copy of the sent document;
-
Fill in the “Add CC” field if you want to send someone else a copy of the email;
-
Fill in the “Add BCC” field if you want to send someone else an email where the email address remains invisible;
-
Fill in the field ‘Reply address’. Any response from the addressee will be sent to this entered e-mail address;
-
Under Details, indicate whether you want to send all registration data, only the serial number and description or a shortcut to the registration in JOIN;
-
If a file is linked to the registration, you can choose from three ways of sending. Behind Files you can choose not to send, attach or send a shortcut to the file. In the latter case, the recipient can open the desired file directly in JOIN via the shortcut;
-
If you do not want to send all linked files, you can tick your choice via Select files;
-
You can check the option to save the sent e-mail;
-
Finally, click on Send Email to send the email.
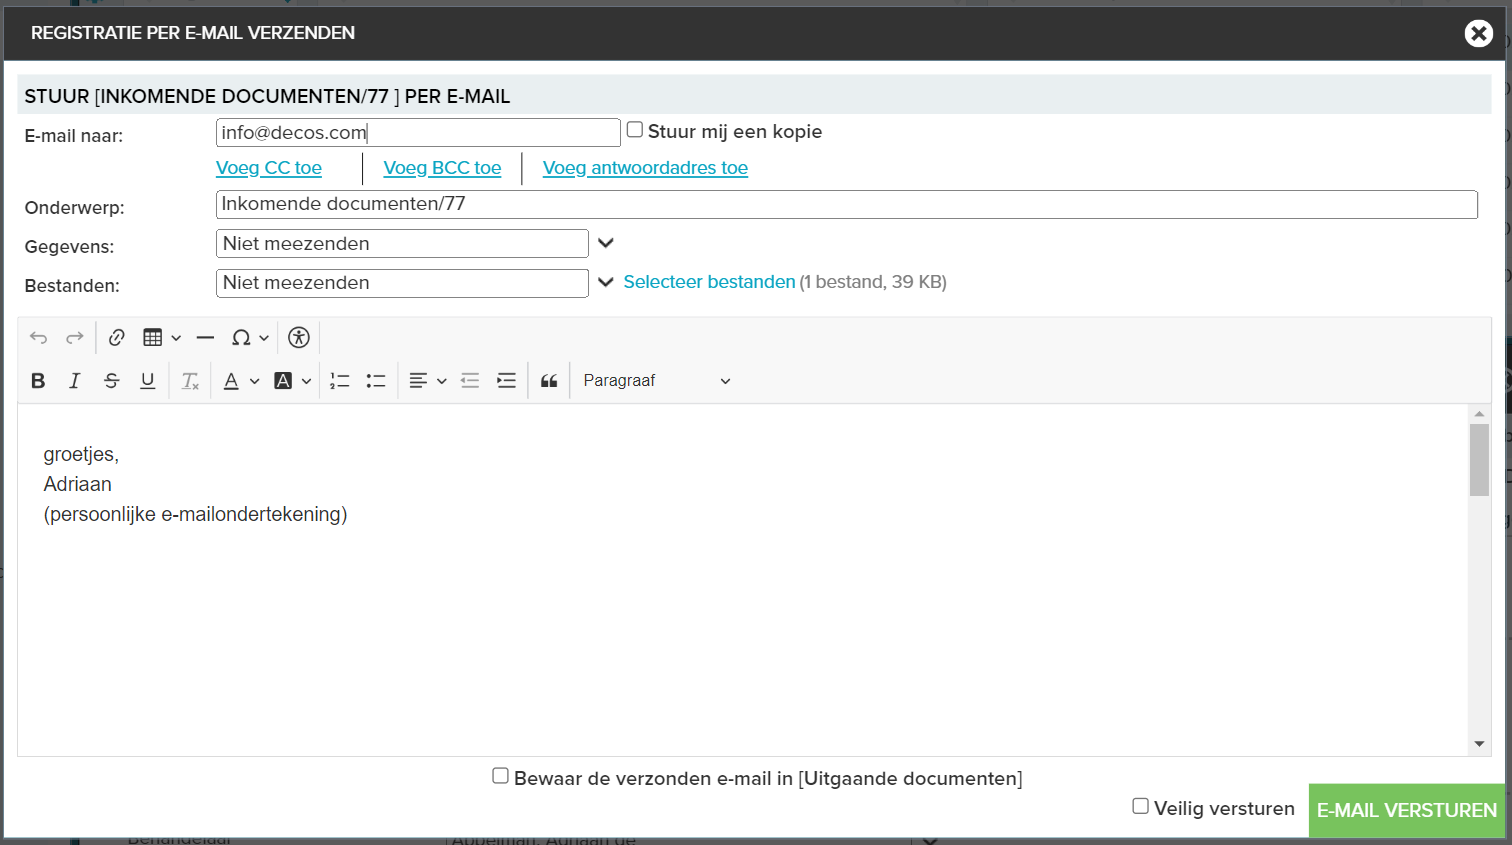
You use sending a shortcut when you send an e-mail within your own organization. Your colleagues can then immediately open the registration in JOIN. If you are sending a message externally, you choose to attach the files. The registration is then sent as an attachment and can be opened from any location.
¶ Organize document book into blocks
Searching through a document book can be done via the filter bar. However, document books in which many thousands of documents are registered can cause a loss in performance. To avoid this, the application manager can divide the document book into blocks in the JOIN - Admin Tool. This is not an actual division, because the documents remain registered in the same book. However, searching the document book is much faster, because not the entire book is searched but only a part.
If the book is divided into blocks, a table with drop-down arrow is visible next to the List toolbar. The table corresponds to blocks of sequence numbers. Select the desired number block using the drop-down arrow. Then enter additional search information in the filter bar and press Enter. A search is now performed in the selected part of the document book, which is considerably faster than if you had to search the entire document book.
¶ My Documents
The My Documents book is designed to register documents that are exclusively for you. Other JOIN users including the application manager do not have access to this data. For example, it is possible to save and edit documents that are still in a draft phase.
From the tabs you can create links with all other parts of the application to which you have rights, for example with addresses or files. These links are also invisible to other users. For example, you can prepare confidential personnel documents that are only available to yourself but are already linked to the correct personnel file.
If you want to make the registration including all links available to other users, you can do this in several ways:
- If you have bulk scan rights, choose My Documents;
- Select the registration you want to make available to others;
- In the toolbar of the Registration screen, click on Move to and click on the appropriate Document Book;
- If necessary, fill in the missing data in the moved registration.
Moving the registration together with all links is a right set by the application manager in the JOIN - Admin Tool. If you do not have the rights to move registrations, proceed as follows:
- From the Menu, select the document book in which you want to include the registration;
- In the toolbar of the Registration screen, click Copy from;
- An overview of the available document books will appear on the left side of the Registration screen and the My Documents folder will appear at the bottom. Click on this folder;
- On the right side of the Registration screen you can select the document to be copied. Click on the sequence number of the correct document to establish the link;
- Fill in the missing information in the Registration screen;
- Click Save to save the registration.
Copying all links together with the registration is a right set by the application manager in the JOIN - Admin Tool. This is a generic setting and therefore applies to all books.
If you do not have this right, you can only copy the registration information and not the links and associated files. If you still want to make a file available to others, take the following steps:
- In the Menu, select My documents;
- In the List you choose the document you want to make available and the details of this registration will appear in the Registration screen;
- Click the Open file button in the toolbar of the Registration screen;
- If there is only one file associated with the registration, the most recent version of the file will be opened. If several files are linked, you will see a screen with an overview of the available files. Clicking on the desired file will open the most recent version;
- The file will be opened in the application in which it was created, for example MS Word. You can now save the file in JOIN via JOIN Direct.