¶ Introduction
With JOIN Decision Making you can carry out the decision making process in a simple and efficient way within the case system. Every actor in the process has been taken into account:
- The writer of the proposal, who starts the decision-making process from the case, gives writes the proposal and asks colleagues for advice.
- The people in the organization who must agree to the proposal, but also have the option of returning the proposal to the original writer.
- The board or director. The person(s) who has ultimate responsibility and is allowed to make the final decision.
- The secretariat that ensures that the proposal is approved on time and that it is linked to the meeting. But also draws up the decision list.
This wiki covers all phases of decision making. Depending on the role you play in the process, we explain which actions you can take.

¶ The process from A to Z
The complete decision-making process (from drafting to making and processing the decision) is explained below.
¶ PHASE 1: Drafting (the concept phase)

Creating a new proposal from the work list or case registration
The proposal is always created from an ongoing case. This can be done in 2 different ways:
- from the work list
- from the case registration
¶ Work list
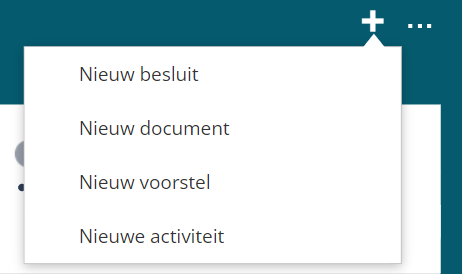
When at least 1 decision-making document is linked to the case type in JOIN Case types, a proposal can be created from the case. In the detail screen of the case handling, the user clicks on the + button and chooses the option “new proposal”.
¶ Case registration
If the case does not take place in JOIN Case & Document, it is possible to create the proposal from the case register. In the toolbar of the case you will find the button “new proposal”:

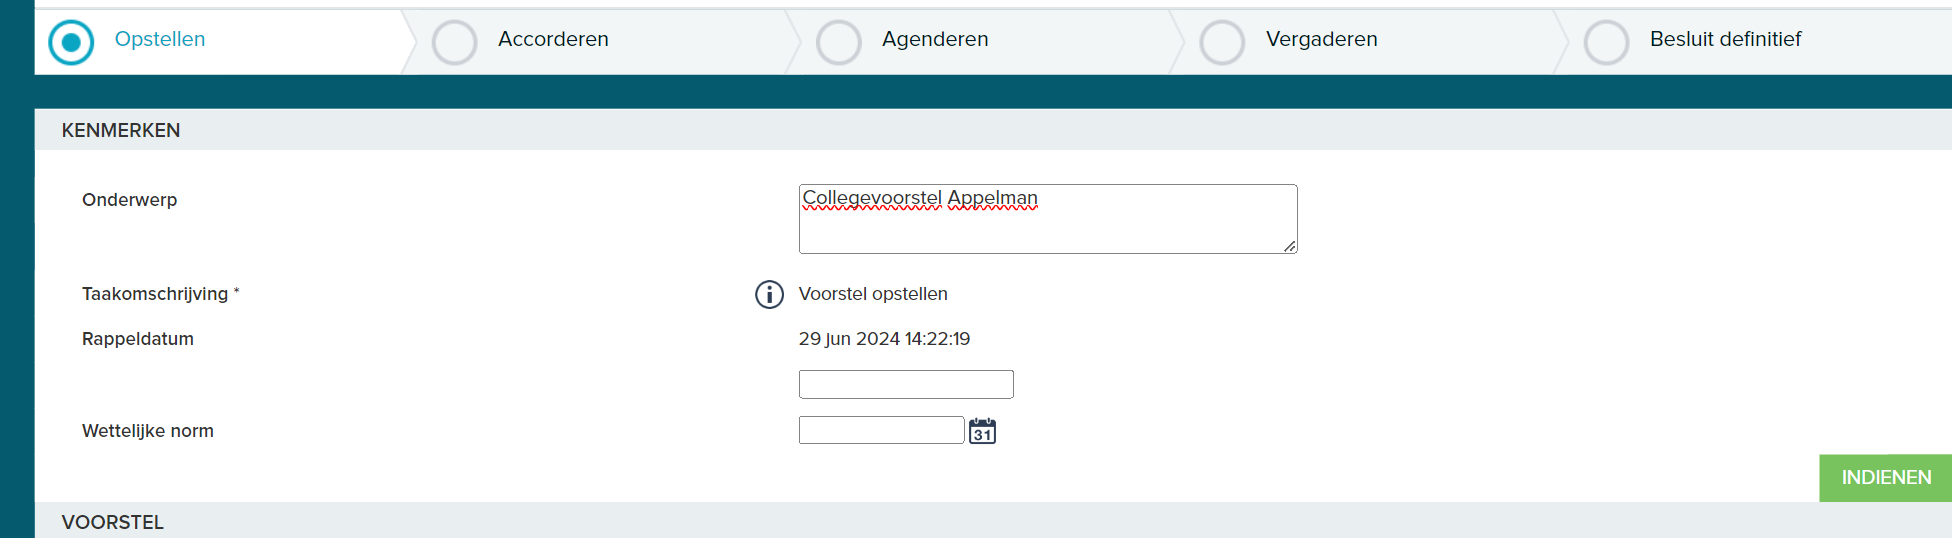
¶ Fill in proposal
Then the regular screen opens to create a new document. Here you fill in the data (at least the data with a *, as these are mandatory). Click on the < save > button to continue.
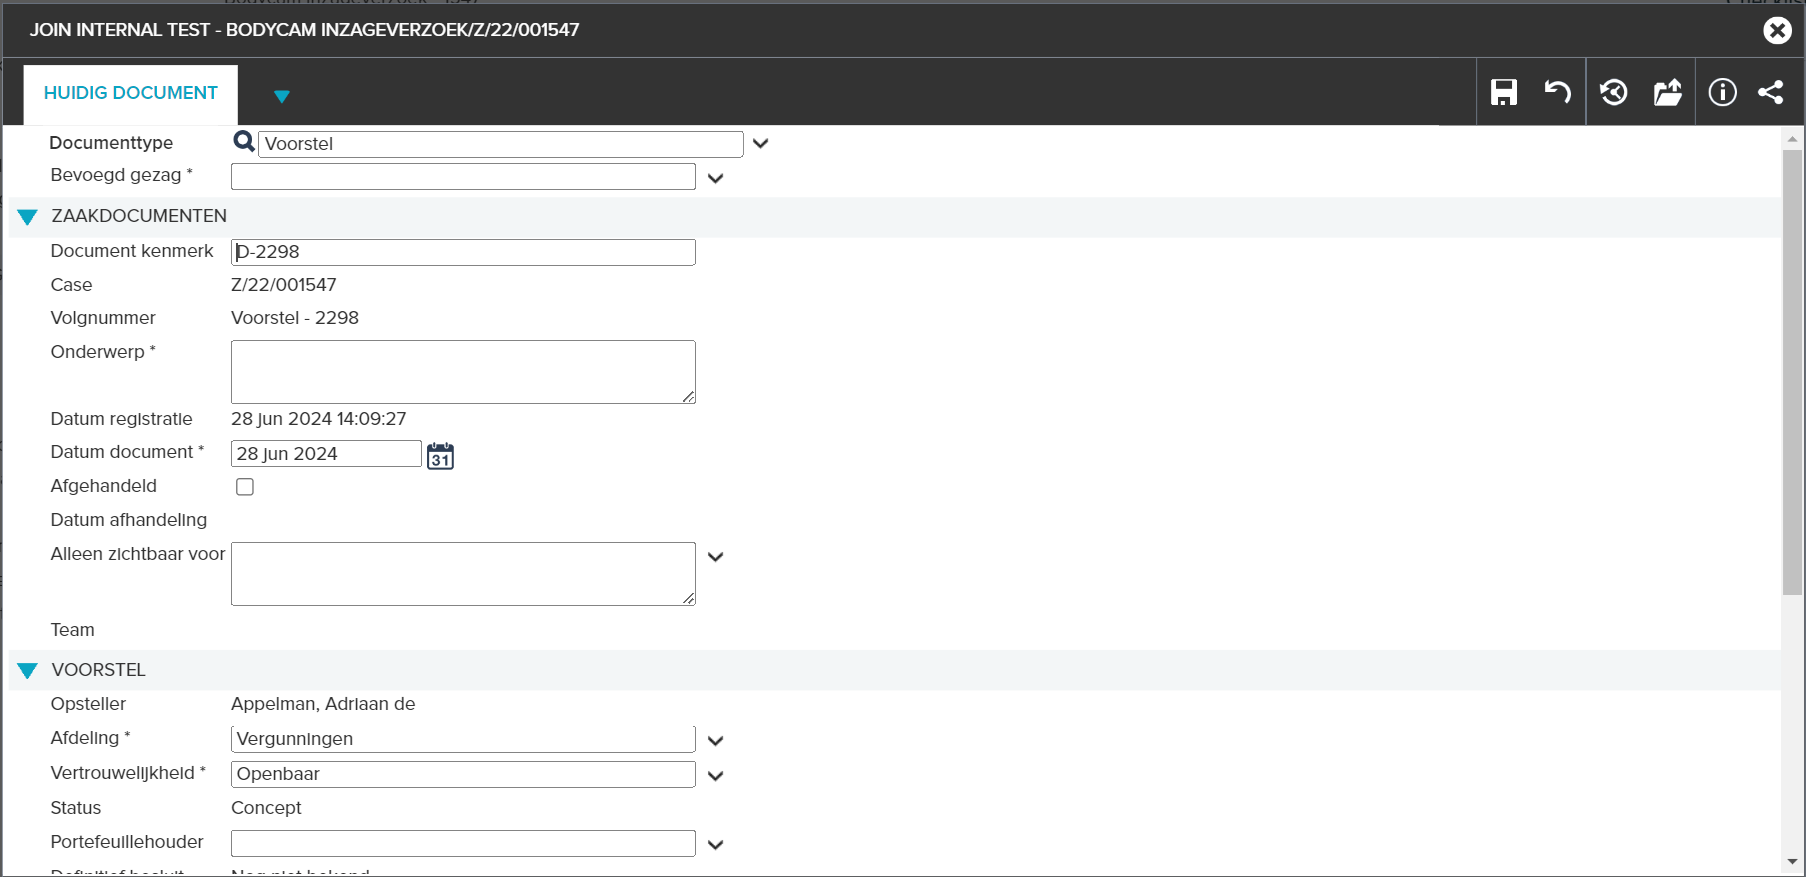
The following options are further discussed below:
- Fill in paragraphs (the content)
- Ask for advise
- Link attachments
- Create PDF (optional)
- Select approval route
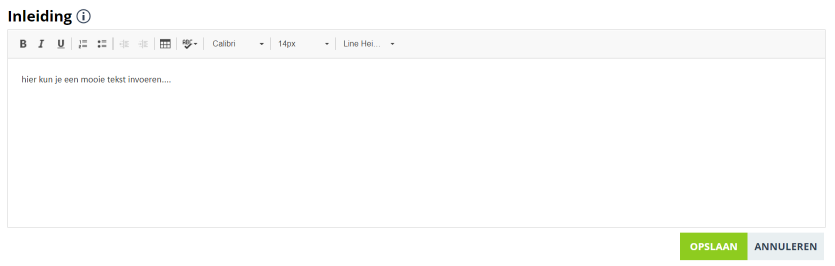
¶ Filling in the paragraphs
After filling in the data in the form, the proposal screen will open. As a proposal writer, you can always access this screen from your own work list.
The very first time you open the proposal, you can edit the first paragraph right away. If you want to edit another paragraph, click “edit”. When you have finished editing, click on “save”. The screen will close again and the text you entered will be saved. You have access to a simple editor with which you can, for example, underline the text, make it bold or add a table. Adding images is not supported. You will find information about the paragraph via the i-icon. A standard text may also have already been entered, which will then be included.
NB: the paragraphs (text blocks) to be completed may differ per proposal type. For example, a council proposal has text blocks other than a council proposal or a mandate proposal.
¶ Asking for advice (feedback)
At the top right of the screen you will find the + button. In this phase, you can use the + button to link attachments and request advice from colleagues. If you choose “ask for advice”, a new screen will open in which you can select colleagues and add extra text.
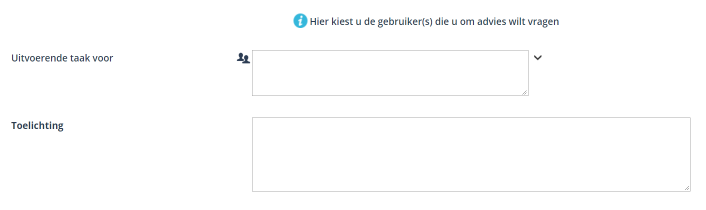
The colleague will receive an email from JOIN containing the text you entered and a link to the advice. As soon as they have given the advice (and completed their action), the originator will receive a message and the advice will be shown in the proposal (per paragraph)
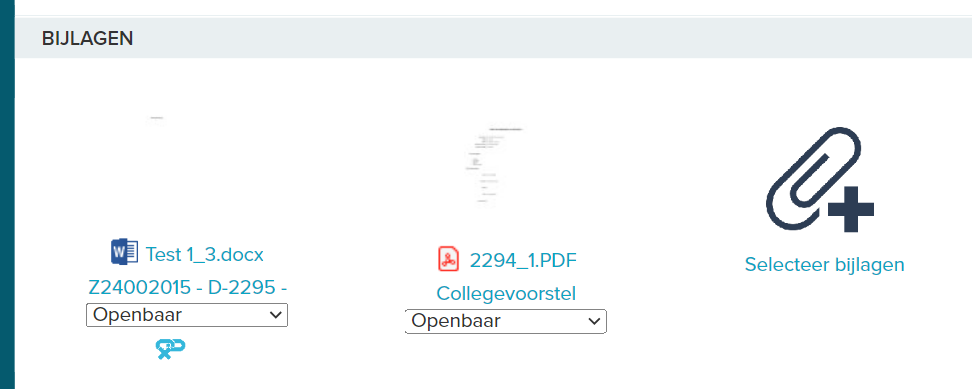
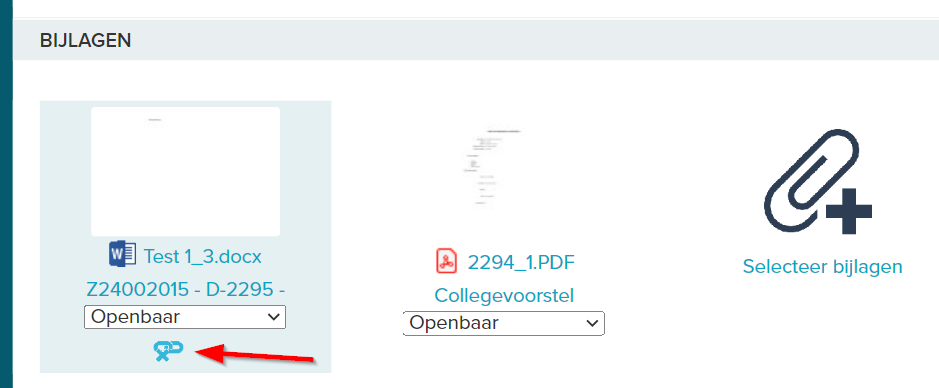
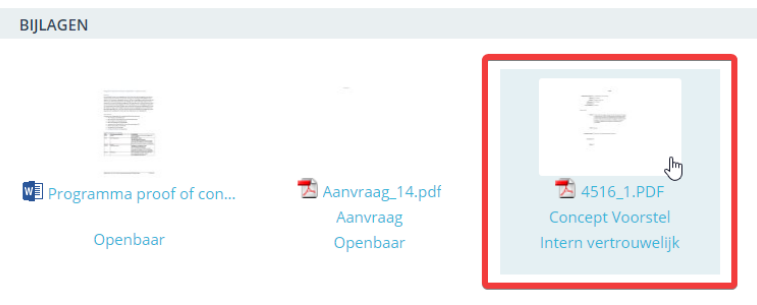
¶ Select attachments
An important part of the proposal are the attachments, such as a letter, a report or other information (eg photos). These attachments are often in the same case, but you do not want to pass the entire case on to your colleagues who have to give advice or their agreement.
You can link attachments to the proposal in 2 ways:
- via the plus button

- at the bottom of the proposal screen
In the screen that opens, simply select the attachments from the case (or sub and follow-up cases) and press “OK” when you are done.
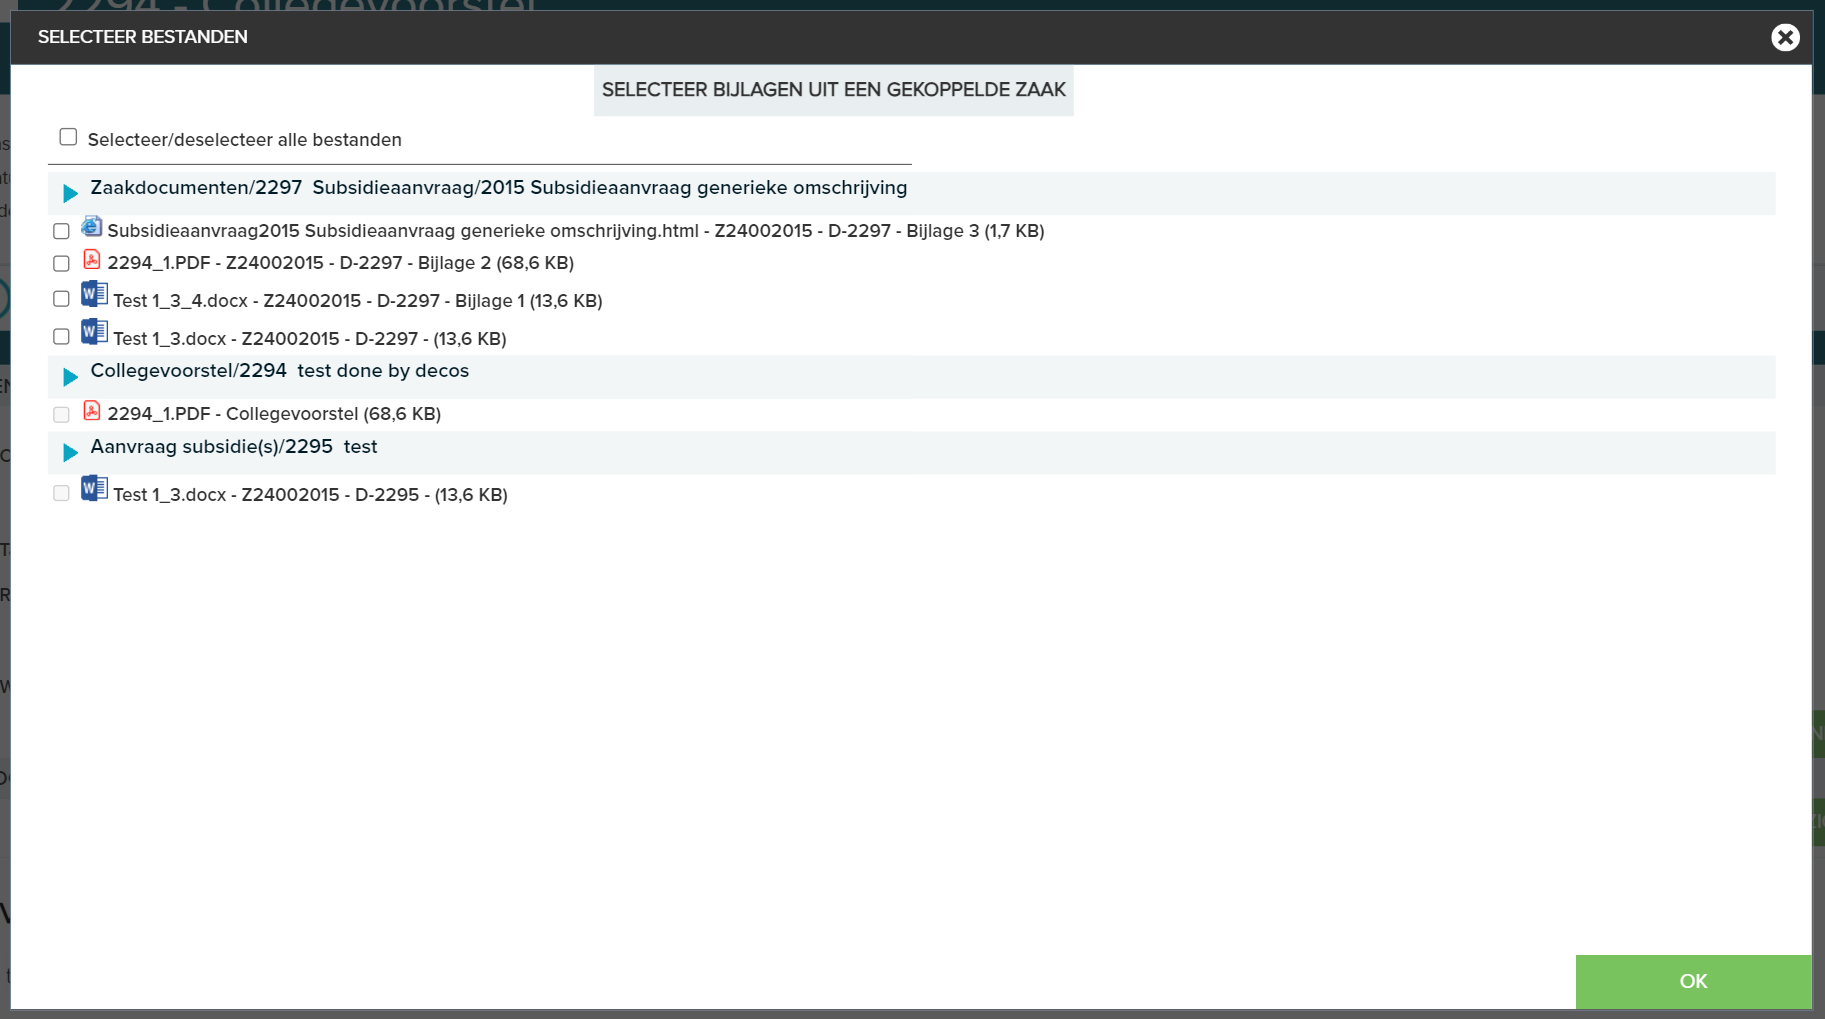
The attachments you have selected are then checked out so that they cannot be edited by others during the decision-making phase. This is especially relevant for Office files. If you do not want the attachments to be checked out, you can indicate this to your organization’s functional manager of JOIN Zaak & Document.
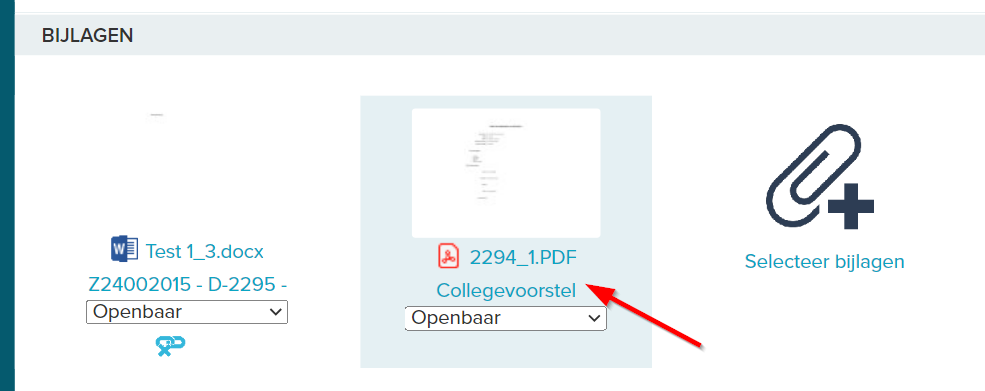
¶ Open and edit files
The attachments are shown at the bottom of the screen. You can view them in our preview mode or open them in your own application (PDF reader, WORD, etc.). This can be done by clicking on the file at the bottom of the screen to download it.
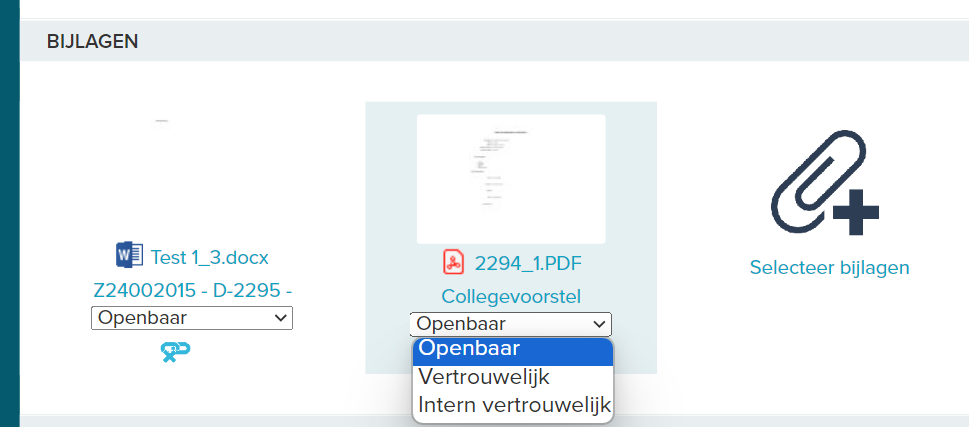
You can also adjust the confidentiality of the attachments in the drop-down menu, this is especially useful in relation to JOIN Scheduling.
If you still want to remove a file from the proposal, you can click on the “Unlink” button.
¶ Create PDF
A PDF of the proposal is automatically created at each save moment and saved with the proposal (as an attachment).
¶ Select approval route
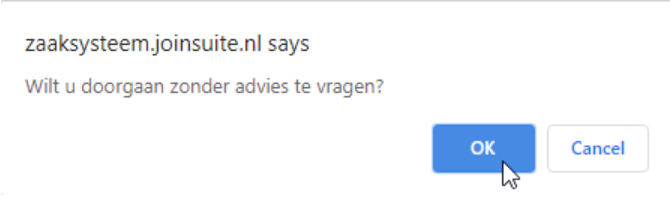
Once the proposal has been drawn up, advice has been processed and attachments selected, you can proceed to start the approval process. You do this by completing the setup phase (green button “Submit / process activity”). If you still have requests for advice from colleagues, you will first be asked whether you want to continue without waiting for this advice. If you wish to proceed anyway, these advice requests will be withdrawn. A warning is also displayed if you have not asked for advice. Again, you can simply choose to continue.
In the next screen you choose the approval route. Your last route selected will be remembered, but you can of course also select another route. When you then click OK, the approval phase starts and the drafting phase is completed.

¶ PHASE 2: Approval
Depending on the chosen configuration, the approval phase has 3 possible variants:
- Approval only: once the last “approver” in the process has approved the document, the decision-making is complete
- Approval and directly on to final decision: as soon as the proposal has been approved by the last “approver”, 1 board member or board member is presented with the document with the request to take a final decision (with or without comments / deferred)
- Complete dual decision-making: after the approval phase, the document is presented to the board (or college), with each member indicating that they wish to discuss the document or directly agree to it. When discussing, a meeting is held about the document before a final decision is taken.
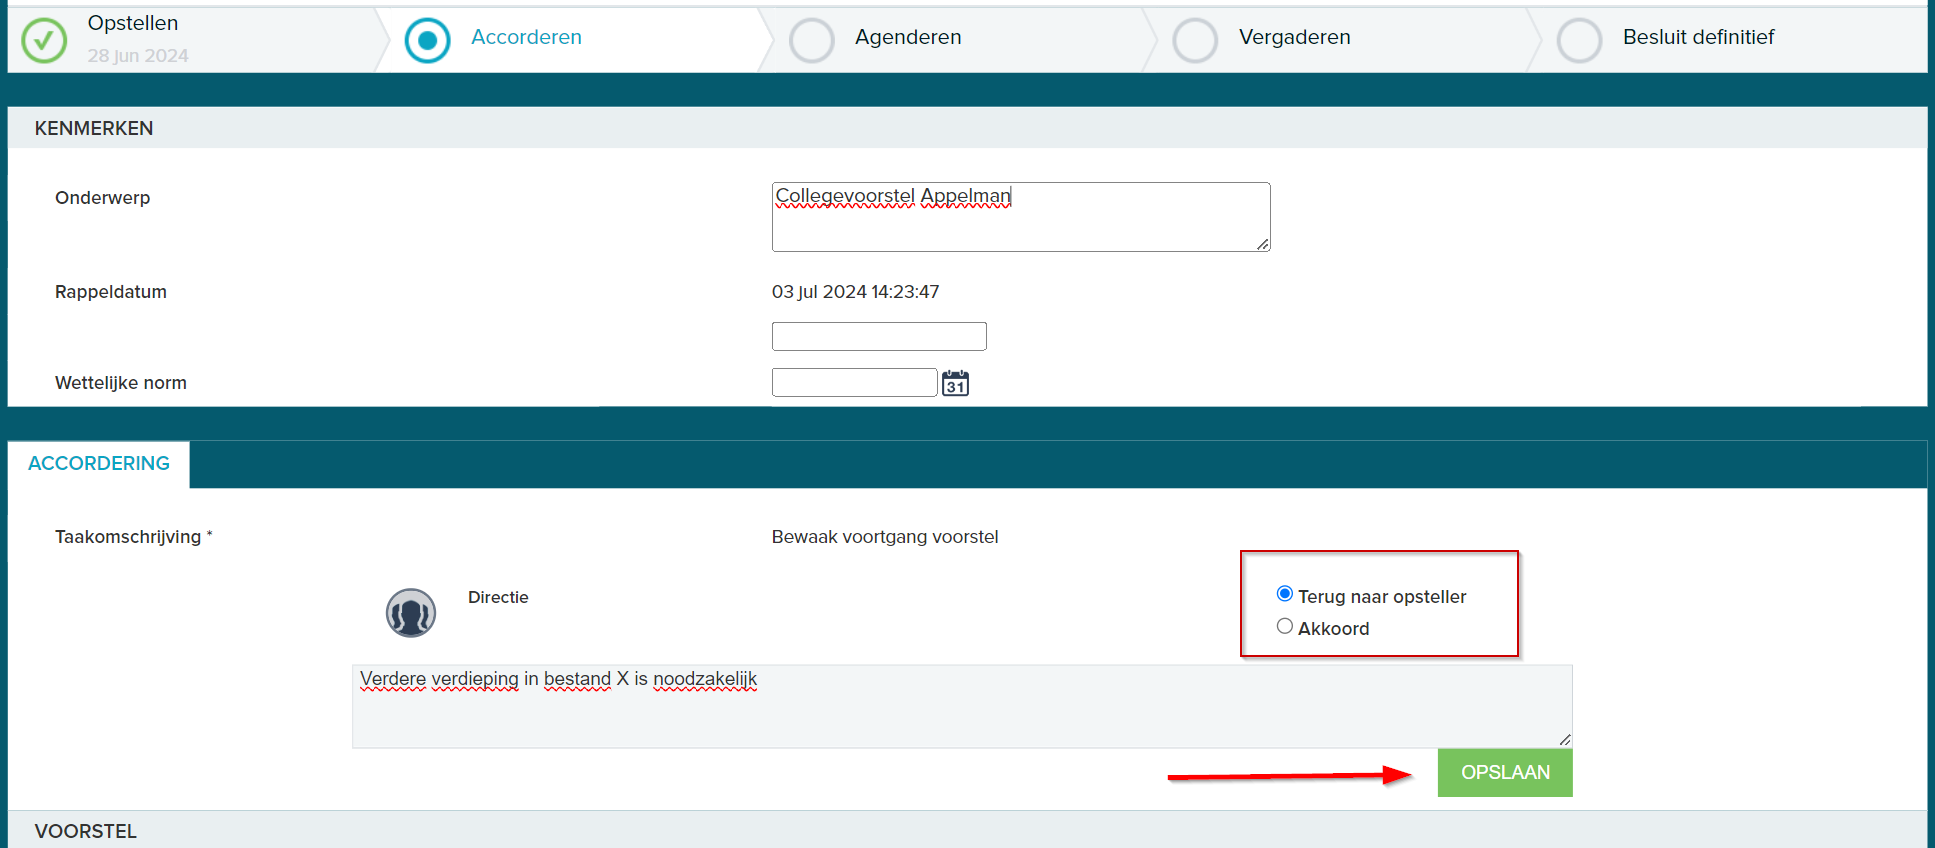
¶ Approve proposal
As soon as the concept phase of the proposal has been completed and the originator has chosen the approval route, the approval phase starts. Agreements are always assigned to a role / group, not directly to the user. The main reason for this is that, for example, a department head is replaced and the successor can immediately continue with the work stock.
Depending on the configuration by the administrator of the system, it is possible to allow changes per step during the approval phase. For example, the head of department should not be allowed to make changes, but the director should.
The originator is given 2 options:
- Agree with the proposal. They can then move on to the next role in the order of approval. The step is confirmed with the green “Save” button.
- Back to the originator. The proposal is returned to the originator (action “adapt proposal”). As soon as the originator has made their changes, the approval route must be restarted.
The above is repeated at each approval step until the last person in the hierarchy has given their approval. At that moment, the proposal will proceed to the next step in the approval process: the board / college will take a decision.
A PDF version of the draft proposal is created that can be easily distributed and used during the meeting (or for taking personal notes). The PDF file is added to the proposal registration.
NB: If the proposal does not go through after approval (eg with a management proposal, where the last approval step also leads to the decision taken), the PDF is generated when linking the approval. Every time the proposal goes back to the originator (and starts the approval again) the PDF is replaced by a new version.
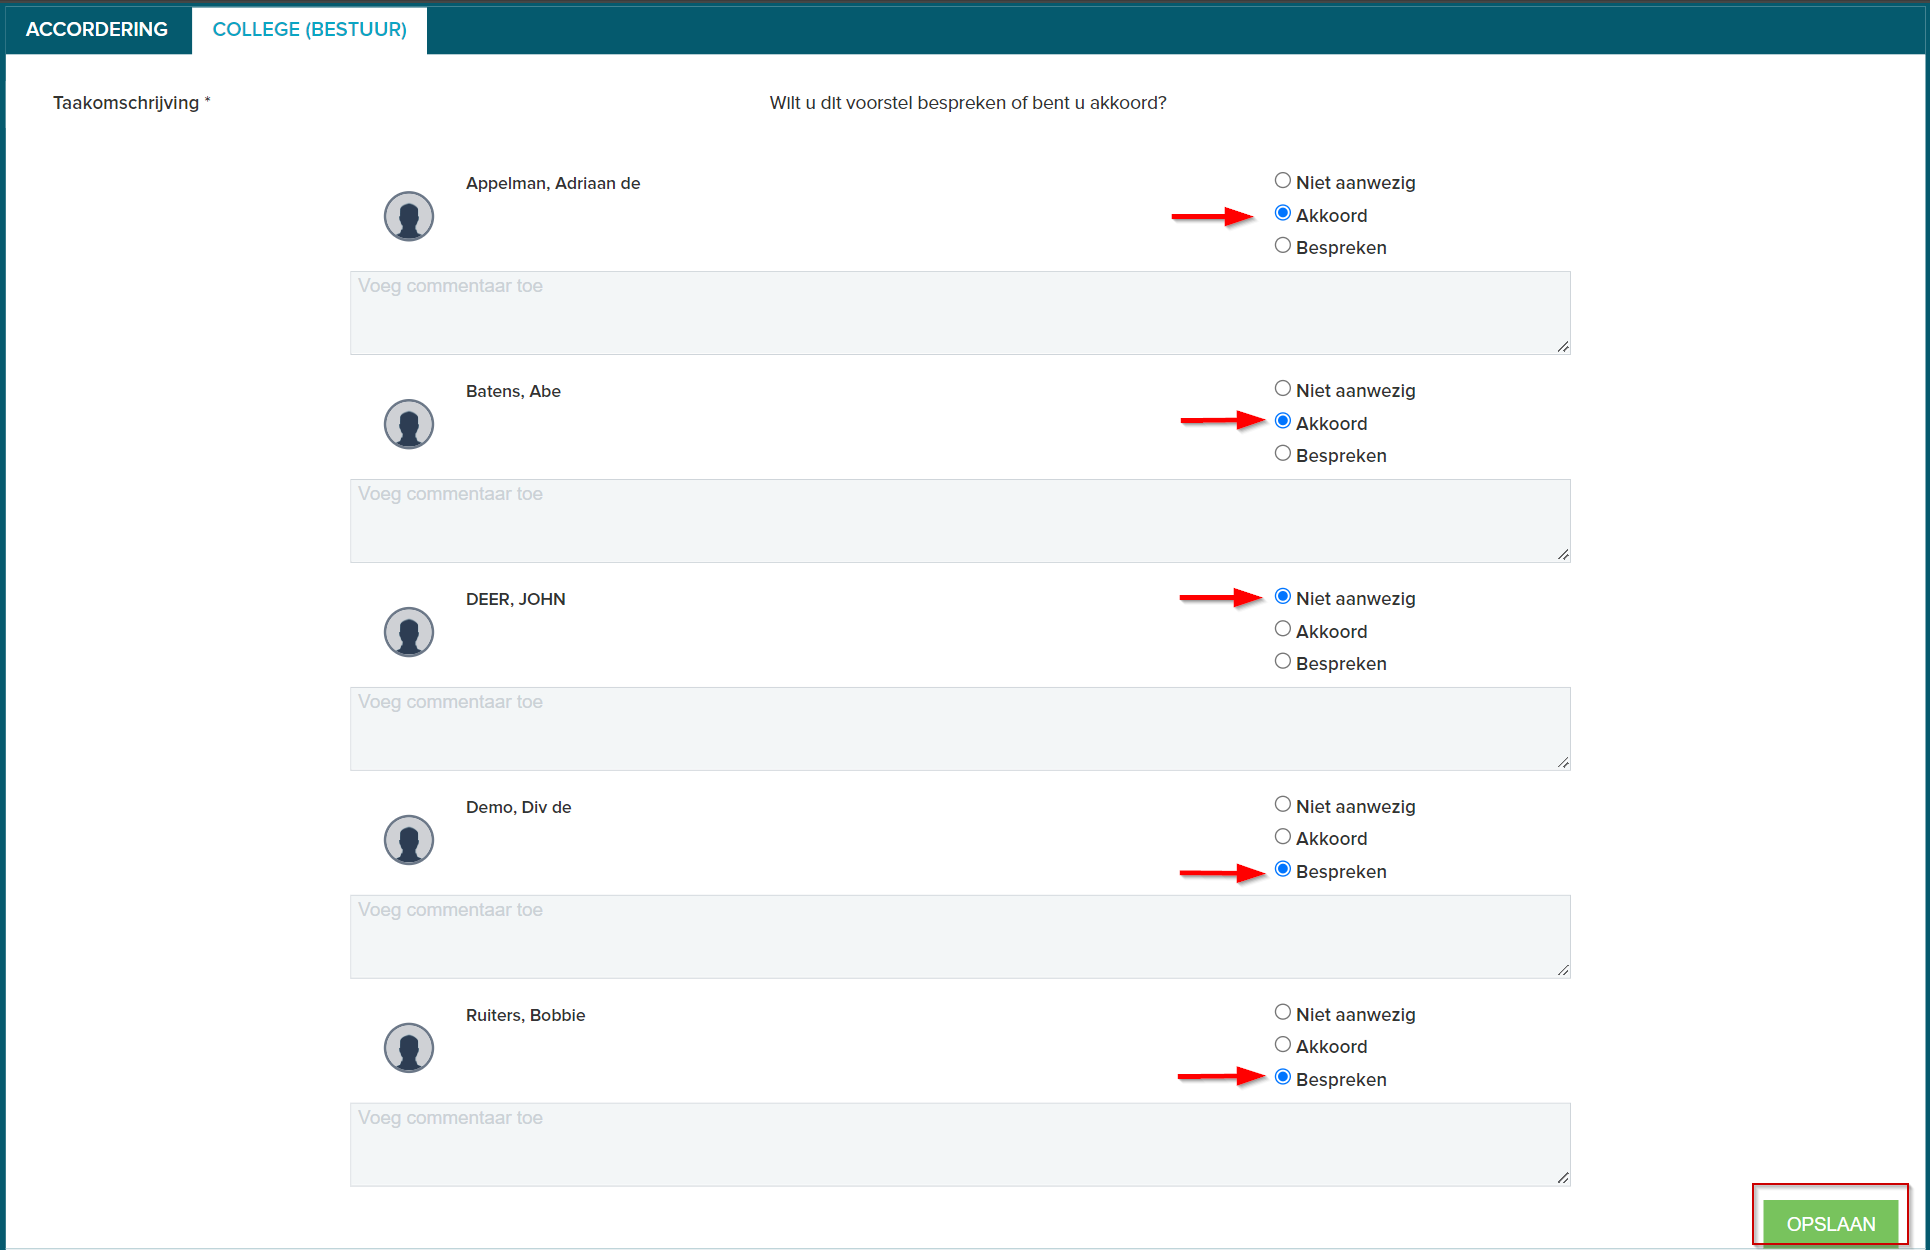
Discuss choice or agree
- When it is configured in JOIN Case Types that the proposal is submitted to the college or board members after approval, all college members receive the proposal in their work queue at the same time. Simultaneously, the secretariat also gets the proposal in the work inventory. In contrast to the board or board members, who can only make the decision themselves, the secretariat has the option of making the decision in front of the full board.*
The following choices can be made:
- The Board member agrees with the content of the proposal.
- The college or board member would like to discuss the proposal during a meeting.
- The board member is not present at the meeting.
If at least 1 board member wants to discuss the proposal, it will be placed on the discussion list. In all other cases, the document is immediately approved and no decision has to be taken again. It is of course the case that in the next step the piece is assigned to the correct meeting.
In all cases, the choice is confirmed by pressing the green button.
Nb. If the proposal does not go to the college or board (this is configured by the functional manager in JOIN Case types), the above step will be skipped.
¶ PHASE 3: Agenda
¶ Link meeting
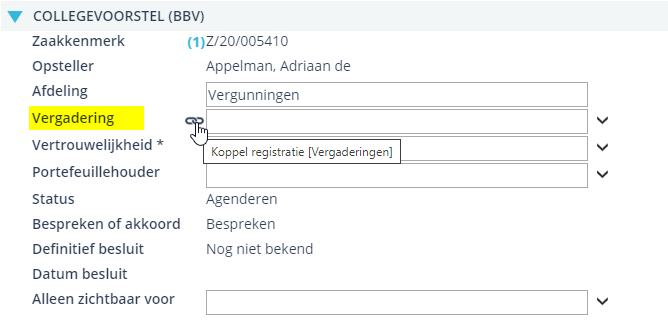
After all college or board members have made their choice (or have it done by the secretariat), the proposal proceeds to the phase in which it is assigned to the correct meeting. The secretariat (or another treatment group) ensures that the correct meeting file is created (new meeting) or selected (existing meeting). This is also where the (possible) link to JOIN Scheduling takes place.
The secretariat has the following options:
- Linking or unlinking one or more existing meetings
- Creating (and directly linking) a new meeting
- Handling the phase (through to the meeting phase)

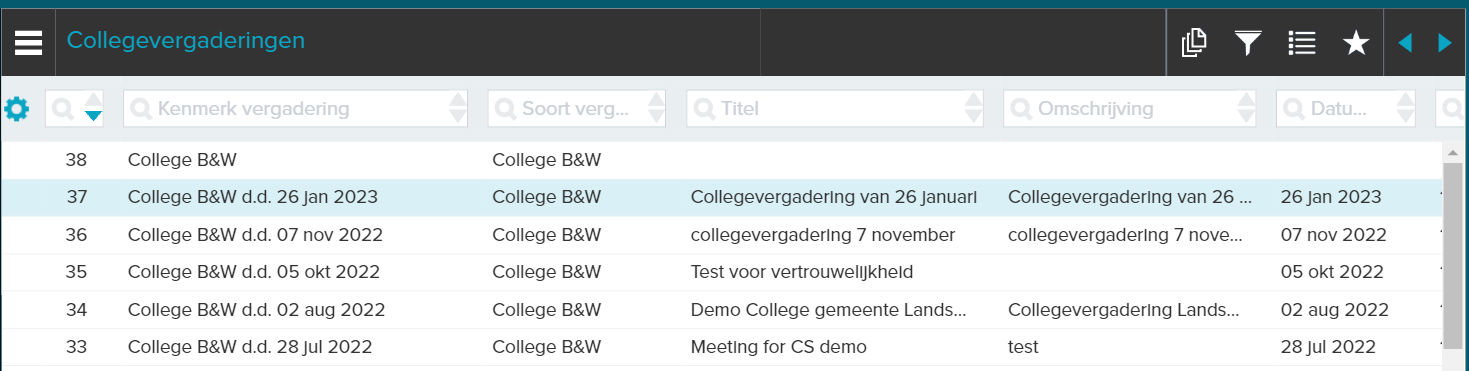
Select ‘Existing Meeting’
Click on the “link” icon to go to the existing meetings. This icon can be found at the top right of the screen. In the screen that opens, select the collection in the left part where the meeting is stored (this is also called a book in JOIN). Search for the correct meeting and select it by clicking in the line. When all meetings have been linked, press “Link”.

Have you linked the wrong meeting? No problem, because with the disconnect function you can easily cancel the choice again and you can immediately link another meeting.
Click the unlink button, select the meeting(s) you wish to unlink and press the check mark.


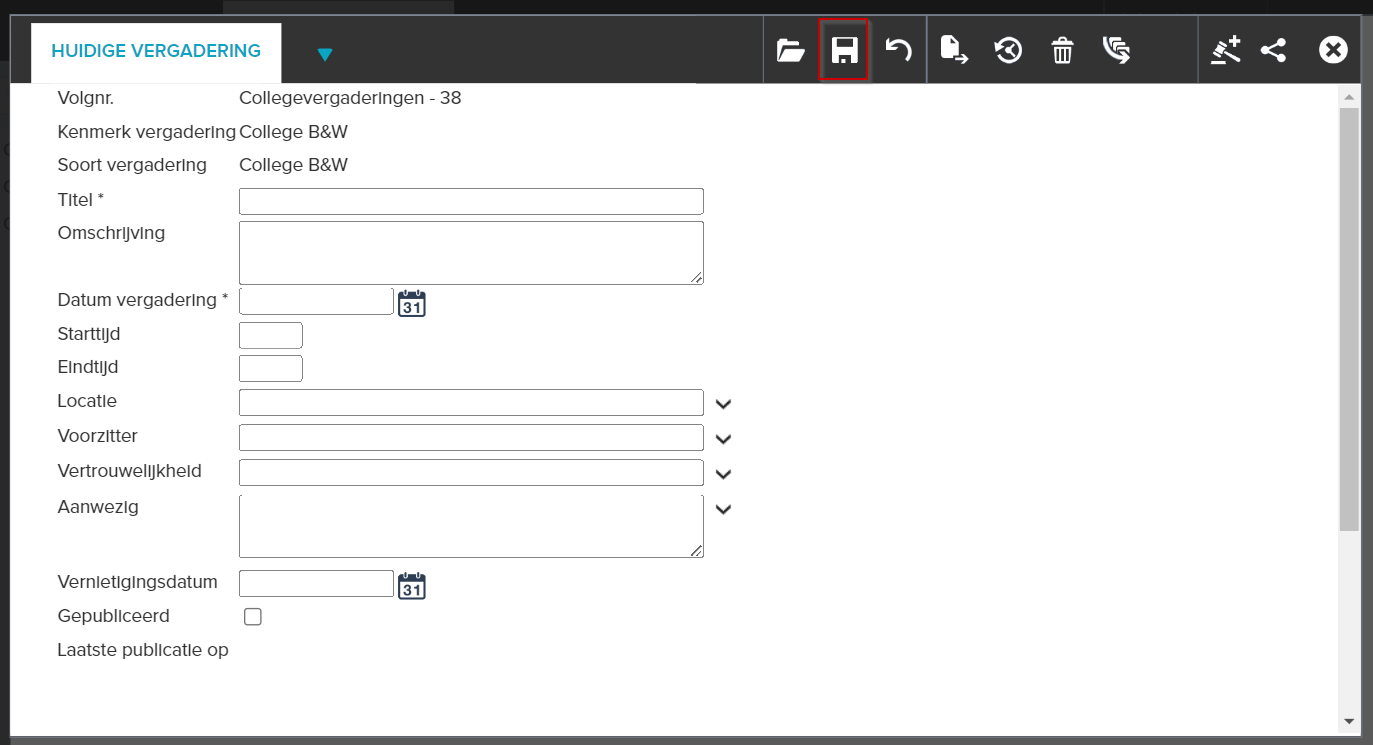
¶ Create and select ‘New meeting’
Click on the “new” icon to create a new meeting. In the next screen, select the correct collection. In the registration screen that opens, fill in the characteristics of the meeting, such as date, body, confidentiality and attendees. Click on save to save the meeting and link it directly.

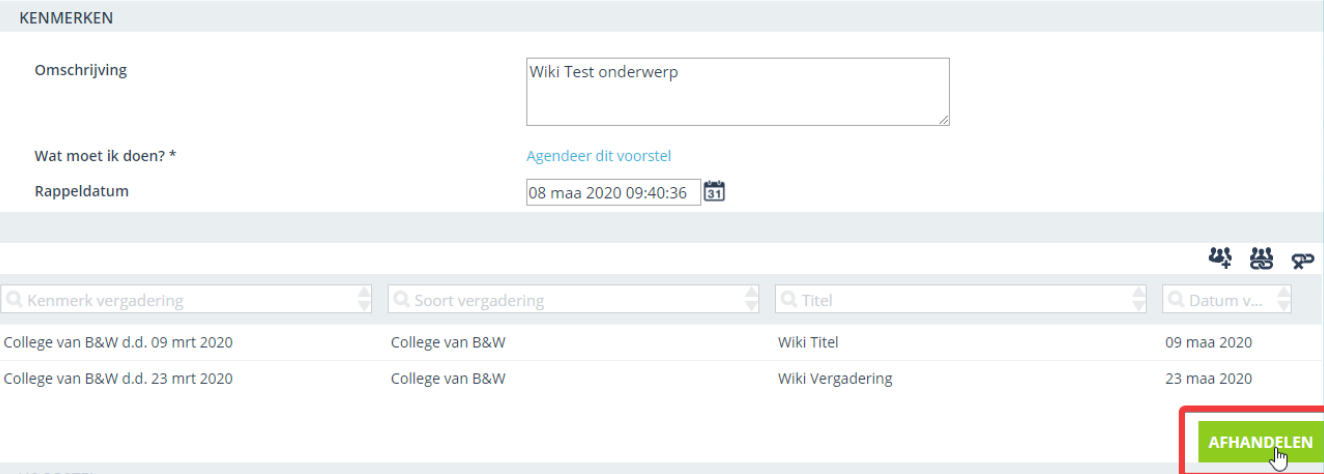
¶ Handling
If you have assigned the proposal to one (or more) meeting(s), this step is completed and you can complete the activity. You do this by clicking on the green button “Finish”.
Have you not (yet) linked a meeting? Then the system asks whether you want to continue without linking a meeting. You can confirm this question or select a meeting.
¶ PHASE 4: Meetings
The actual meetings, in which the proposal to be discussed is discussed in substance, does not take place in JOIN Case & Document. This usually takes place in specific meeting applications, but this can also be Minute or the JOIN Meeting App. Ask Decos about the possibilities of both applications.
¶ Meeting (making decision)
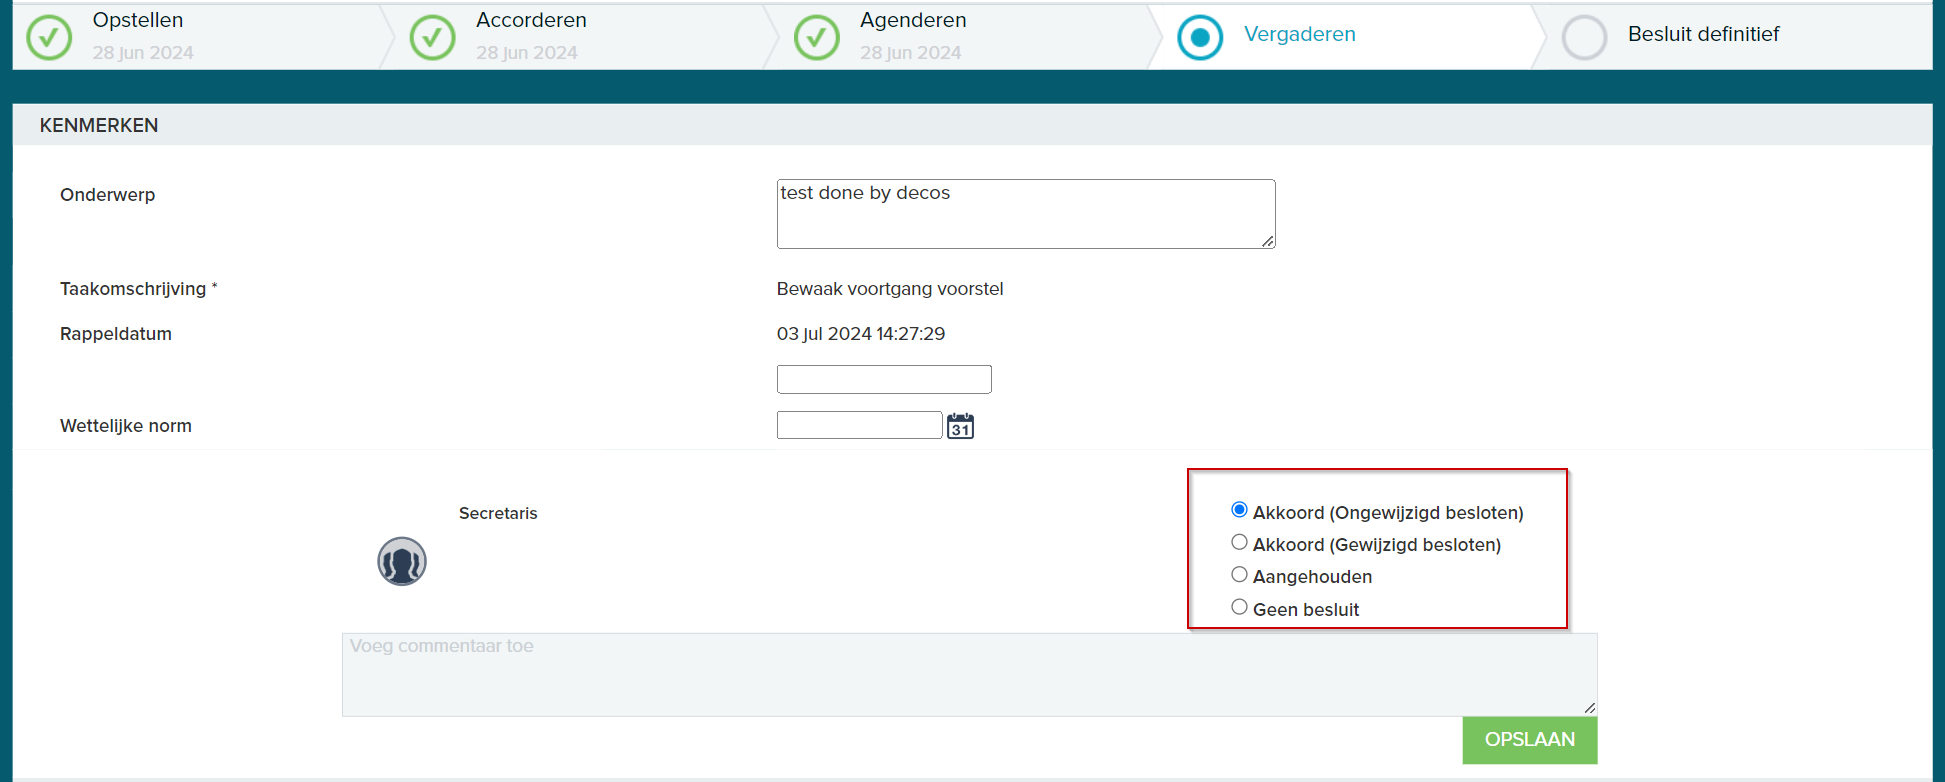
In the actual meeting phase, the proposal is discussed and a decision is taken. The action to take the decision is often assigned to, for example, the secretary or secretariat. The texts of the different chapters may be edited at this stage.
In this phase 3 outcomes are possible:
- Decision without changes
- Conclude with changes
- Put on hold
¶ ‘Decision without changes’
Or Agreed (Decided without changes). Under this option, the proposal is accepted without further changes. After completion, it can go directly to the orignial proposal writer who can continue to implement the decision.
¶ ‘Decision with changes’
Or Agree (Decided with changes). With this option, the proposal is amended during (or immediately after) the meeting and can then be passed on to the author who can continue to work with it.
¶ ‘Put on Hold’
If the proposal is put on hold, no decision has been taken. One reason could be, for example, that the writer has to make a change to the proposal before it can be discussed again.
If “on hold” is chosen, the proposal will go back to the person who last approved the proposal in the approval process (and passed the document on to the commission). This person can return the piece to the original writer or immediately pass it on to the college.
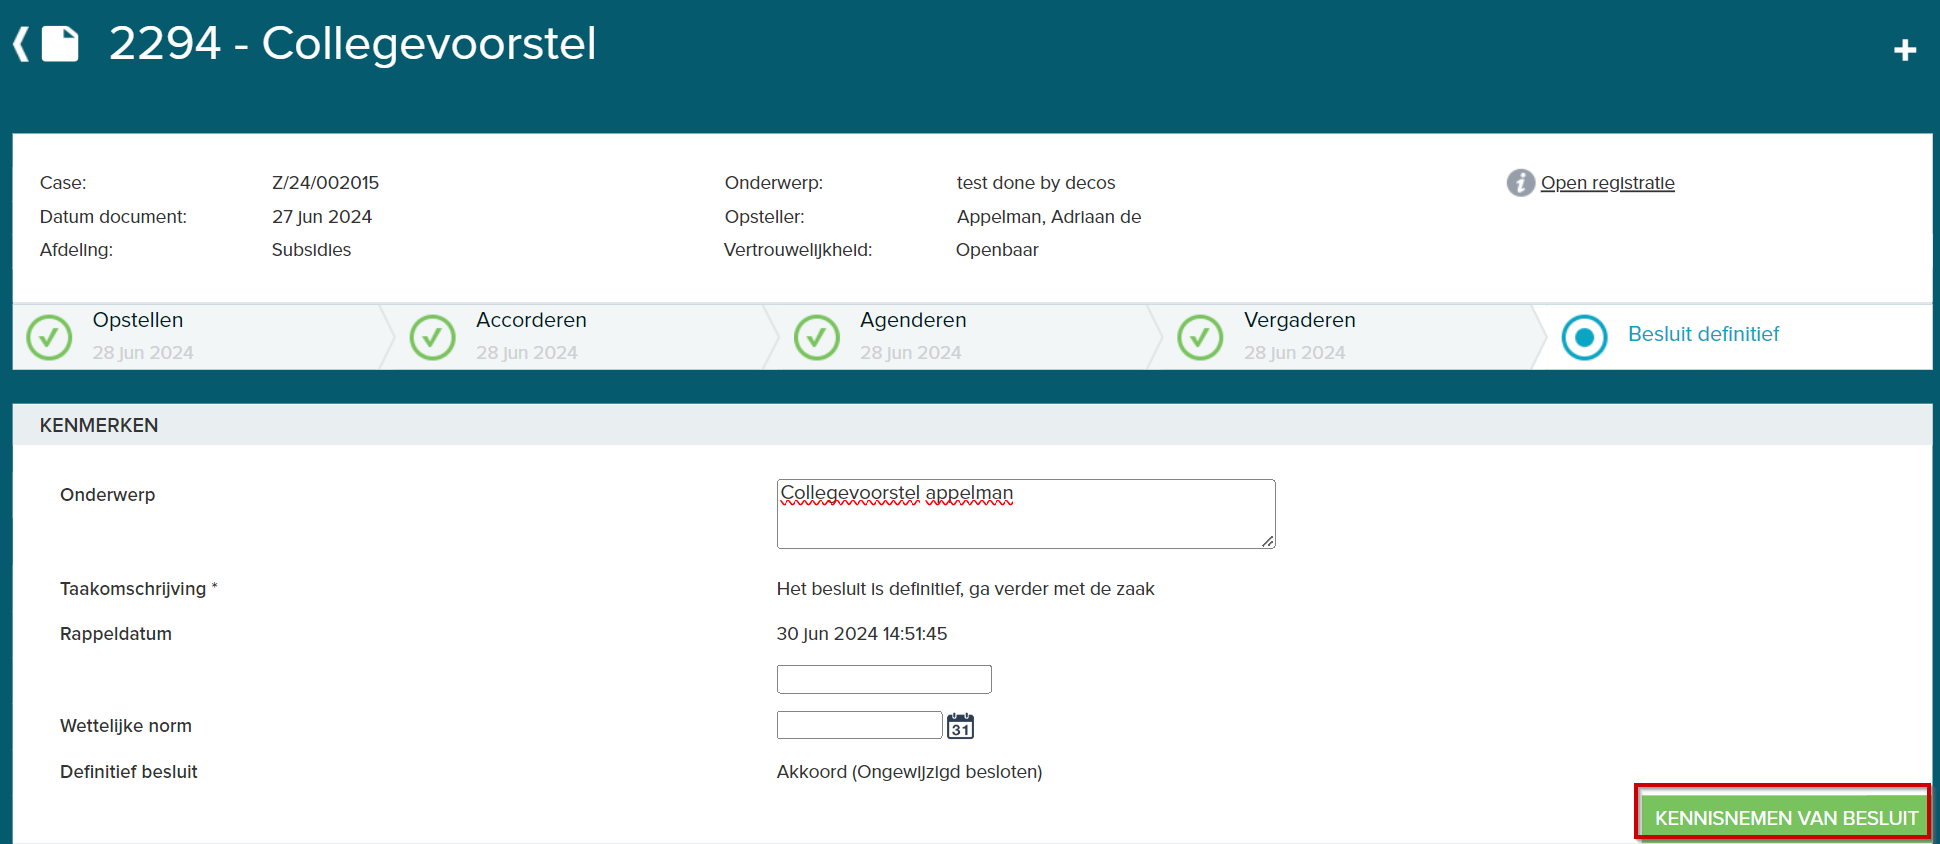
¶ PHASE 5: Make decision final
As soon as the decision has been taken in the above phase, the final activities can be carried out. These consist of the completion of the decision-making process by the original writer (by means of the action “final decision, proceed with the case”) and the generation of the decision list.
Once the activity is completed by clicking the green “make final” button, the final version of the PDF file will be created. The concept version is not overwritten, but “archived” as an old version. Here, the version control mechanism of JOIN is used.
NB: For both the draft and the final decision you can use a separate template to generate the PDF. For more information, contact Decos.
¶ Create decision list
The decision list is generated from the meeting file, where all proposals of the meeting are linked. All these proposals were passed (or postponed) after the meeting and can be combined on a decision list.
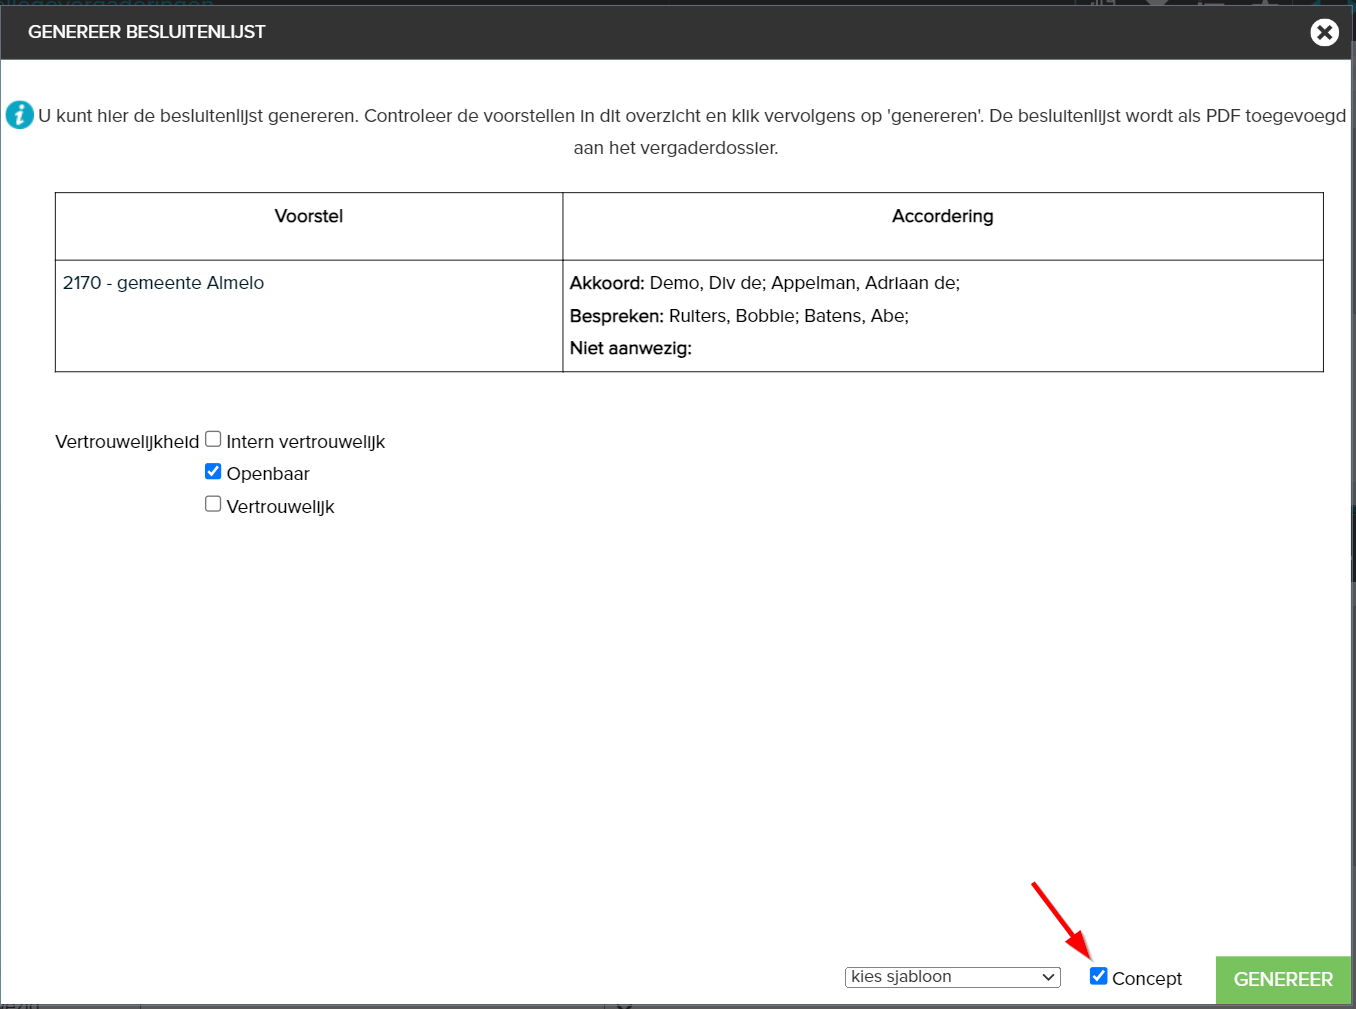
The person who may generate the decision list clicks on the “generate decision list” icon. The correct confidentiality can be indicated in the screen that opens. By means of the green “generate” button, all decisions are automatically combined and opened as PDF (A) file. The decision list is also added to the meeting file as a registration.

.png)
¶ Draft vs Final decision list
You can create both a draft and a final decision list. After all, your decision list is often not adopted until the next meeting. As with the proposal / decision, it is possible to use a different template for this (draft / final). Some remarks:
- to the left of the green “generate” button you will see the checkbox “concept”. Check this if you only want to show the draft proposals (which have not yet been adopted) on the decision list
- If you do not tick “concept”, you will make a list of decisions for the final documents
- An exception is made for the documents that are on hold. Although these documents do not yet have a decision, they are shown on the final decision list
¶ Multiple relevant authorities
From version 6.0.13 it is possible to work together with several “relevant authorities” in 1 case warehouse in JOIN Case & Document. For example, when 3 municipalities work together officially, but still exist as 3 separate municipalities. In this case there are still 3 colleges and municipal councils. For JOIN Decision-making, this means that you take decisions and generate lists of decisions for each relevant authority.
The new functionality for relevant authorities is reflected in JOIN Decision-making. In the configuration of the decision-making process (in JOIN Case types) you can configure the sections, roles and approval routes for each relevant authority.
.png)
When creating a proposal, you must choose the relevant authority for each proposal. You do this in the field “relevant authority”. Based on the choice, the correct configuration is then applied (paragraphs, approval routes and roles)