¶ Linking documents
Once you have selected the template, you can continue creating the agenda items. You can use the documents from the meeting file (JOIN Case & Document).
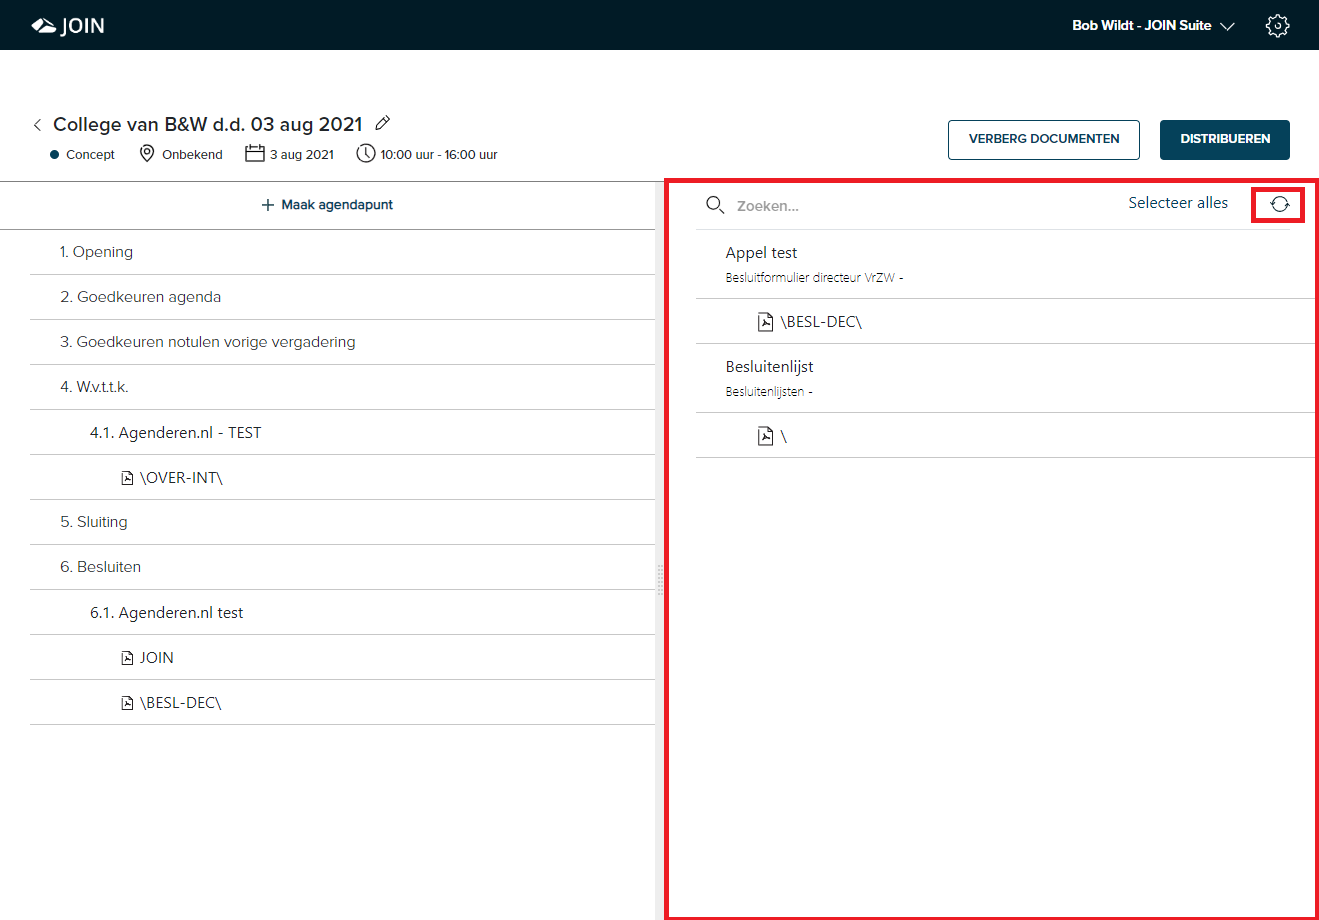
To retrieve the documents from the meeting file in JOIN Case & Document, click on the “Show documents” button. Depending on the number of linked documents in JOIN Case & Document, the retrieval takes a few seconds. A text is then displayed so that it is clear that the documents are still being retrieved. The documents appear on the right side of the screen. You can also hide the document panel again by clicking the “hide documents” button. You can make the document panel wider and narrower by dragging it. If you have just added a document via JOIN Case & Document, click the “refresh” button to retrieve it.
¶ View documents
When the document window is opened, the documents and files retrieved from the meeting file in JOIN Case & Document are displayed. This concerns the metadata of the document (this is called “document” in JOIN) and the actual physical files (this can be more, for example a report with accompanying photos or a proposal with attachments). You can search through the list of documents from the search bar at the top of the window. You can click on the document to view the metadata.
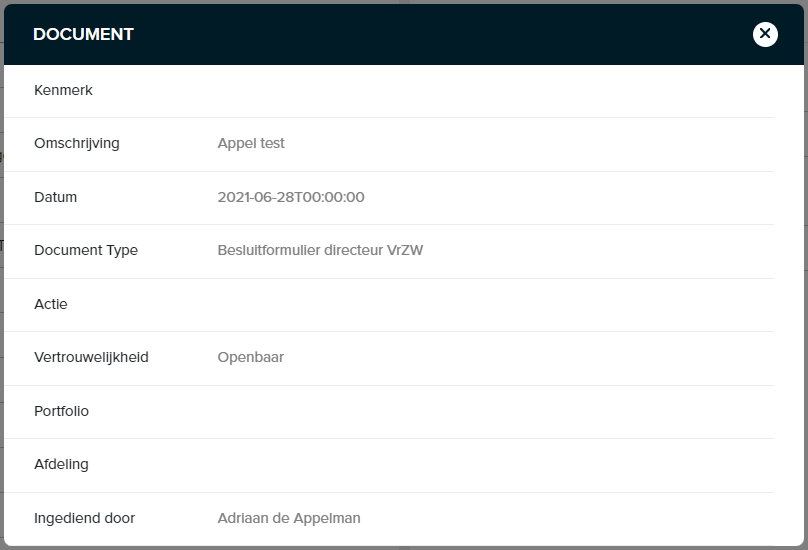
If you click on the description of the document, you will see the metadata of the document. You cannot edit them, because they can only be edited in the source (JOIN Case & Document).
When you click on the file icon (icon or description), the file will be opened from JOIN Case & Document. Note that you must have access to JOIN and to the file.
¶ Linking documents
You can create new agenda items with the documents retrieved from the meeting file. You can do this in several ways:
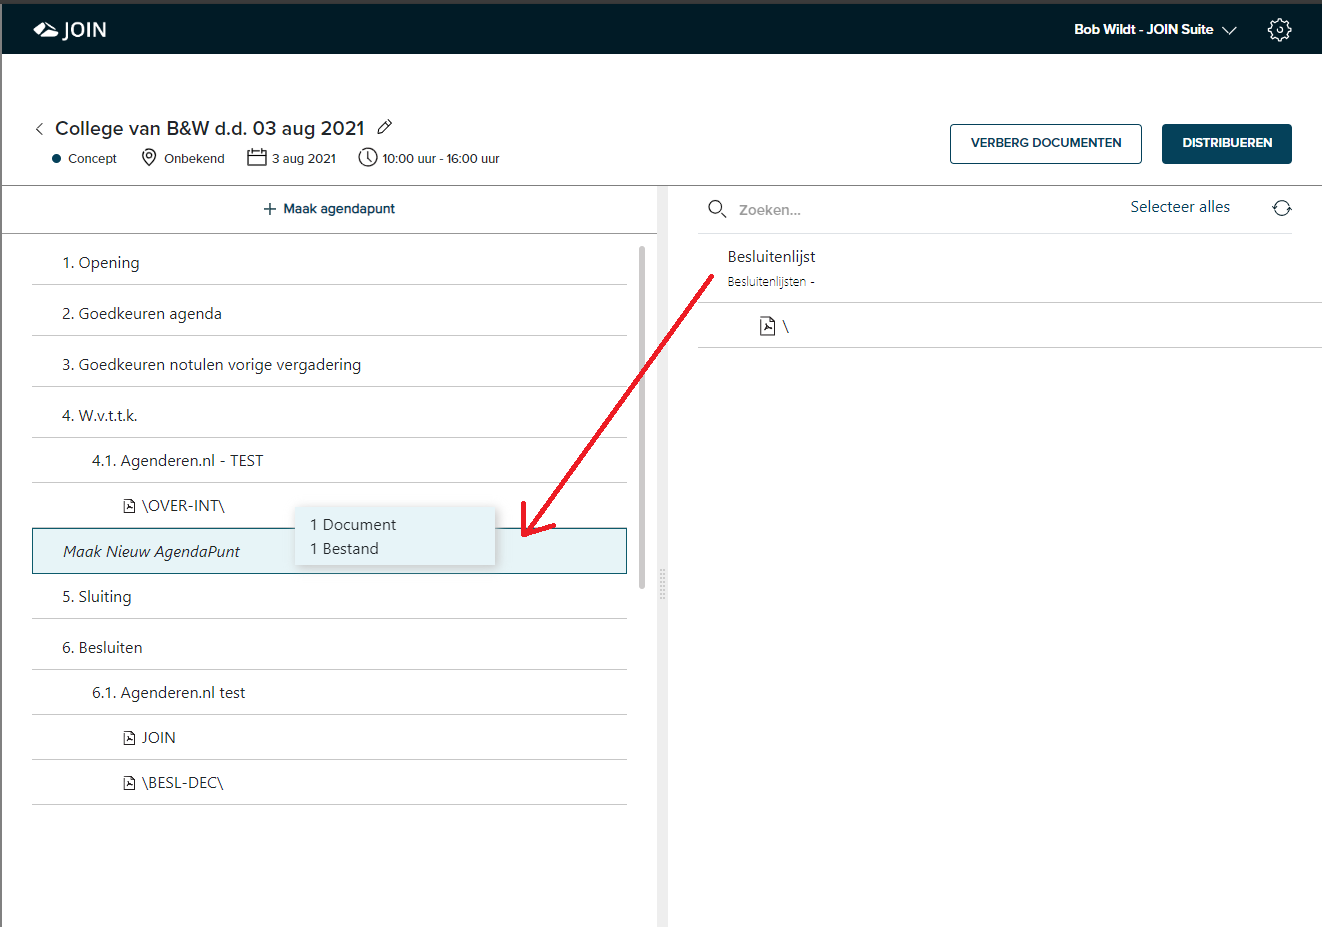
- You can drag the document (or several documents at the same time) to the calendar and create a new agenda item. Select the document by clicking it once and pick it up with the left mouse button and drag it to the calendar. You can select a new agenda item here (see image) or drag the document to the desired position in the agenda. This depends on the position where you “release” the document
- You can drag one or more files to the calendar. You can also compile these files from multiple documents. Please note that individual files can only be linked to an existing agenda item.
Drag the document or file to the calendar. Drag a document between 2 agenda items to create a new agenda item or drag it onto an agenda item to create a sub item.
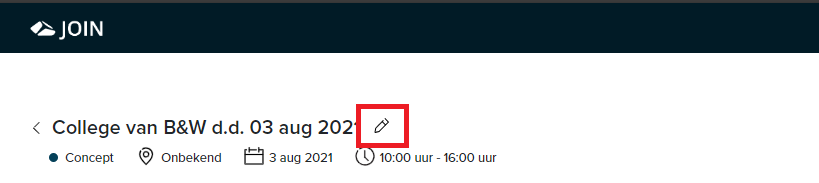
¶ Edit calendar details
Each agenda contains information about the meeting, such as time, location, attendees and confidentiality. Part of this information is taken over from the meeting file, but can be supplemented or changed in the agenda if desired.
When you click on the pin next to the name of the calendar, a window opens where you can find and edit this information. Click save to keep the changes or the X to save the screen without saving your edit.
¶ Create agenda items
In addition to creating agenda items by dragging files and documents into the agenda, you can also create agenda items from the agenda screen. You can do this very easily with the button “+ new agenda item”.
¶ Edit agenda items
You can edit agenda items in several ways
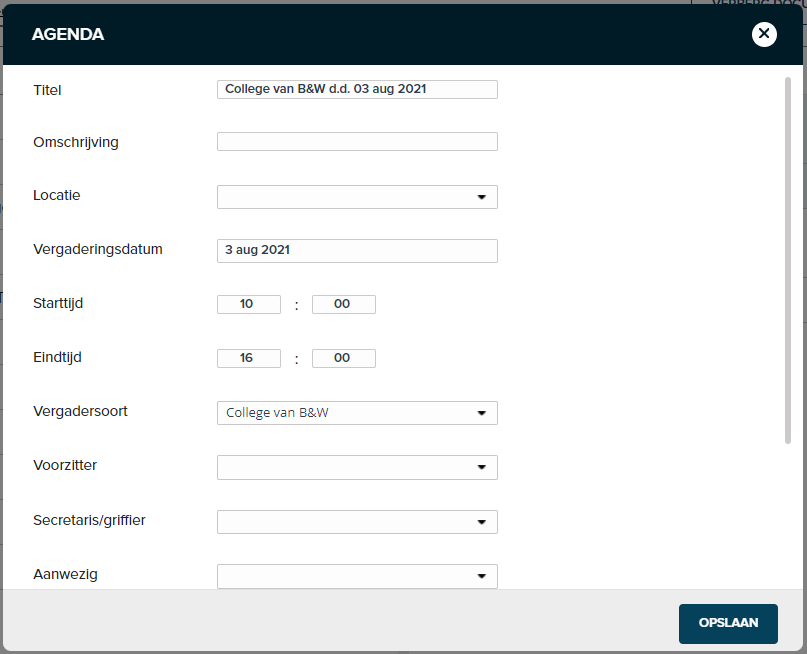
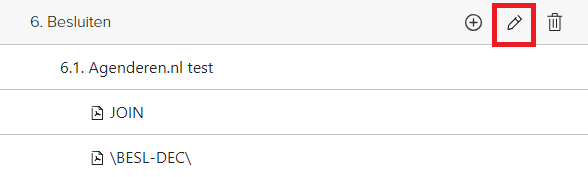
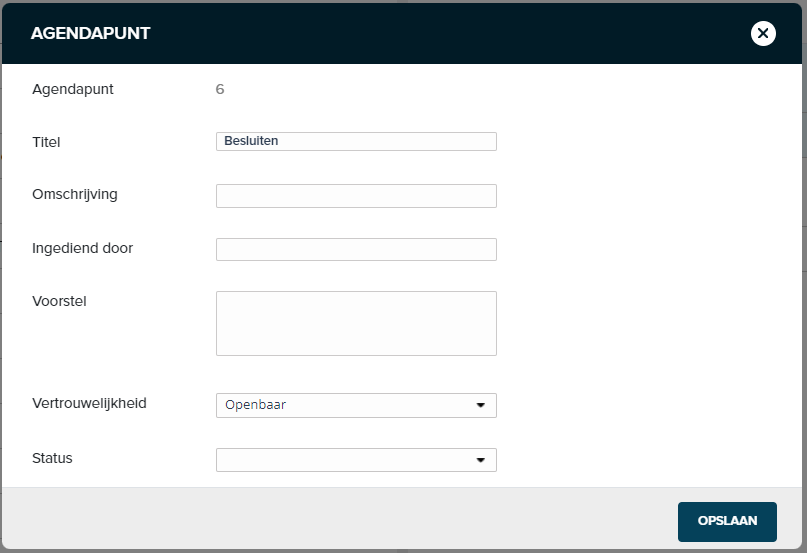
¶ Change calendar and file metadata
By clicking on the pencil next to the file or agenda item in the calendar, you will open a window where the metadata are displayed. You can change this. Don’t forget to click save to confirm this.
¶ Reorder agenda items / files
Besides editing the metadata of the agenda points, you can also change the order and create new (sub) points. Move the mouse to the agenda item you want to drag. The agenda item (or file) then turns light blue and your mouse changes into a drag icon. You can then hold and drag it with the left mouse button. You can drag an agenda item between 2 agenda items (then the agenda items will be reordered), drag it onto an existing agenda item (then it will become a sub-item under the agenda item). And you can always drag a file to another agenda item or rearrange it within the existing agenda item.
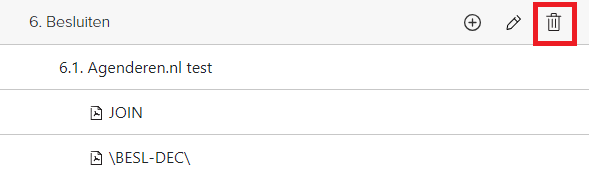
¶ Delete agenda items / files
You can easily delete an agenda item or file by clicking on the trash can. Files then automatically reappear on the right (in the document panel). Note: we will not issue a warning, clicking delete, the action cannot be undone. So gone is really gone!