¶ Introduction
The JOIN Decision Making module enables you to configure the entire decision-making process (or multiple decision-making variants) in the case type catalog (JOIN Case Types). Once you have completed the configuration you will be able to:
- Create a proposal from within the business
- Complete the chapters of the proposal
- Select and go through the approval of the proposal (who has to approve the proposal)
- Shaping the continuation of decision-making after approval
- Schedule the proposal for a meeting (in combination with JOIN Agenda and JOIN Meeting)
- Make the final decision
- Generating the decision list (including appropriate confidentiality)
In the chapters below you can read how to configure the following components in JOIN Case types:
- The chapters / paragraphs in the decision-making document (the proposal)
- The approval routes (including authorizations)
- The roles / practitioners who (can) play a role in the decision-making process
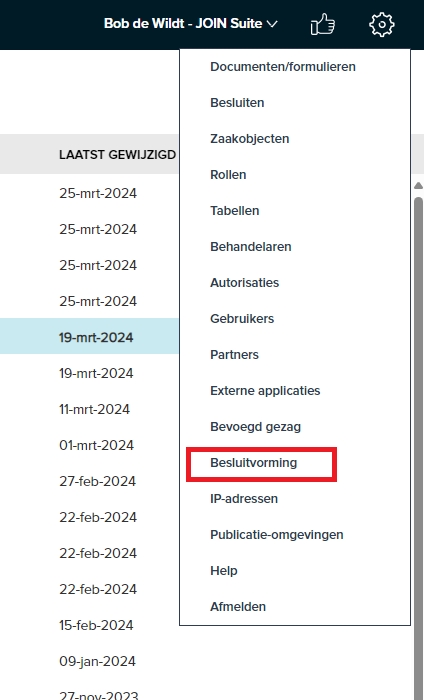
The above parts can be found in JOIN Case types under the gear -> decision making
¶ Decision-making document type configuration
In the document type you indicate whether this is a decision-making document (the proposal). When the decision-making document type is linked to a case type, the end user can create a proposal from the case based on this document type. It is also possible to link multiple decision-making document types to a case type and to link a document type to multiple case types.
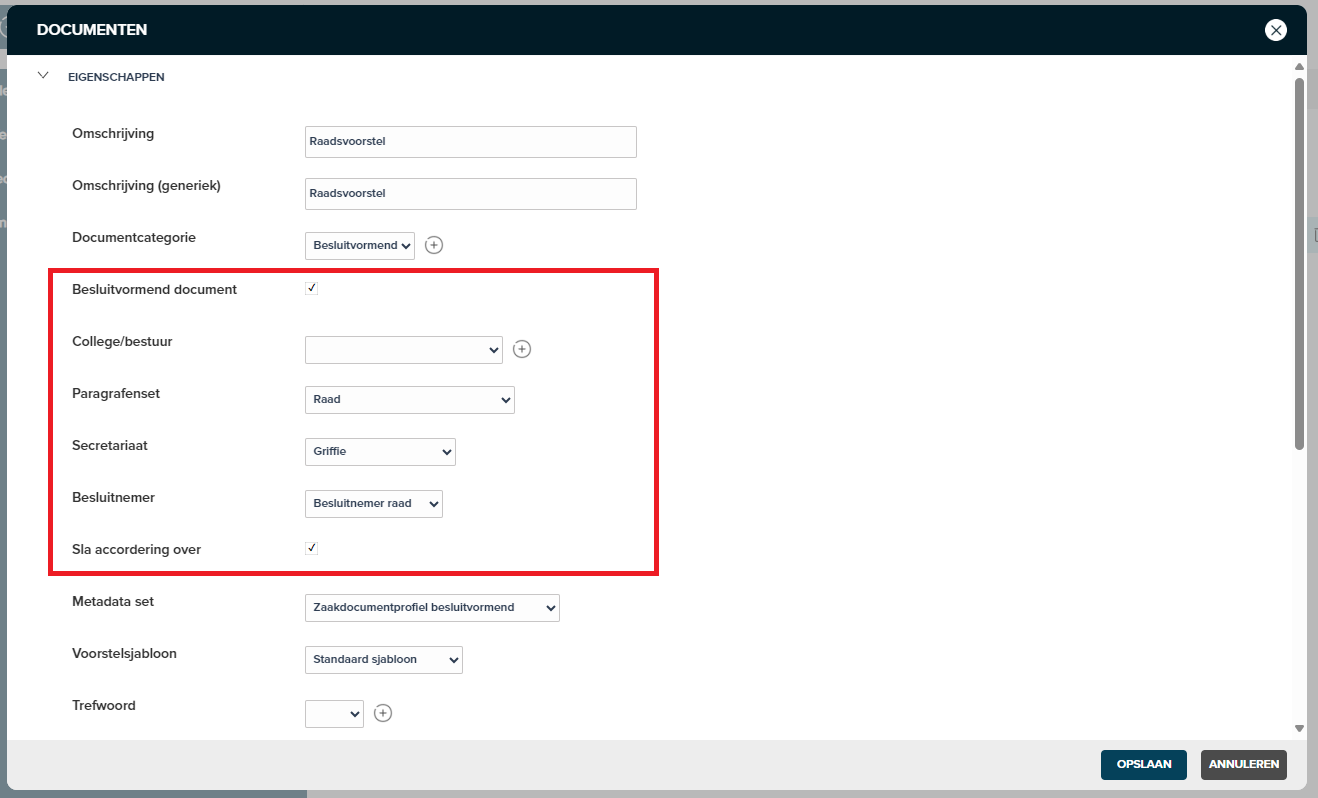
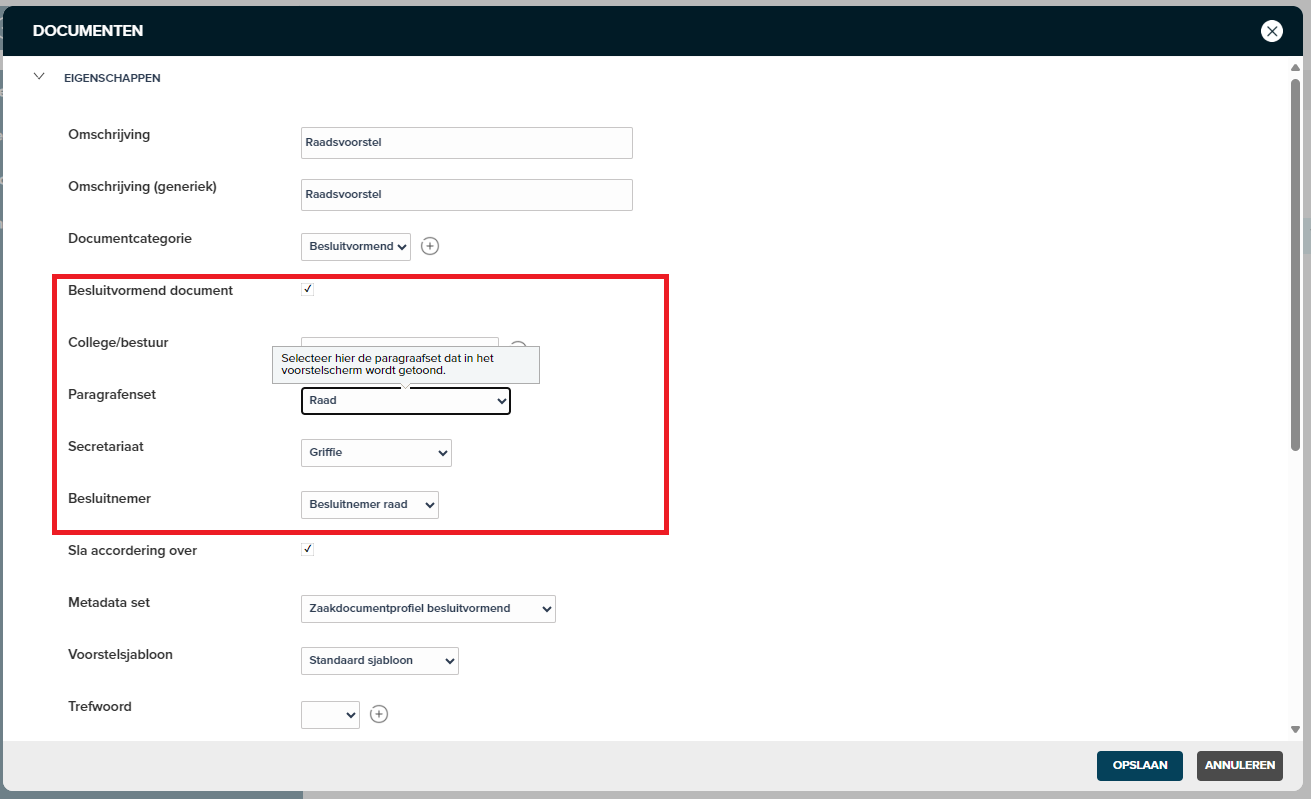
With the document type you will find the following properties:
- Decision-making document: if you check this box, you can use this document type for decision-making. In the case system you can select this document type at the option “create proposal”.
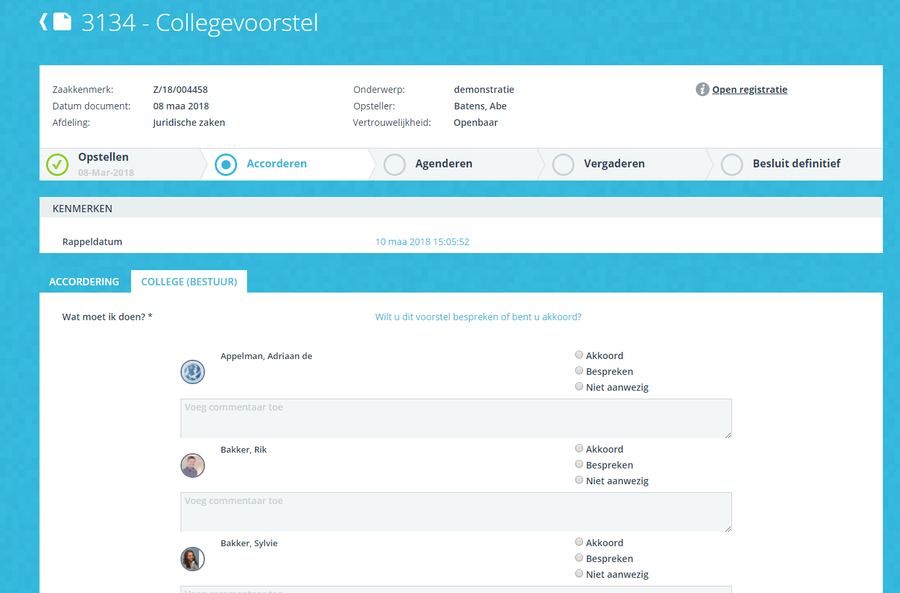
- College / board: when in the process a board has to determine what should be done with the proposal prior to the meeting, a role is selected here (eg a presidium, a college or a board of directors). If you leave it blank, this step in the process will be skipped.
- Paragraph set: here you select the relevant template, with which the correct text blocks are included in the proposal. A council proposal often has a different structure than a council proposal. See further on this page how to configure the paragraph set.
- Secretariat: a secretariat does several things in the decision-making process. It monitors the progress of a proposal, checks whether the Board members have made their choice prior to the meeting and ensures that the proposal is put on the agenda. If you leave the field empty, all these functions will be skipped.
- Decision maker: no decision can be made without a decision maker, so it is important to fill it in. An exception to this rule is the situation in which no further step is configured after the approval phase. The decision is then always “agreed”
- Skip approval: the function does what it says, no approval phase is initiated after submission of the proposal by the originator.
The options “college / board”, “skip approval”, “decision maker” and “secretariat” set up the process steps between submitting the proposal and processing the decision (by the author). A total of 16 different routes are possible. These routes are listed below in a clear and well-arranged table:
| route | approval route | college / board | secretariat | decision maker | process |
|---|---|---|---|---|---|
| 1 | well | well*** | well | well | submit -> approval route -> college approval -> agenda -> take decision -> take note of decision |
| 2 | no | well | well | well | submitting -> approval by the board -> putting the agenda on the agenda -> taking a decision -> taking note of the decision ** |
| 3 | well | well | no | well | submit -> approval route -> college approval -> take decision -> take note of decision |
| 4 | no | well | well | no | submit -> college approval -> agenda -> take note of decision * |
| 5 | well | well | well | no | submit -> approval route -> college approval -> put on the agenda -> take note of decision * |
| 6 | no | well | no | well | submitting -> approval by the board -> taking a decision -> taking note of the decision ** |
| 7 | well | well | no | no | submit -> approval route -> college approval -> take note of decision * |
| 8 | no | well | no | no | submit -> college approval -> take note of decision * |
| 9 | well | no | well | well | submit -> approval route -> agenda -> take decision -> take note of decision |
| 10 | no | no | well | well | submit -> agenda -> take decision -> take note of decision ** |
| 11 | well | no | no | well | submit -> approval route -> take decision -> take note of decision |
| 12 | no | no | well | no | submit -> put on the agenda -> take note of the decision * |
| 13 | well | no | well | no | submit -> approval route -> agenda -> take note of decision * |
| 14 | no | no | no | well | submit -> take decision -> take note of decision ** |
| 15 | well | no | no | no | submit -> approval route -> take note of decision **** |
| 16 | no | no | no | no | submit -> take note of decision * |
- *: If no decision maker is configured, the “No decision” decision is always entered. The outcome of the college is then ignored
- **: if there is no approval route, an accepted proposal is always returned to the originator
- ***: if a role is linked, the lecture step is always created (discuss / agree / not present). We no longer check if there are more than 2 users in the role
- ****: In scenario 15 the outcome is “agreed (unchanged)”. This is an exception to the rule
- *****: If no lecture step has been configured, the value “not applicable” will be entered in the registration field “lecture”
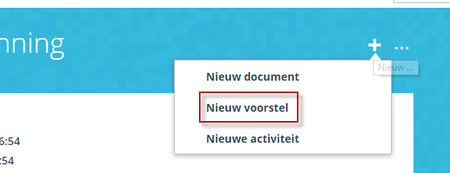
The screenshot below shows how the decision-making document can be created in JOIN Case from the case handling (new proposal):
¶ Chapters / sections configuration
The menu item “paragraph set” is used to configure the chapters / paragraphs in the proposals. Where this was previously done in a WORD template, it has now become a fully integrated part of the solution. This has great advantages, for example because the author of the proposal can work from one and the same screen. Since October 2018, it has been possible to set up a separate set of paragraphs for each proposal type.
¶ How it works?
In JOIN Case Types, go to the “Decision Making” menu. In the screen that opens, choose the paragraph sets option. There is 1 paragraph set by default (that is the set that is now used for all proposals that you have already set up).

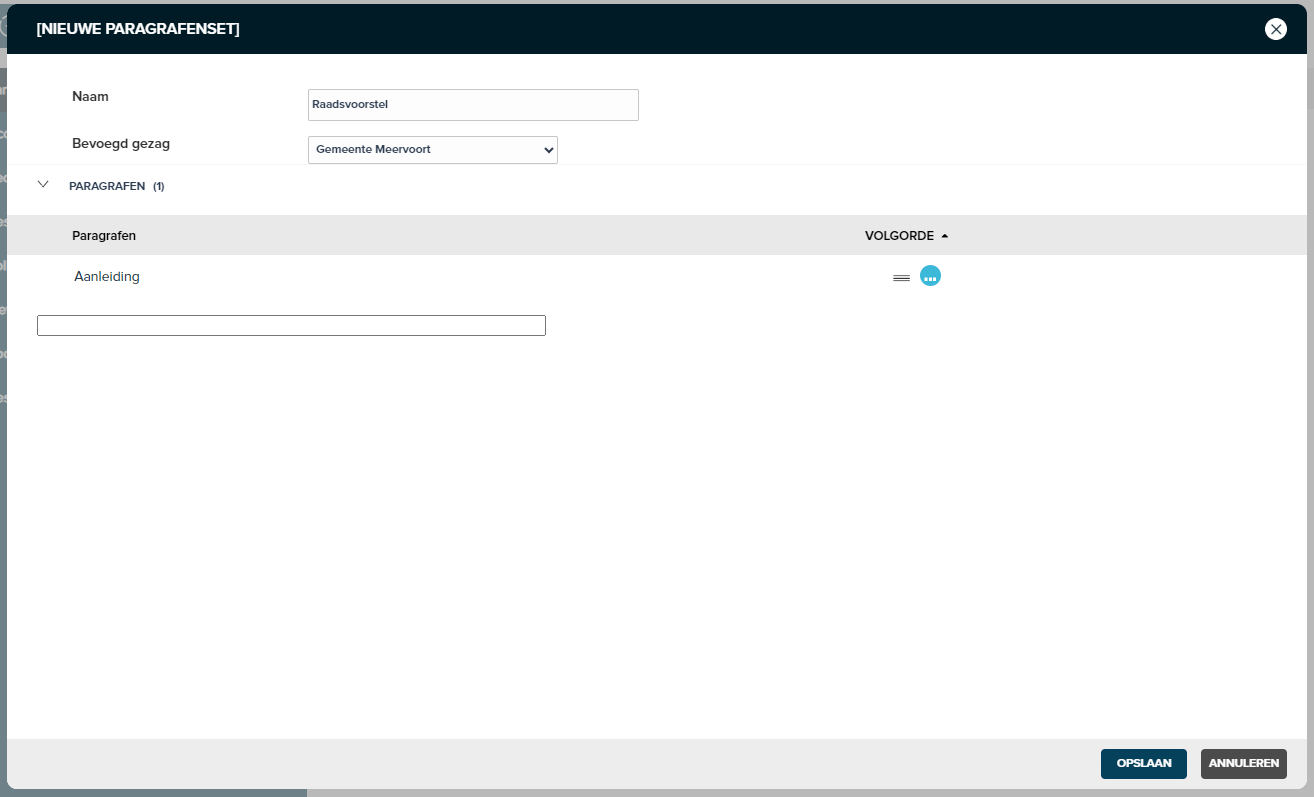
click on new paragraph set to create a set and fill it with paragraphs.
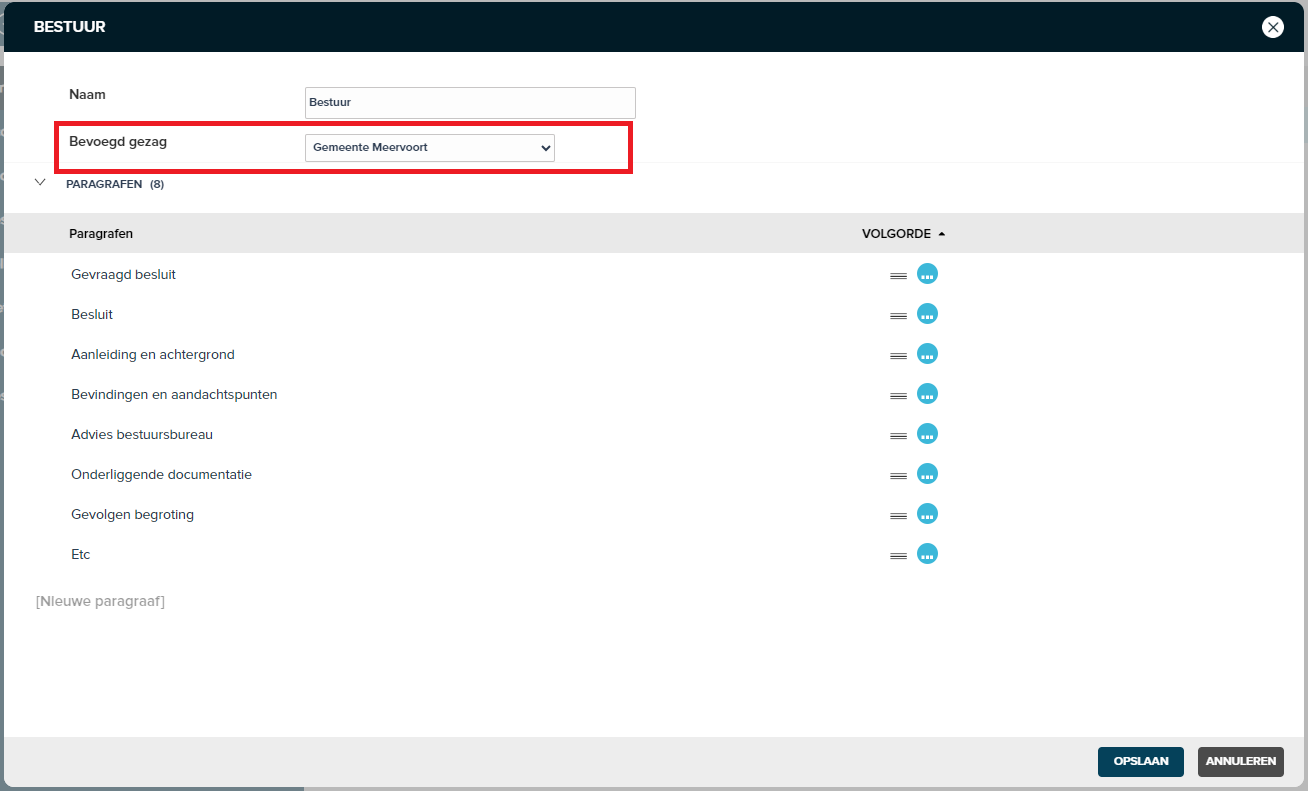
Click on “new paragraph set” to create a new set. A popup opens where you give the paragraph set a logical name (as in the example “council proposal”). If you work with multiple organizations in 1 JOIN System, you make use of the competent authority. In this case, please note that you must set up a separate section set for each competent authority!
Then enter all paragraphs and finally click on save.
You are almost there! Now all you have to do is link the paragraph set to the correct document type. To do this, go to the document type (via the menu or via the case type) and select the correct set in the “paragraph set” field. Note that you can only do this for document types with the “decision-making document” ticked.
¶ Input instructions & standard texts
For both options, go to the decision-making section (menu in JOIN Case Types) and click on the … next to the name of the paragraph (see image below). A pop-up will then open where you can enter both the instruction and the standard text. This is automatically processed to the case system (JOIN Case & Document)

¶ Configuration of approval routes
In the section “approval routes” you determine who must agree to the proposal before the decision can be taken. It is good to realize that the continuation of the route (the decision is immediately final or must first go through a management board, board of directors or the mayor & aldermen) does not depend on this. In fact, approval is separate from the decision phase.
You can create multiple approval routes within the system. For example, a route where finances and Works Council must also agree or a route per department.
You create a new approval route by clicking the “new approval route” button at the top left:
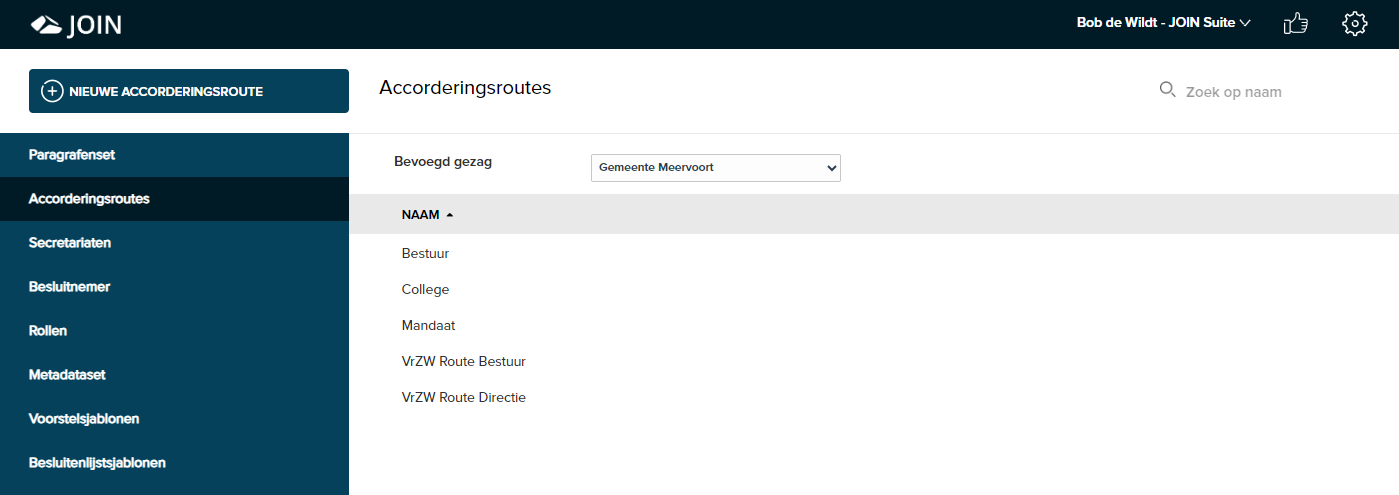
You then give the approval route a name. Provide a logical name that is recognizable to the originator of the proposal: it is the originator who will ultimately select the route when his proposal is ready for approval.
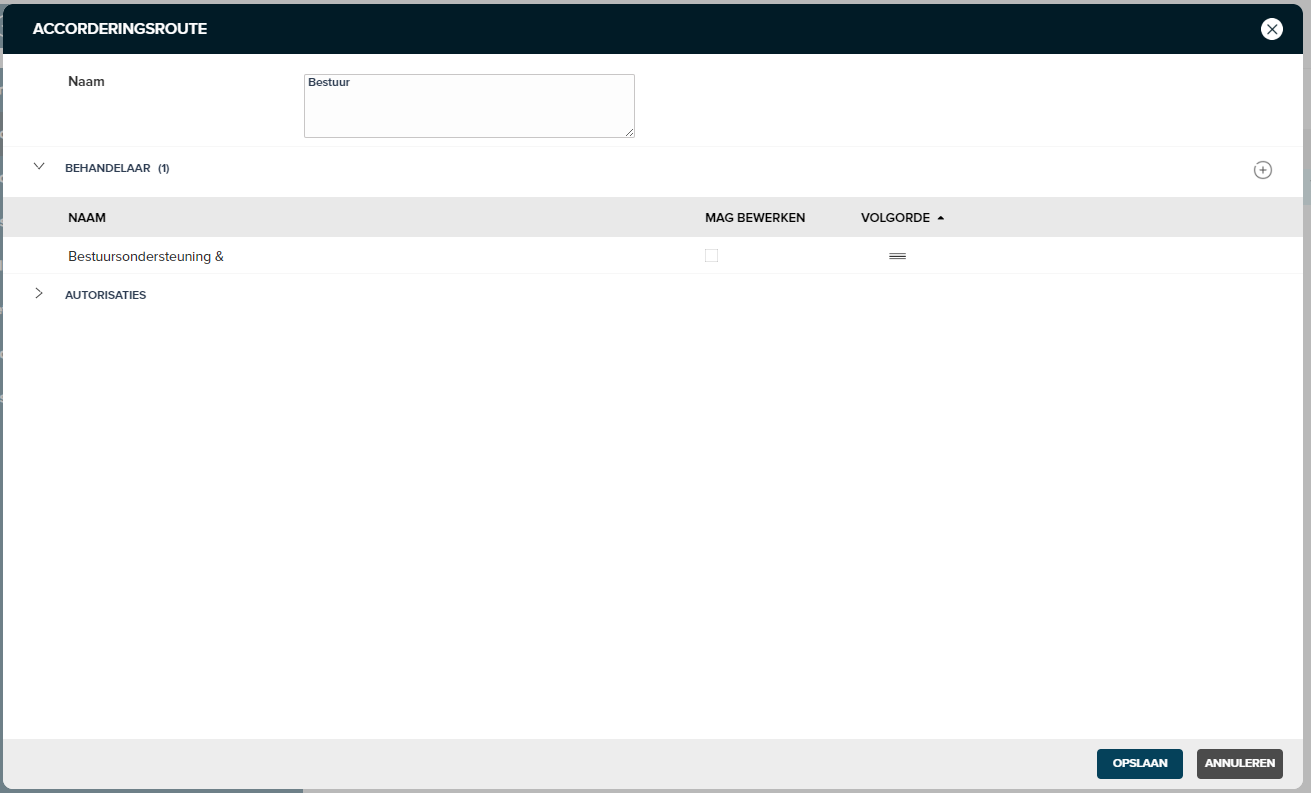
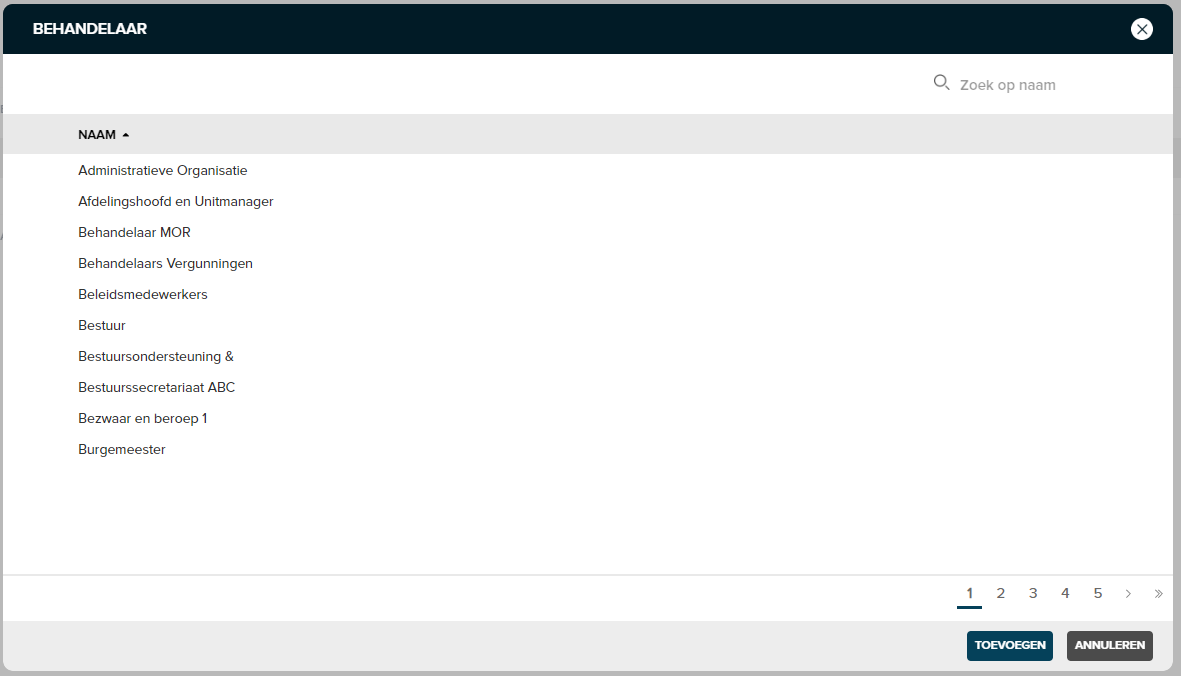
In the section “practitioners” click on the + to add the practitioners who agree to the relevant route. In the pop-up screen that opens, select the practitioners by clicking on the line. You can therefore select multiple practitioners at once. When you have clicked OK, the practitioners are linked to the approval route and you can adjust the order. In the decision-making process, the practitioner who is shown first receives the action to approve the proposal first.
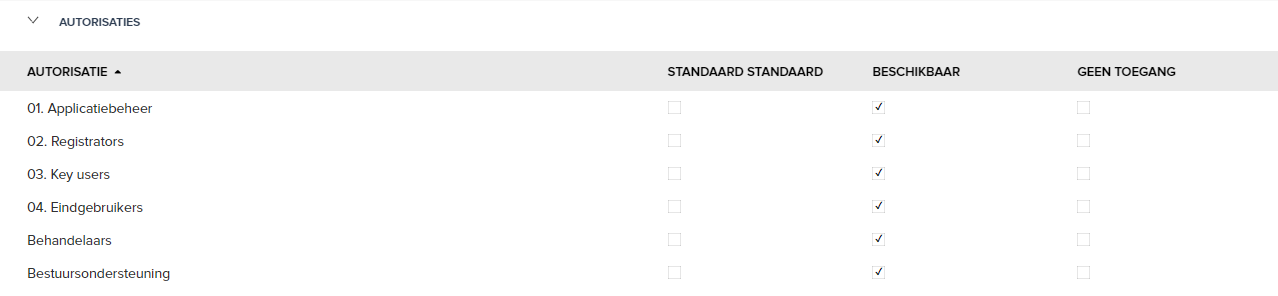
Finally, in the “authorizations” section, you determine which user profiles (see also JOIN Admin) have access to the approval route. Only users who are members of this profile are given the option to select this route in the decision-making process.
¶ Configuration roles
The last part that you configure before you can get started with your decision-making process (es) in JOIN Business is the roles part. It is important that you properly configure the decision list management role, they cannot be left empty to ensure proper functioning of JOIN Decision making. The role linked here may generate the decision list in JOIN.
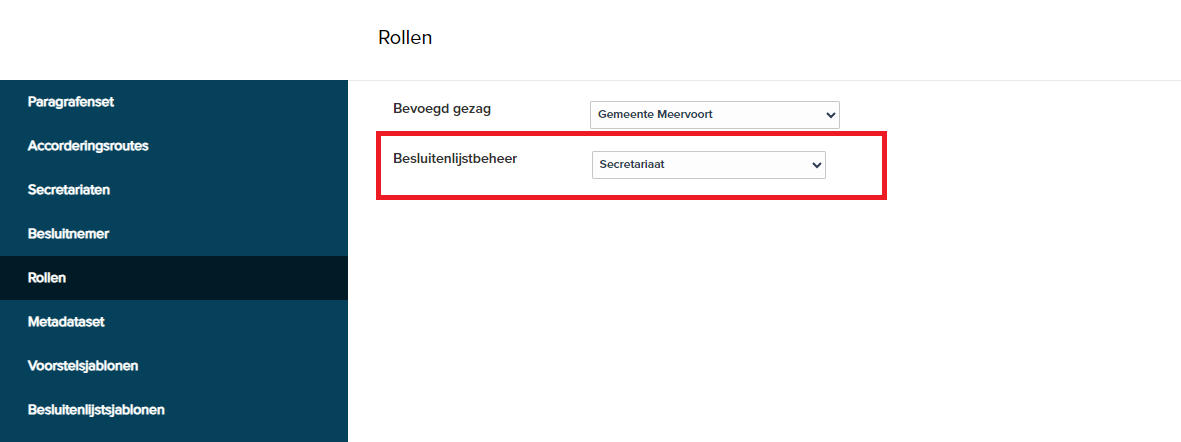
Configure decision list management role
¶ Authorization decision list
Part of JOIN Decision-making is the automatic generation of the decision list after the meeting. In JOIN Case this can be done from the meeting file. To prevent someone from just generating a decision list, the right to do so is limited to the user profile that you set here.
¶ Competent authority configuration
When several organizations work together in 1 business system, the distinction in organization can be configured by the competent authority. In JOIN Decision-making you can then configure the following for each competent authority:
- Sections: you configure a set of sections for each competent authority
- Approval routes: You configure the available approval routes for each competent authority
- Secretariat: a separate secretariat can be set up for each document type. The secretariat can also differ per competent authority.
- Decision list: same as with the secretariat
- Roles: You configure the role of decision list management for each competent authority
In the menu “competent authority” (only available if you have activated (purchased) it, configure the different competent authorities (see screenshot below)
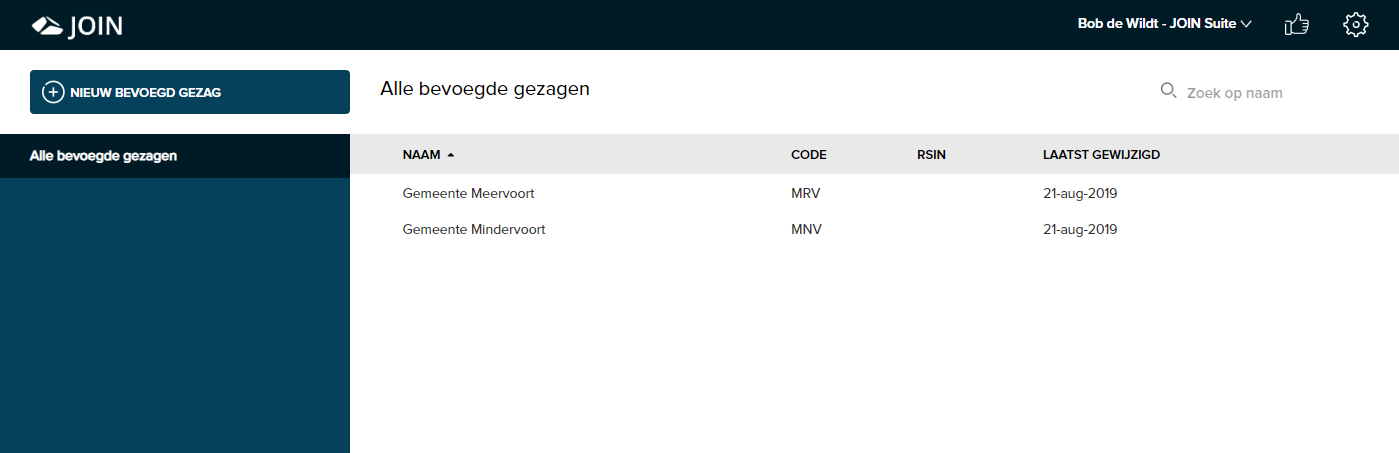
When at least 2 competent authorities are configured, you can configure the sections, approval routes and roles per configuration item in JOIN Decision-making.
¶ Metadata set
From version 2019.4.627 (of JOIN Case & Document) it is possible to set up item profiles per proposal type. This is done in JOIN Case Types.
This functionality has been developed to better support the counseling process. Since a council proposal often contains different information than, for example, a council proposal and you often want to see this information again on the cover page of the PDF proposal, it is nice if you can actually distinguish between them.
For this reason, it is now also possible to set up your own metadata set for each proposal type (we call this an item profile in JOIN).
¶ How does it work?
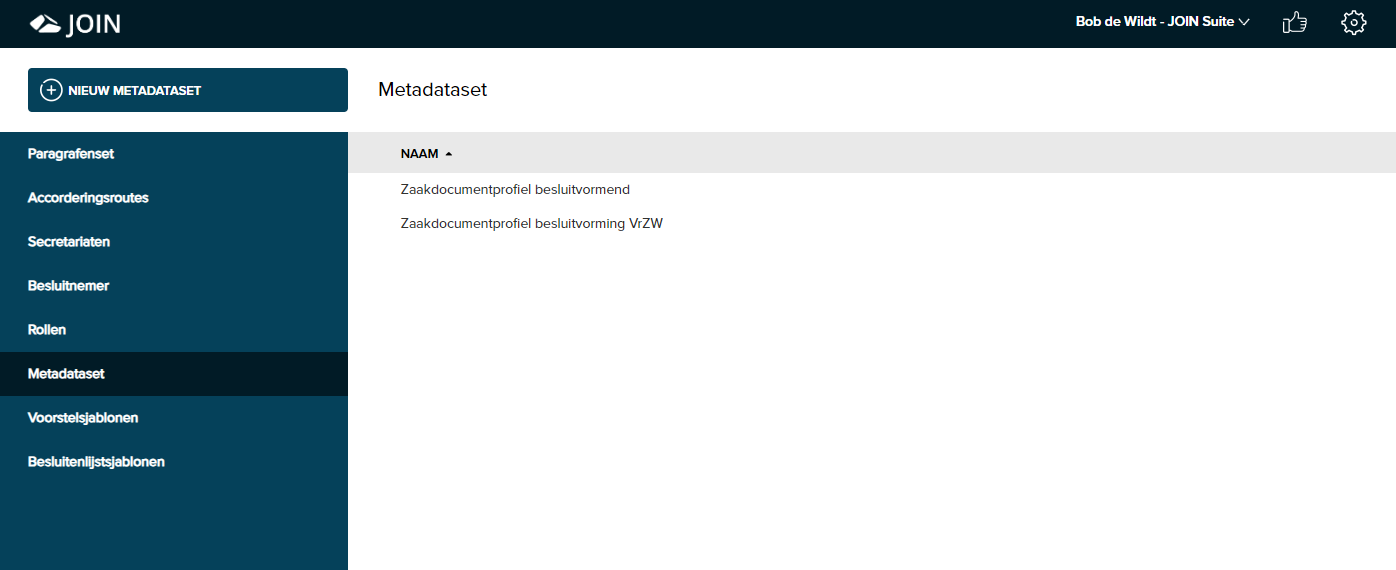
- First, go to JOIN Case Types. In the section “Decision making” you will now find the new section “Metadata set”
- By default there is 1 metadata set that fits all proposals. Create more if you want to vary (for example 1 for a management proposal and 1 for a council proposal). Make as many as you need.
- You can then link these metadata sets to the document type
- as soon as you publish the case type (you have changed a document type) the metadata set is exported to JOIN Case & Document.
- In JOIN you can design the item profile as you see fit. Make sure that you do not omit fields for, for example, the status and the decision / outcome from the profile.
- From now on, your chosen document type uses the correct / specific item profile
Do you want help? that is possible, because we have several specialists at Decos who can help you with this.
¶ Proposal templates
From version 2019.4.627 (from JOIN Case & Document) it is possible to set up one PDF template per proposal type and to set up multiple PDF templates for decision lists. This is done in JOIN Case Types.
This functionality has been developed to better support the counseling process. A council proposal often looks different (in layout and content) than a council proposal. Naturally, this also applies to the decision lists of, for example, the board / council / management.
It is possible to differentiate this. Each proposal type can now have its own layout in PDF form. The same for the decision list.
How does it work?
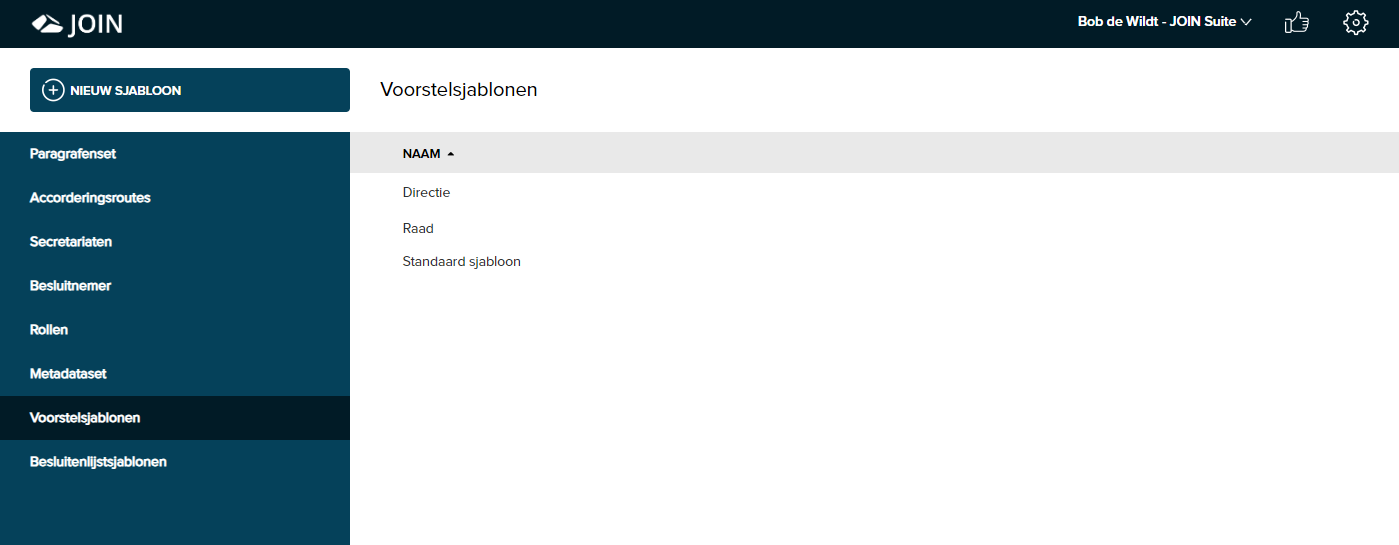
- First, go to JOIN Case Types. In the section “Decision-making” you will now find the new sections “proposal templates” and “decision list templates”.
- There is 1 proposal template as standard. Make more if you need more. The same for the decision list templates
- You link the proposal template per document type. So council template to council proposal and college template to college proposal.
- You do not have to do the above for decision lists
- Then you publish the case type to JOIN Case & Document
- In the decision list screen, all available templates are now shown by default. Choose the correct one when generating the decision list.
- You don’t have to do anything for the proposals. The proposal PDF is automatically generated during the decision-making process
Did you know that in addition to the (draft) proposal PDF, you can also make a (final) decision PDF. A consultant can help you design the various templates.
Based on the example above, you can then create the following templates (but of course there may be more!):
- Concept college proposal
- Final board decision
- Concept of council proposal
- Final council decision
- Concept decision list college
- Final list of decisions of the college
- Concept decision list board
- Final list of decisions of the council
this link will take you to the instruction on how to configure multiple PDF templates (for both proposal and decision list): manage decision templates