¶ Administrator levels
JOIN Admin has different administrator levels. These levels determine the access of groups of application administrators to the various functions in JOIN Admin. By default there are two administrator levels:
- Super administrators: they have access to the entire application.
- Standard administrators: they only have access to functions defined by the super administrator.
At least one application manager must be a Super administrator. If you are a Super administrator, you have the option to assign rights to Standard administrators.
For example, you can protect a confidential book from unwanted changes, but you can also show administrators per department or location only those menus, profiles and books that are relevant to them.
¶ Button bar at Administrator levels
| Button | Description | Key combination |
|---|---|---|
| Show full list | Alt A. | |
| New user | Alt N. | |
| New group for users | Alt G. | |
| Save | Alt S. | |
| Cancel | Alt C. | |
| Delete User | Alt R. |
¶ Add new administrator level
- In the Navigation, click on User management -> Administrator levels. The available Administrator levels appear in the Center.
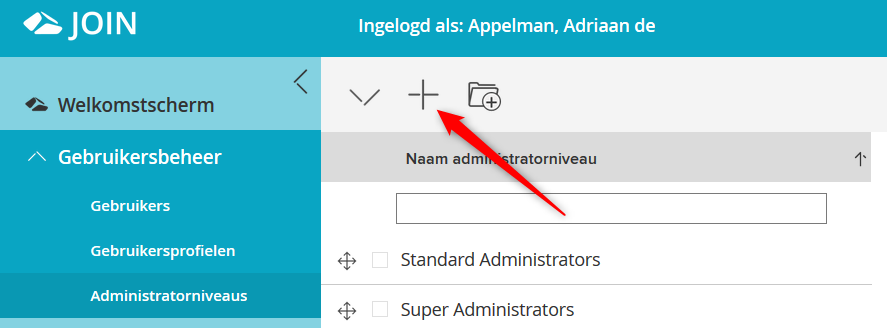
- Click the New button in the toolbar of the Center.
- Enter the name of the new level in the Administrator level name field.
- Select the Users tab.
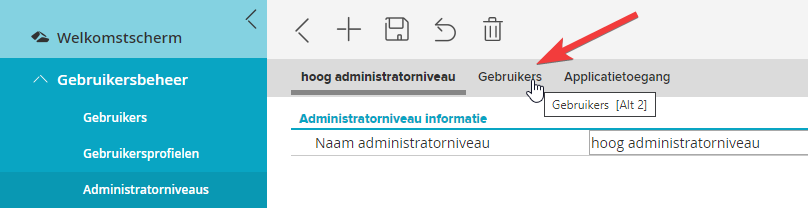
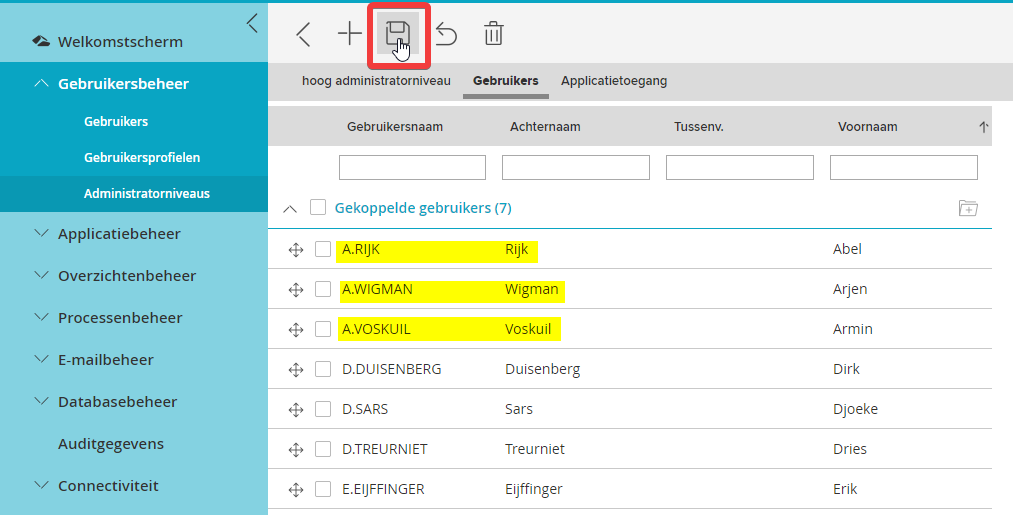
¶ Users tab
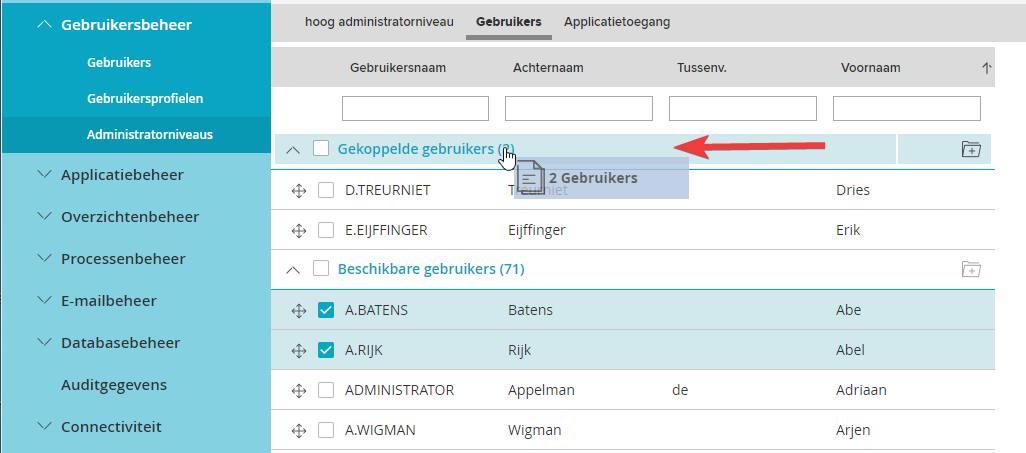
After you have clicked on the desired administrator level, you can then go to the users tab (see: next two images). On the Users tab, choose the user you want to associate with the Administrator level. Two hyperlinks are visible on the tab: linked users and available users. Behind these hyperlinks is a number in brackets, indicating how many users are already linked and how many users are available in total. By clicking on a hyperlink, or by clicking on the arrow icon in front of the link, all users from that category will be visible
Note: of course you can only link users if they have already been created.
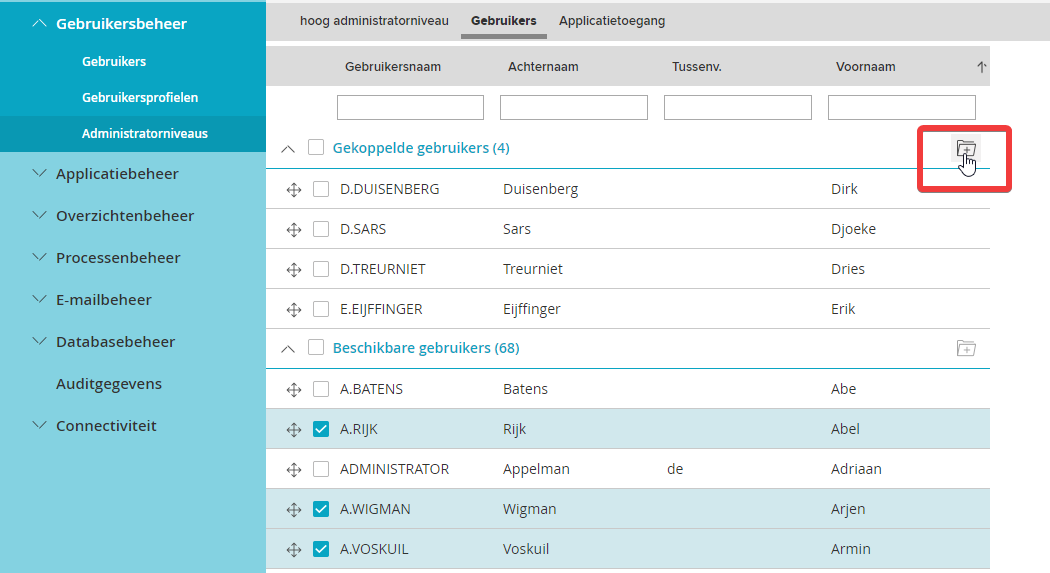
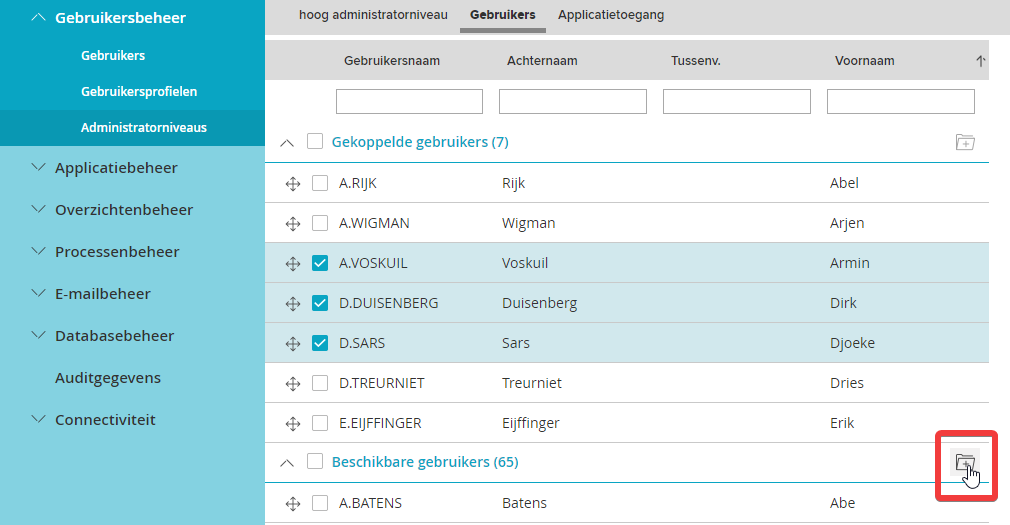
¶ Linking users to administrator levels:
- Click Available Users.
- Check the users to add out to the administrator level. The line on which the checked user is standing changes color.
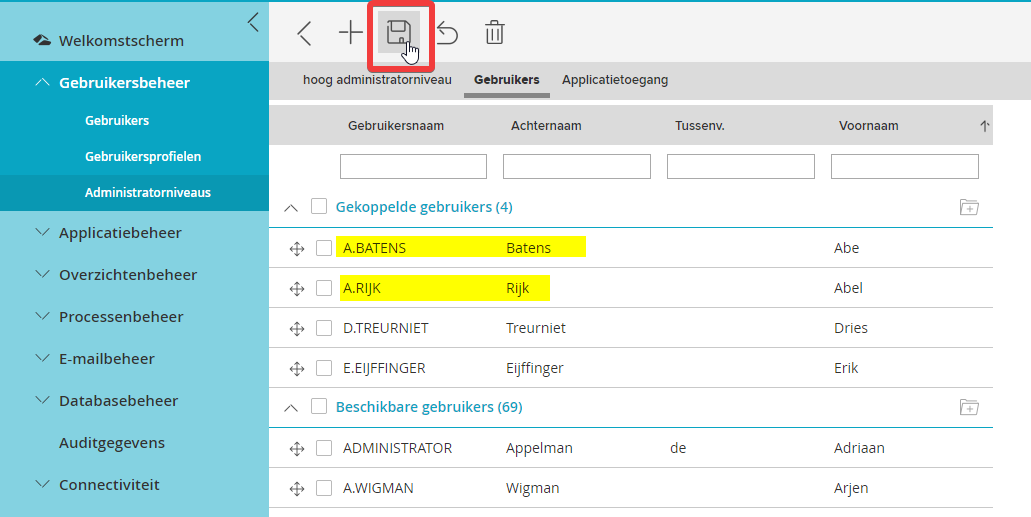
- Click the Link items button next to Linked users.
- Click Save in the toolbar.
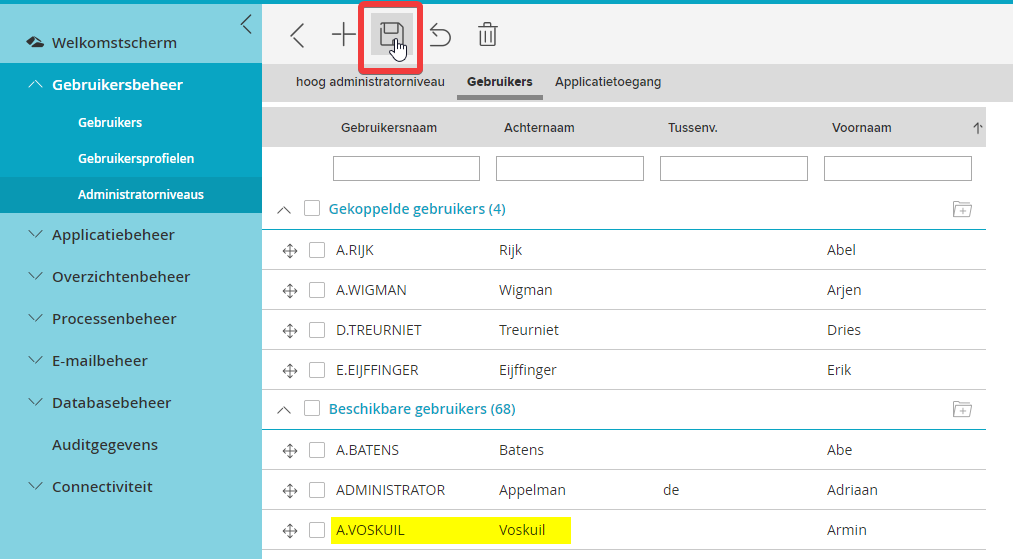
To unlink users from administrator levels:
- Click Associated Users.
- Check the users you want to disconnect. The line on which the checked user is standing changes color.
- Click the Unlink Items button next to Available Users.
- Click on the Save button.
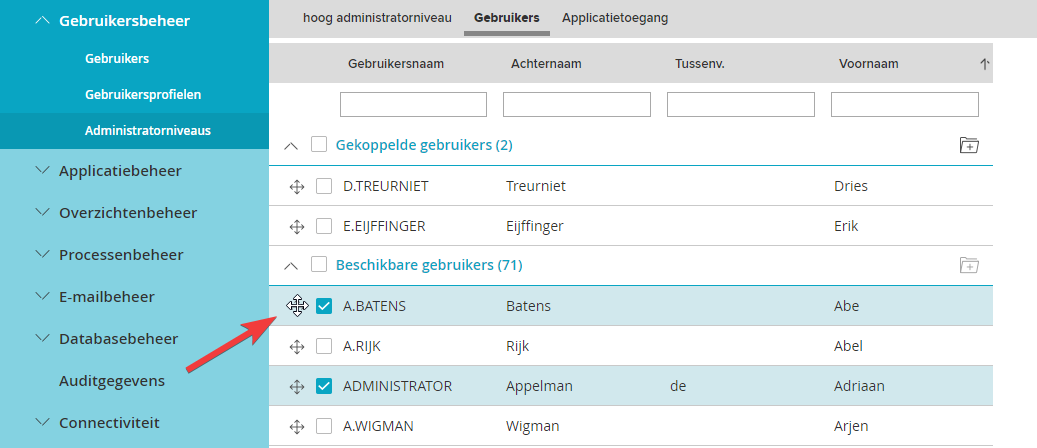
You can also link or unlink users by dragging:
- Select the users you want to move to Associated users or Available users. The selected users change color.
- Click on the plus sign for one of the users you want to move.
- Hold down the left mouse button.
- Now drag the selected users to the Associated users or Available users line. A logo will appear as soon as you perform the action.
- As soon as you release the left mouse button, the users are moved and thus linked or disconnected.
- Click on the Save button
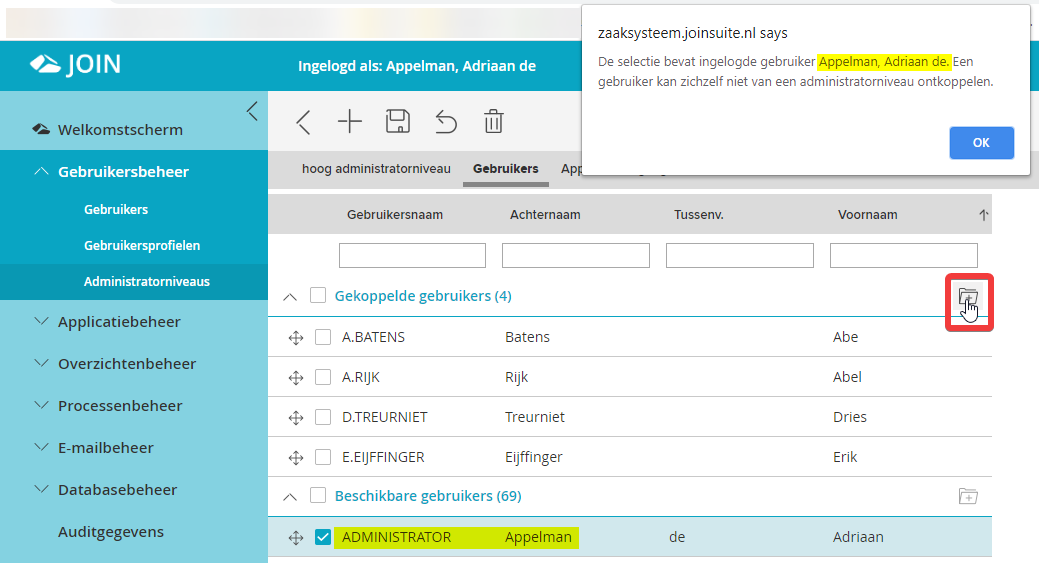
Incidentally, it is not possible for an administrator to link or unlink himself from an administrator level.
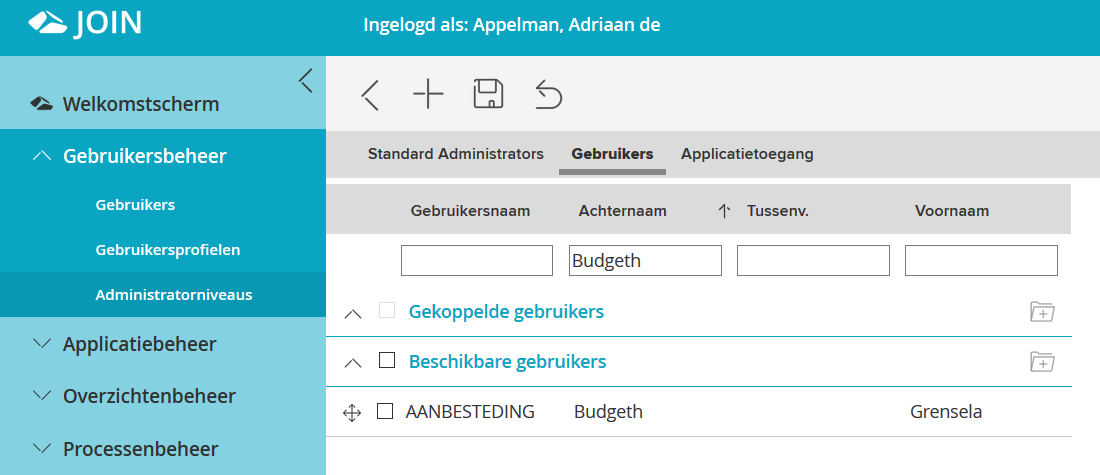
To search for a user:
- Enter the name of a user in the filter bar.
- Hit Enter.
¶ Set administrator level
As a Super administrator you can set which group of administrators has access to certain functions in JOIN Admin:
- Select the Application Access tab. This tab displays the JOIN Admin Navigation.
- By clicking on the plus signs in front of a description the underlying structure is opened.
- You can place check marks in front of those parts of the navigation tree that the administrator should have rights to.
- By clicking on Save in the toolbar you can store the rights.
Note: If you select the Super Administrator from the list of available Administrator levels, the Application Access tab is missing. The Super Administrator is the only one who always has rights to all parts of the application.
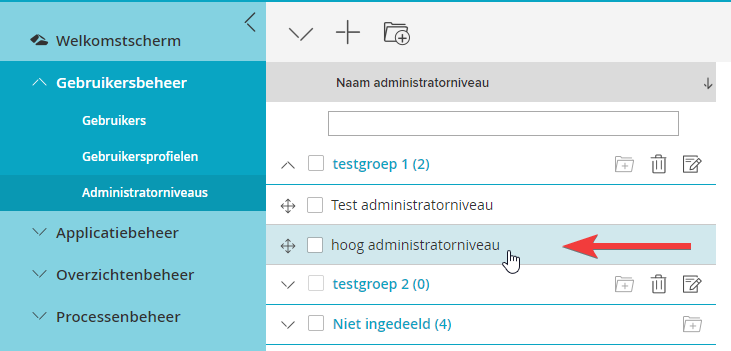
¶ Add group for administrator levels
The list of available administrator levels may be very long. To keep it clear, you can organize it in groups.
- Select User management -> Administrator levels in the Navigation. The list of available administrator levels appears in the Center.
- In the toolbar of the Center, click New group for administrator levels.
- In the screen that appears you can enter a name for the new group. Click OK.
- In addition to the newly created group, you will now also see the Not classified group.

Next, you will group administrator levels by dragging:
- Click on the group Not classified. The list of unassigned administrator levels opens.
- Click the plus sign in front of the name of the administrator levels you want to place in the new group. Hold down the left mouse button.
- Now drag the administrator levels to the new group you created. A logo will appear when you perform the action.
- As soon as you release the left mouse button, the administrator levels is placed in the new group.
- To remove the administrator levels from the group, drag them back to the Unassigned group.