¶ Usergroup
After you have created Privilege Sets, you link user groups to these sets. In the application management screen, click the User Groups button.
A user group bundles individual users into a group of users who have the same privileges. This speeds up and simplifies the granting of privileges and makes management easier.
Note: you can choose external groups or local goups. The external groups are automatically based on the Active Directory of your organization.
The User Groups screen consists the follow steps:
-
First select the correct user group you want to link. Tip use the Search box at the top right to find your Group faster.
-
When you have selected the user group, you can choose Edit Priviliges in the top right corner to assign the correct Priviliges. You can also assign a default Mailbox if you use EWS as your mailbox.
Place a check mark in front of the desired set and click Save. You will be notified that the privilege set has been successfully saved.
However, if you want to link a privilege set for the relevant user group that differs slightly from the available sets, this is easy to realize:
- Link an existing privilege set as described above.
- Then check the privileges you want to change for this specific group.
- Click on Save
In this way you adjust the privileges for this user group only and the default privilege set remains unchanged.
¶ Local group
If the customer has the license for the module “Local Groups”, you have an extra option to create your own groups in JKC.
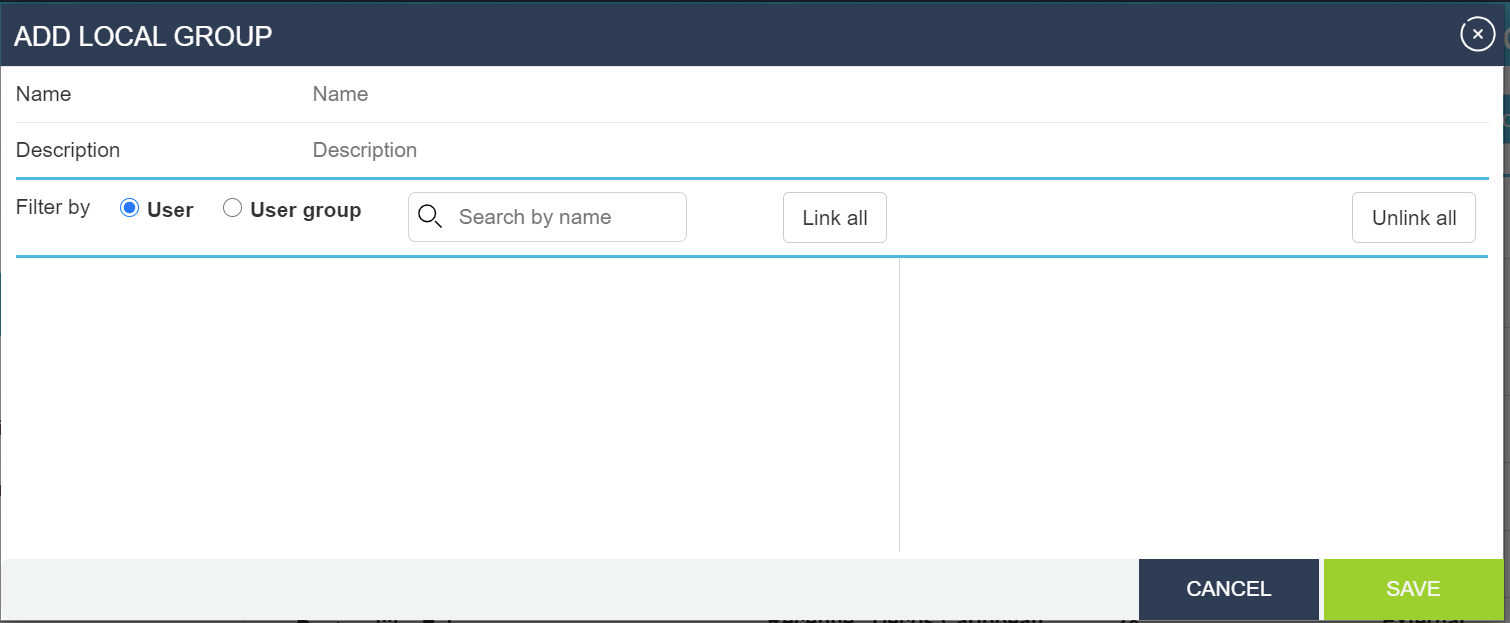
¶ Add local group
Press on the button add a local group.

¶ Create local group
Create a name and description. Link all the users or usergroups that a member of the group and save the local group.
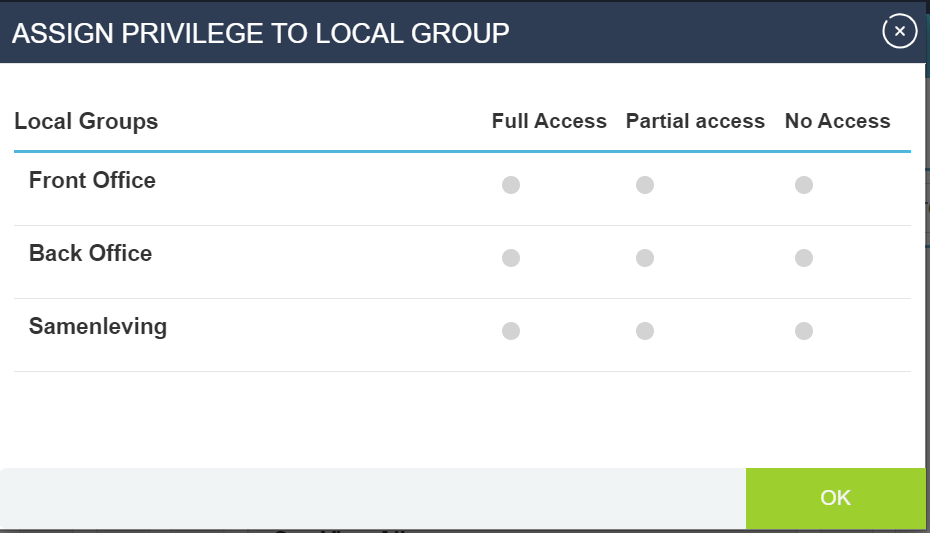
¶ Assign Privileges local groups
In Contacthistory and Task is the possilibities to give the local group:
- FULL ACCES
- PARTIAL ACCES
- NO ACCES
¶ Private field Privileges local groups
For the source Persons, Organizations, Tasks and Contacthistory we have the possibillity to make a field Private.
This part has a relationship with Assign Privileges for a local group.
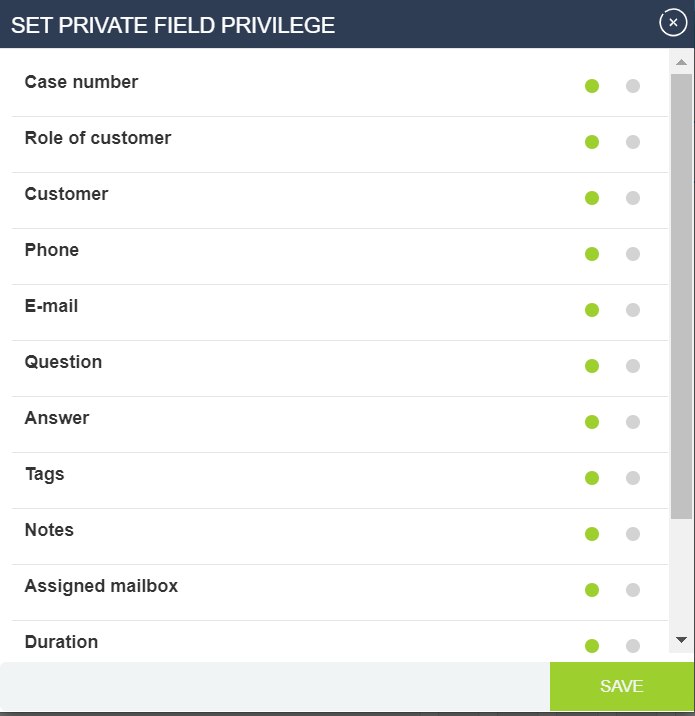
For example the output when you make the field BSN private.
