¶ JOIN Customer contact Cloud admin Privilege sets
By clicking the Privilege Sets button, you can define sets of rights that you want to give to users and user groups.
¶ How does it work?
The Privilege Sets screen consists of three parts:
-
You can search for a privilege set in the search box.
-
At the top right is the Add New Set button, with which you can create a new privilege set
-
Here are all the existing privilege sets that you can assign and / or change or delete
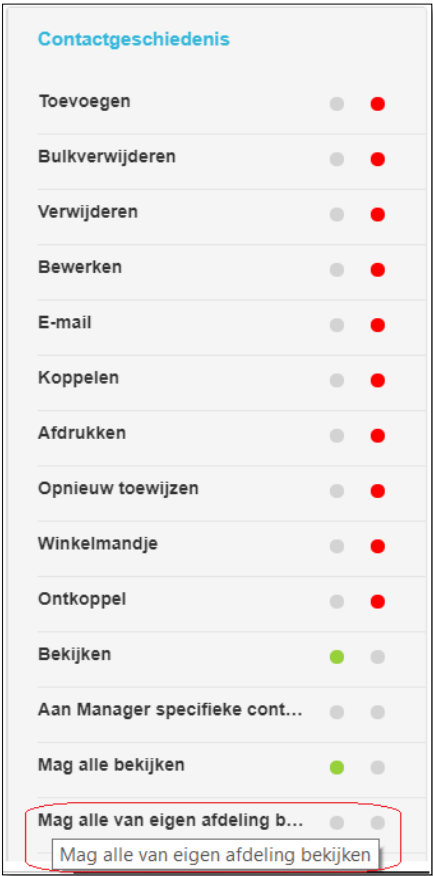
To create a new set, click add new set. In the screen that appears, enter a name that you want to give to this privilege set. Click on save to save the name. The name and date is added. You will then see details of this privilege set in the overview screen. Because the set is new, no users and / or user groups have been linked yet. You click select the privilege set to change something. You can indicate per column which privileges should or should not apply. In each column you will find an overview of functions / rights and per function you can tick whether or not this should be possible. A green check mark means “rights”; a red check mark means “no rights”. If you have set the privileges in the first column, you can move to the next column using the arrows on your keyboard. The column in which you can register privileges is colored instead of gray. Once you have registered the rights in all columns, click on the green Save button at the bottom left.
¶ View only contact history for “my department”
The option makes it possible to choose “My Department” in addition to the existing options for contact history of “Myself” and “All”.